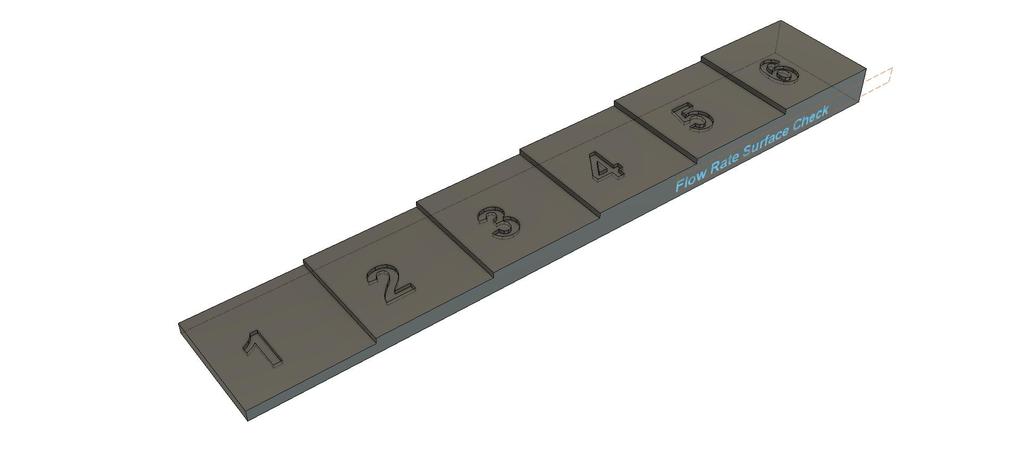
Flow Rate Surface Check/Test, Check 6 Flow Rates per print
thingiverse
***UPDATE 1*** --> Tiles now bigger (20mm² instead of 10mm²) and steps raised to 1mm each step. I encountered an issue where the surface of my prints was not always perfectly flat. There was sometimes a slight overextrusion or small holes between infill and walls due to underextrusion. To check the change in surface quality, I conducted a test by changing flow rates in CURA or any other program. In Cura, you can adjust the Flow Rates through the "Post Processing Script". Choose "ChangeAtZ 5.1.1" and start adjusting the flow rate for each step: first at 3mm, then at 4mm, next at 5mm, followed by 6mm, and finally at 7mm. Each step is a 20mm x 20mm square. Measurements are 120 x 20 x 7mm, with a depth of 0.4mm for the number stamps. The material used is approximately 10g. Printing time with a speed of 40mm/s takes about 46 minutes, while printing at 60mm/s takes around 36 minutes. I advise against using semi-transparent Filament for this test, as it can be difficult to see the connections between lines. My white ERYONE PETG is visible in the pictures. The Fusion360 file has been uploaded, allowing you to modify the measurements if needed. It would be great if your print turned out well! Please consider sharing a MAKE of your finished product.
With this file you will be able to print Flow Rate Surface Check/Test, Check 6 Flow Rates per print with your 3D printer. Click on the button and save the file on your computer to work, edit or customize your design. You can also find more 3D designs for printers on Flow Rate Surface Check/Test, Check 6 Flow Rates per print.
