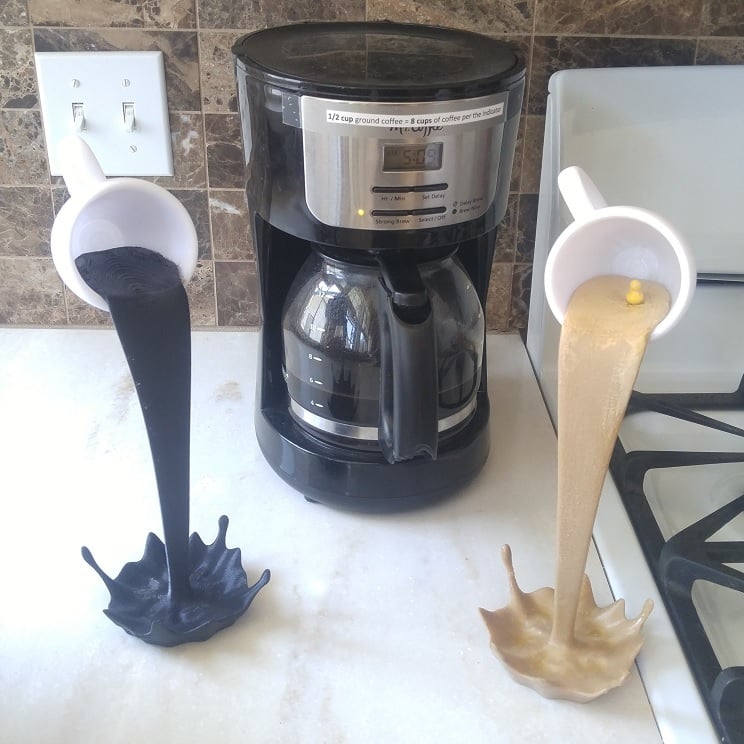
Floating Cup (smoother look, foolproof assembly)
thingiverse
This is a significant improvement on the previous version located at https://www.thingiverse.com/thing:3617536 . This and that previous submission are both remixes of HappyMoon's "Floating Cup Sculpture". I've edited the files and summary a bit more (July 7, 2019), as I found that printing the 'stream' part of the sculpture can be difficult on some printers when printed high off the bed. And that actually, printing it sideways on the bed works and looks much better. July 19: rotated the "preferred" version of stream so that it can fit also on a 200mmx200mm bed **[(May 6, 2020) I've also published a set of trapezoidal pins scaled to a range of sizes, used to attach the "splash" to the "stream" and keep them aligned. Choose the largest one that fits into the sockets in the "stream" and "splash" parts.]** I've used super-glue (cyanoacrylate) **gel** or clear 2-part epoxy glue (best choice) to attach the stream, pin, and splash parts. Test-fit the pieces first (!), file mating surfaces if necessary. You may need to trim the edges of the "pin" if there is any 'elephant's foot' on the print -- choose the best fitting pin from the set, and use a razor knife, file or sandpaper to trim any squished edges. THEN, after adding glue and assembling, stand it up on a table near a wall with the part of the stream that will go into the cup pushed slightly against the wall to make it lean a little more toward over the "splash" (see photo). Most important is to prevent it from leaning the other way as gravity would tend to take it! Leave it set against the wall like that until the glue cures. As with any time you use epoxy or superglue, avoid moving the glued joint while it cures. The best way I've found to hold the cup and stream together while glue sets is to use a small ratcheting bar clamp or C clamp -- keep the stream down against the cup all the way to its back. But almost as good is to just lie the cup on its side at the edge of a table and then put the stream&splash inside of it after glue applied, with the splash part hanging under the table. It might be a good idea to stack up some cards under the back of the cup (not shown in the photo) so that the cup stays tipping forward during curing to help balance. There is a set of trapezoidal pins scaled to a range of sizes, used to attach the "splash" to the "stream" and keep them aligned. Choose the largest one that fits into the sockets in the "stream" and "splash" parts. Trimming their edges with a knife or clipper, or sanding them down may be required. _______________________________________ similar pouring cups using the same type construction: Floating goblet: https://www.thingiverse.com/thing:3761400 Floating skull: https://www.thingiverse.com/thing:3772304
With this file you will be able to print Floating Cup (smoother look, foolproof assembly) with your 3D printer. Click on the button and save the file on your computer to work, edit or customize your design. You can also find more 3D designs for printers on Floating Cup (smoother look, foolproof assembly).
