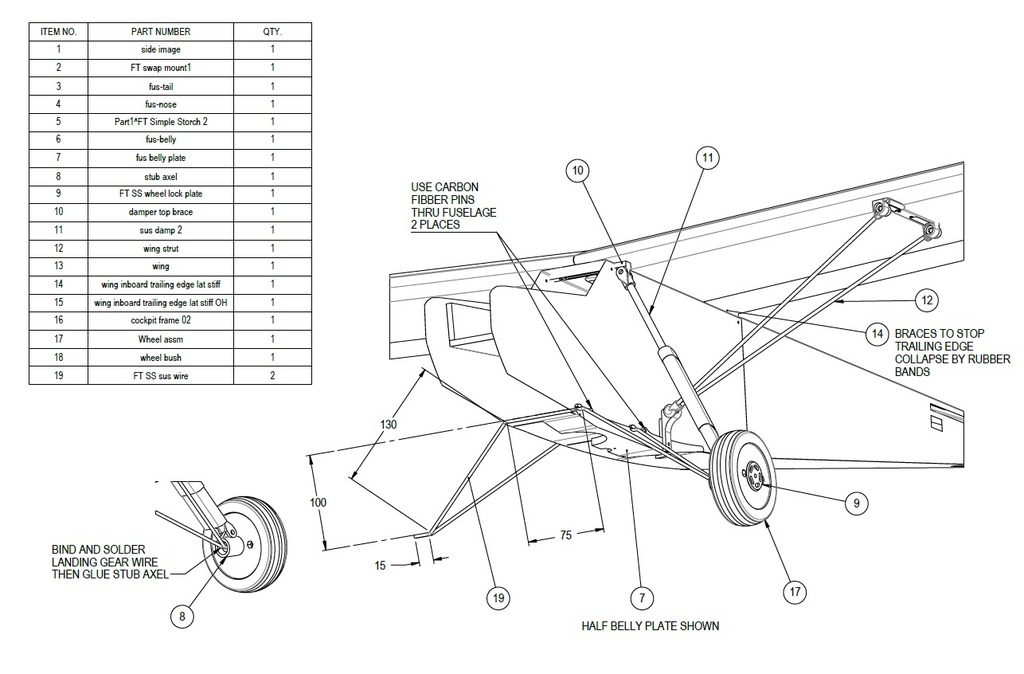
Flite Test Simple Storch landing gear and wing struts
thingiverse
Here are the STL files and step-by-step instructions to customize your very own Flite Test Storch model. The complete design of the Flite Test Storch is available for download as a series of STL files, which can be 3D printed using various materials. To get started with modifying your Flite Test Storch, you will first need to download the STL files from the official website or repository. These files contain all the necessary data for printing the model's parts. Once you have downloaded and prepared the STL files, it is time to start printing the individual parts of the model. You can use a variety of materials such as PLA, ABS, or PETG, depending on your preferences and the desired outcome. The printed parts will need to be assembled together using various techniques such as gluing, screwing, or clipping. Be sure to follow the provided instructions carefully to ensure proper alignment and fitment of all components. After assembling the model, you can proceed with painting and finishing it according to your design preferences. This includes applying a base coat, adding details, and sealing the surface with a clear coat. Customization is key when working with 3D printed models. With the STL files and instructions provided for the Flite Test Storch, you can experiment with different designs, colors, and textures to create a truly unique piece that reflects your personality and style. The possibilities are endless when it comes to modifying the Flite Test Storch model. Whether you're looking to add intricate details or make significant changes to its overall design, the STL files and instructions will guide you every step of the way.
With this file you will be able to print Flite Test Simple Storch landing gear and wing struts with your 3D printer. Click on the button and save the file on your computer to work, edit or customize your design. You can also find more 3D designs for printers on Flite Test Simple Storch landing gear and wing struts.
