FlashForge Creator Pro 2016 - Dual extrusion fan duct
pinshape
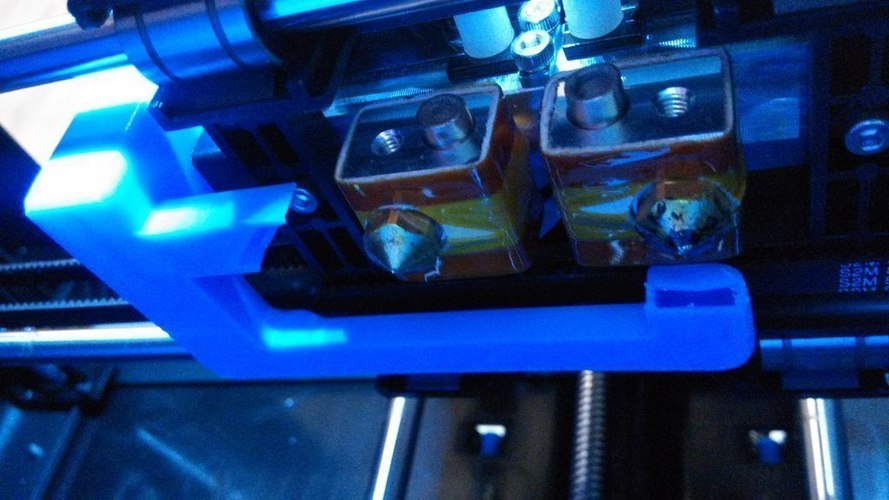
You're advised to print with PLA on the left extruder and ABS on the right extruder. That's a direct quote from the FlashForge Creator Pro 2016 manual, but I've found that this printer can handle printing PLA through the right extruder for excellent dual-strusion prints. All it needs is an upgraded fan duct. Take a look at the attached photos to see how this improved fan duct boosts print quality and accuracy. You can easily swap out the stock fan duct with this one without relocating the fan or making any major changes to your machine. Here's what you need to do: Download the STL file and print it in ABS using the recommended settings. Make sure your printer has cooled down before installing this piece. Remove the three bolts holding the fan to the extruders. Separate the fan from its included duct. Move the fan away from the extruders and check if the new duct fits snugly. Don't force it too much – if you encounter any issues, carefully sand it down a bit. When both parts fit without applying excessive force, align the fan in its place (but don't secure it with bolts just yet!). Install the new fan duct from below to avoid any collisions. Reinstall the three bolts to secure the fan to the extruders. I've included the SolidWorks file if you'd like to improve this design. Printer settings: FlashForge Creator Pro 2016, no rafts, yes supports, 0.2mm resolution, and 15% infill. I recommend using supports; if you have Simplify3D, use the Customize Support Structures menu to place them as shown in the included screenshots. Post-printing, your freshly printed fan duct will be visible, with supports in some areas of the piece.
With this file you will be able to print FlashForge Creator Pro 2016 - Dual extrusion fan duct with your 3D printer. Click on the button and save the file on your computer to work, edit or customize your design. You can also find more 3D designs for printers on FlashForge Creator Pro 2016 - Dual extrusion fan duct.