Fix/Mod for Audi 80 B2 instrument cluster lighting
prusaprinters
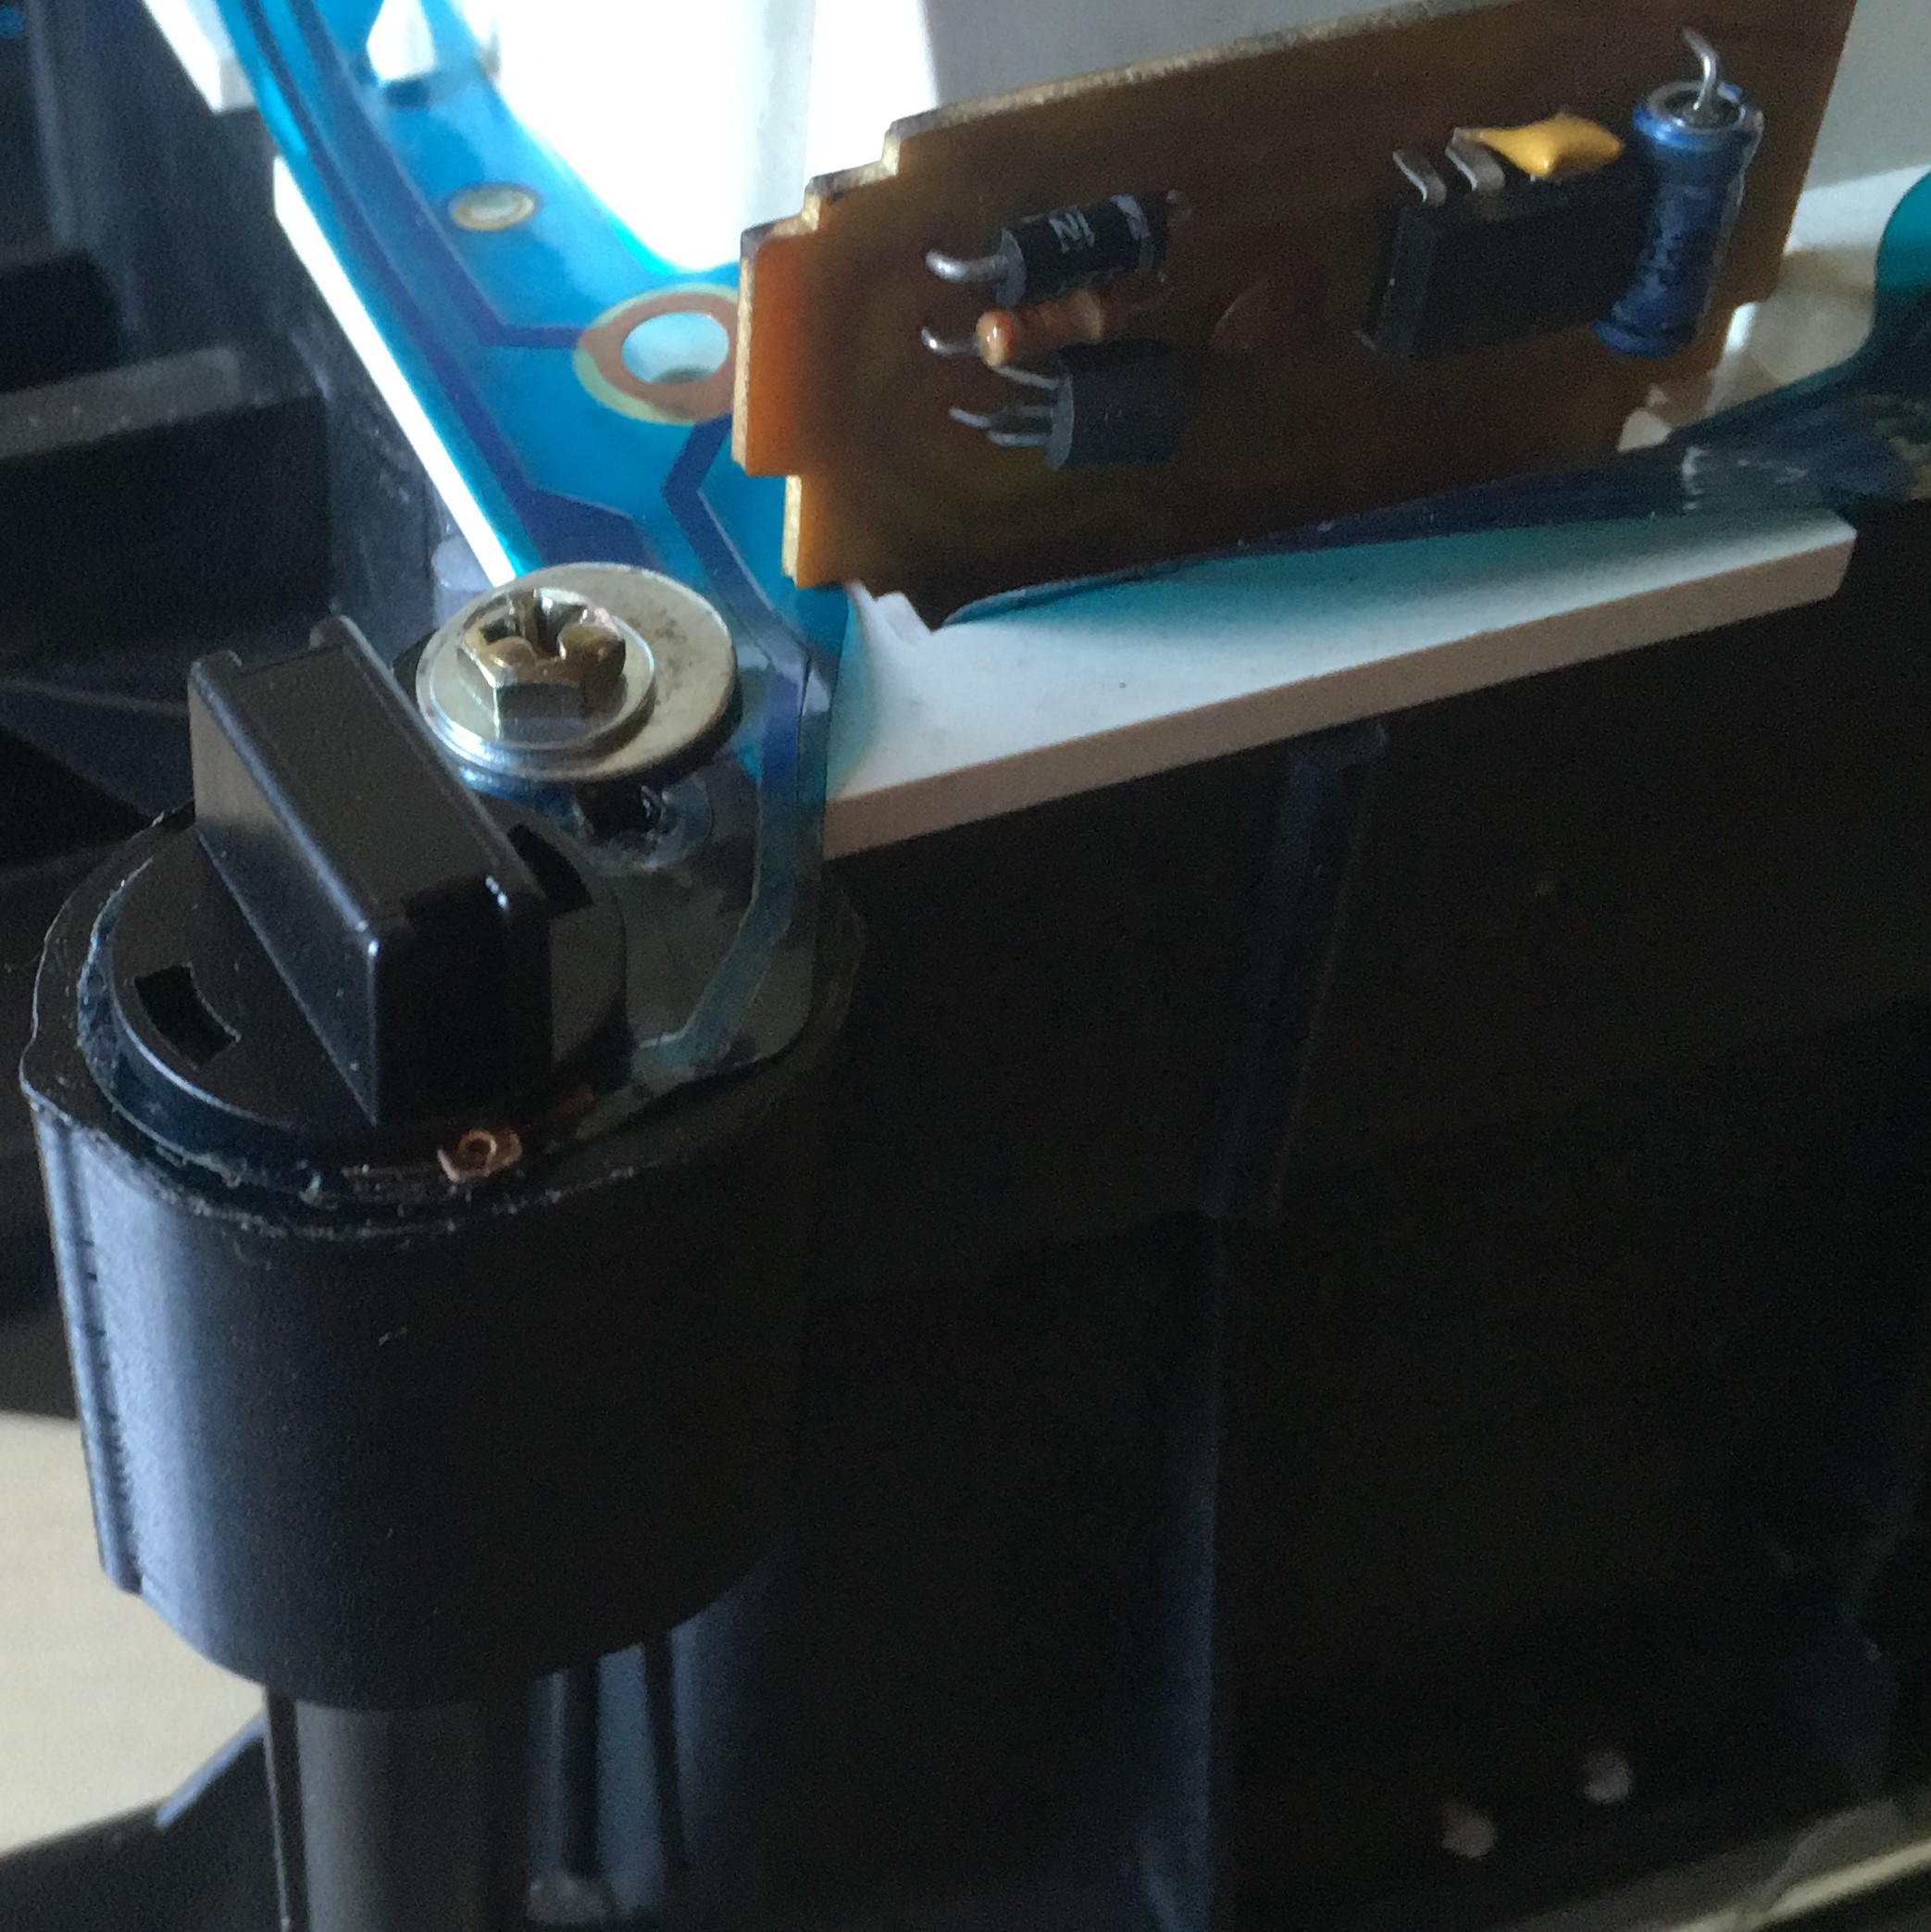
<figure class="image image-style-align-right image_resized" style="width:50%;"><img src="https://media.prusaprinters.org/media/prints/78101/rich_content/98a9c9da-574b-4374-800b-014f3280b8b8/vorher_nachher-min.png#%7B%22uuid%22%3A%224f3f4700-81c0-48e3-841e-0a4da6830dfd%22%2C%22w%22%3A3288%2C%22h%22%3A2475%7D"></figure><p>[ENGLISH VERSION BELOW]</p><p>Dies ist eine Anleitung zur Reperatur der Kombiinstrument-Beleuchtung im Audi 80 B2, vermutlich auch übertragbar auf ähnliche Modelle. Bei diesen Kombiinstrumenten schmilzt in der Regel durch die Verwendung falscher Glühbirnen die entsprechende Fassung irreparabel auf. Durch 3D-Druck Teile können die beschädigten Stellen ersetzt werden (siehe vorher-nachher Vergleich rechts). </p><p>Im ersten Schritt müssen die beschädigten Fassungen vorsichtig herausgesägt werden, Je nach Schadensbild kann entweder nur der untere Teil (schwarz), oder auch die Twist-Lock Aufnahme an sich (weiß) ersetzt werden. Hierfür habe ich zwei verschiede Versionen erstellt. Da jedoch meist auch die Fassung für die Glühbirne die besten Zeiten hinter sich hat und neue Twist-Lock Lampenfassungen sowieso nötig sind, lohnt es sich beides zu ersetzen. Die von mir verwendeten Fassungen finden sich bei ebay als <a href="https://www.ebay.de/sch/i.html?_from=R40&_trksid=p2380057.m570.l1313&_nkw=10x+T10+Keilabsatz+Lampenfassung+Twist-Lock+F%C3%BCr+Armaturenbrett+Instrument+Licht&_sacat=0">T10 Keilabsatz Lampenfassung Twist-Lock Für Armaturenbrett Instrument Licht</a> oder so ähnlich (siehe Bild).</p><figure class="image"><img src="https://media.prusaprinters.org/media/prints/78101/rich_content/93ea7e09-03ad-447a-9647-851c9bc7c064/fassung-min.png#%7B%22uuid%22%3A%22a0a52192-c1bb-4630-8c94-c577def11b12%22%2C%22w%22%3A4950%2C%22h%22%3A2475%7D"></figure><figure class="image image-style-align-right image_resized" style="width:50%;"><img src="https://media.prusaprinters.org/media/prints/78101/rich_content/1ccba7a0-9d20-4944-beee-0659b140e56b/20211006_095132013_ios.jpg#%7B%22uuid%22%3A%2233ac7e60-1414-472e-a44d-63399233eb4d%22%2C%22w%22%3A3024%2C%22h%22%3A3024%7D"></figure><p>Zum Auseinandernehmen alle Sechskant Schrauben und Muttern aufmachen, dafür vorher die zwei schwarzen Führungen für die Kombistecker vorsichtig heraushebeln. Beim Heraussägen reichen ein Schnitt waagrecht und einer senkrecht, diese werden zwangsläufig etwas schräg, das Bauteil ist entsprechend angepasst. Zum Lichtleiter hin sind die alten Plastikteile leicht verschmolzen, das ganze lässt sich relativ leicht abziehen, zur Not aufsägen, jedoch nicht verwinden. Die herausgesägten Teile sind im Bild rechts zu sehen.</p><p>Ansonsten die neuen Bauteile aufstecken, verklebt habe ich nichts. Passende Lampen sind W3W bzw. T10 <strong>3W</strong>. Die 5W Lampen sind die falschen :P</p><p>Falls die Halterung zum Anschrauben des Kombiinstruments am Armaturenbrett auch hinüber ist, habe ich noch eine Adapterplatte in die Dateien gepackt. </p><p>Druckanleitung: </p><p>Material: ABS</p><p>Infill: 100%</p><p>Brim: Ja</p><p>Support: Überall</p><p>Die Datei “Mod Kombiinstrument” besteht aus 4 Einzelteilen, anzuordnen wie in der GCODE Datei. </p><p>Viel Spaß beim Drucken!</p><p> </p><figure class="image image-style-align-right image_resized" style="width:50%;"><img src="https://media.prusaprinters.org/media/prints/78101/rich_content/98a9c9da-574b-4374-800b-014f3280b8b8/vorher_nachher-min.png#%7B%22uuid%22%3A%224f3f4700-81c0-48e3-841e-0a4da6830dfd%22%2C%22w%22%3A3288%2C%22h%22%3A2475%7D"></figure><p>[ENGLISH VERSION]</p><p>This is a guide to repairing the instrument cluster lighting in the Audi 80 B2, probably also transferable to similar models. In these instrument clusters, the use of incorrect bulbs usually melts the corresponding socket irreparably. 3D printed parts can be used to replace the damaged areas (see before and after comparison on the right).</p><p>In the first step, the damaged sockets must be carefully sawed out. Depending on the damage, either only the lower part (black), or the twist-lock socket itself (white) can be replaced. For this I have created two different versions. However, since the bulb holder is usually also past its prime and new twist-lock lamp holders are needed anyway, it is worth replacing both. The sockets I used can be found on ebay as <a href="https://www.ebay.de/sch/i.html?_from=R40&_trksid=p2380057.m570.l1313&_nkw=10x+T10+Keilabsatz+Lampenfassung+Twist-Lock+F%C3%BCr+Armaturenbrett+Instrument+Licht&_sacat=0">T10 wedge heel lamp socket twist-lock For dashboard instrument light</a> or something along those lines (see picture).</p><figure class="image"><img src="https://media.prusaprinters.org/media/prints/78101/rich_content/93ea7e09-03ad-447a-9647-851c9bc7c064/fassung-min.png#%7B%22uuid%22%3A%22a0a52192-c1bb-4630-8c94-c577def11b12%22%2C%22w%22%3A4950%2C%22h%22%3A2475%7D"></figure><figure class="image image-style-align-right image_resized" style="width:50%;"><img src="https://media.prusaprinters.org/media/prints/78101/rich_content/1ccba7a0-9d20-4944-beee-0659b140e56b/20211006_095132013_ios.jpg#%7B%22uuid%22%3A%2233ac7e60-1414-472e-a44d-63399233eb4d%22%2C%22w%22%3A3024%2C%22h%22%3A3024%7D"></figure><p>To disassemble, undo all hexagonal bolts and nuts, first carefully lever out the two black guides for the combined connectors. When sawing out, one cut horizontally and one vertically are sufficient, these are inevitably somewhat slanted, the component is adapted accordingly. Towards the optical fiber, the old plastic parts are slightly fused, the whole thing can be relatively easily pulled off, sawed open if necessary, but not twisted. The sawed out parts can be seen in the picture on the right.</p><p>Otherwise put the new parts on, I did not glue anything. Suitable lamps are W3W or T10 <strong>3W</strong>. The 5W lamps are the wrong ones :P</p><p>If the bracket for screwing the instrument cluster to the dashboard is also gone, I added an adapter plate ("Adapterplatte") to the files.</p><p>Printing instructions:</p><p>Material: ABS</p><p>Infill: 100%</p><p>Brim: Yes</p><p>Support: Everywhere</p><p>The file "Mod Kombiinstrument" consists of 4 parts, to be arranged as in the GCODE file.</p><p>Happy printing!</p><p>Translated with www.DeepL.com/Translator (free version)</p><p> </p><p> </p>
With this file you will be able to print Fix/Mod for Audi 80 B2 instrument cluster lighting with your 3D printer. Click on the button and save the file on your computer to work, edit or customize your design. You can also find more 3D designs for printers on Fix/Mod for Audi 80 B2 instrument cluster lighting.