Five Spools + MMU2S on TOP of Prusa Ikea Lack Enclosure
prusaprinters
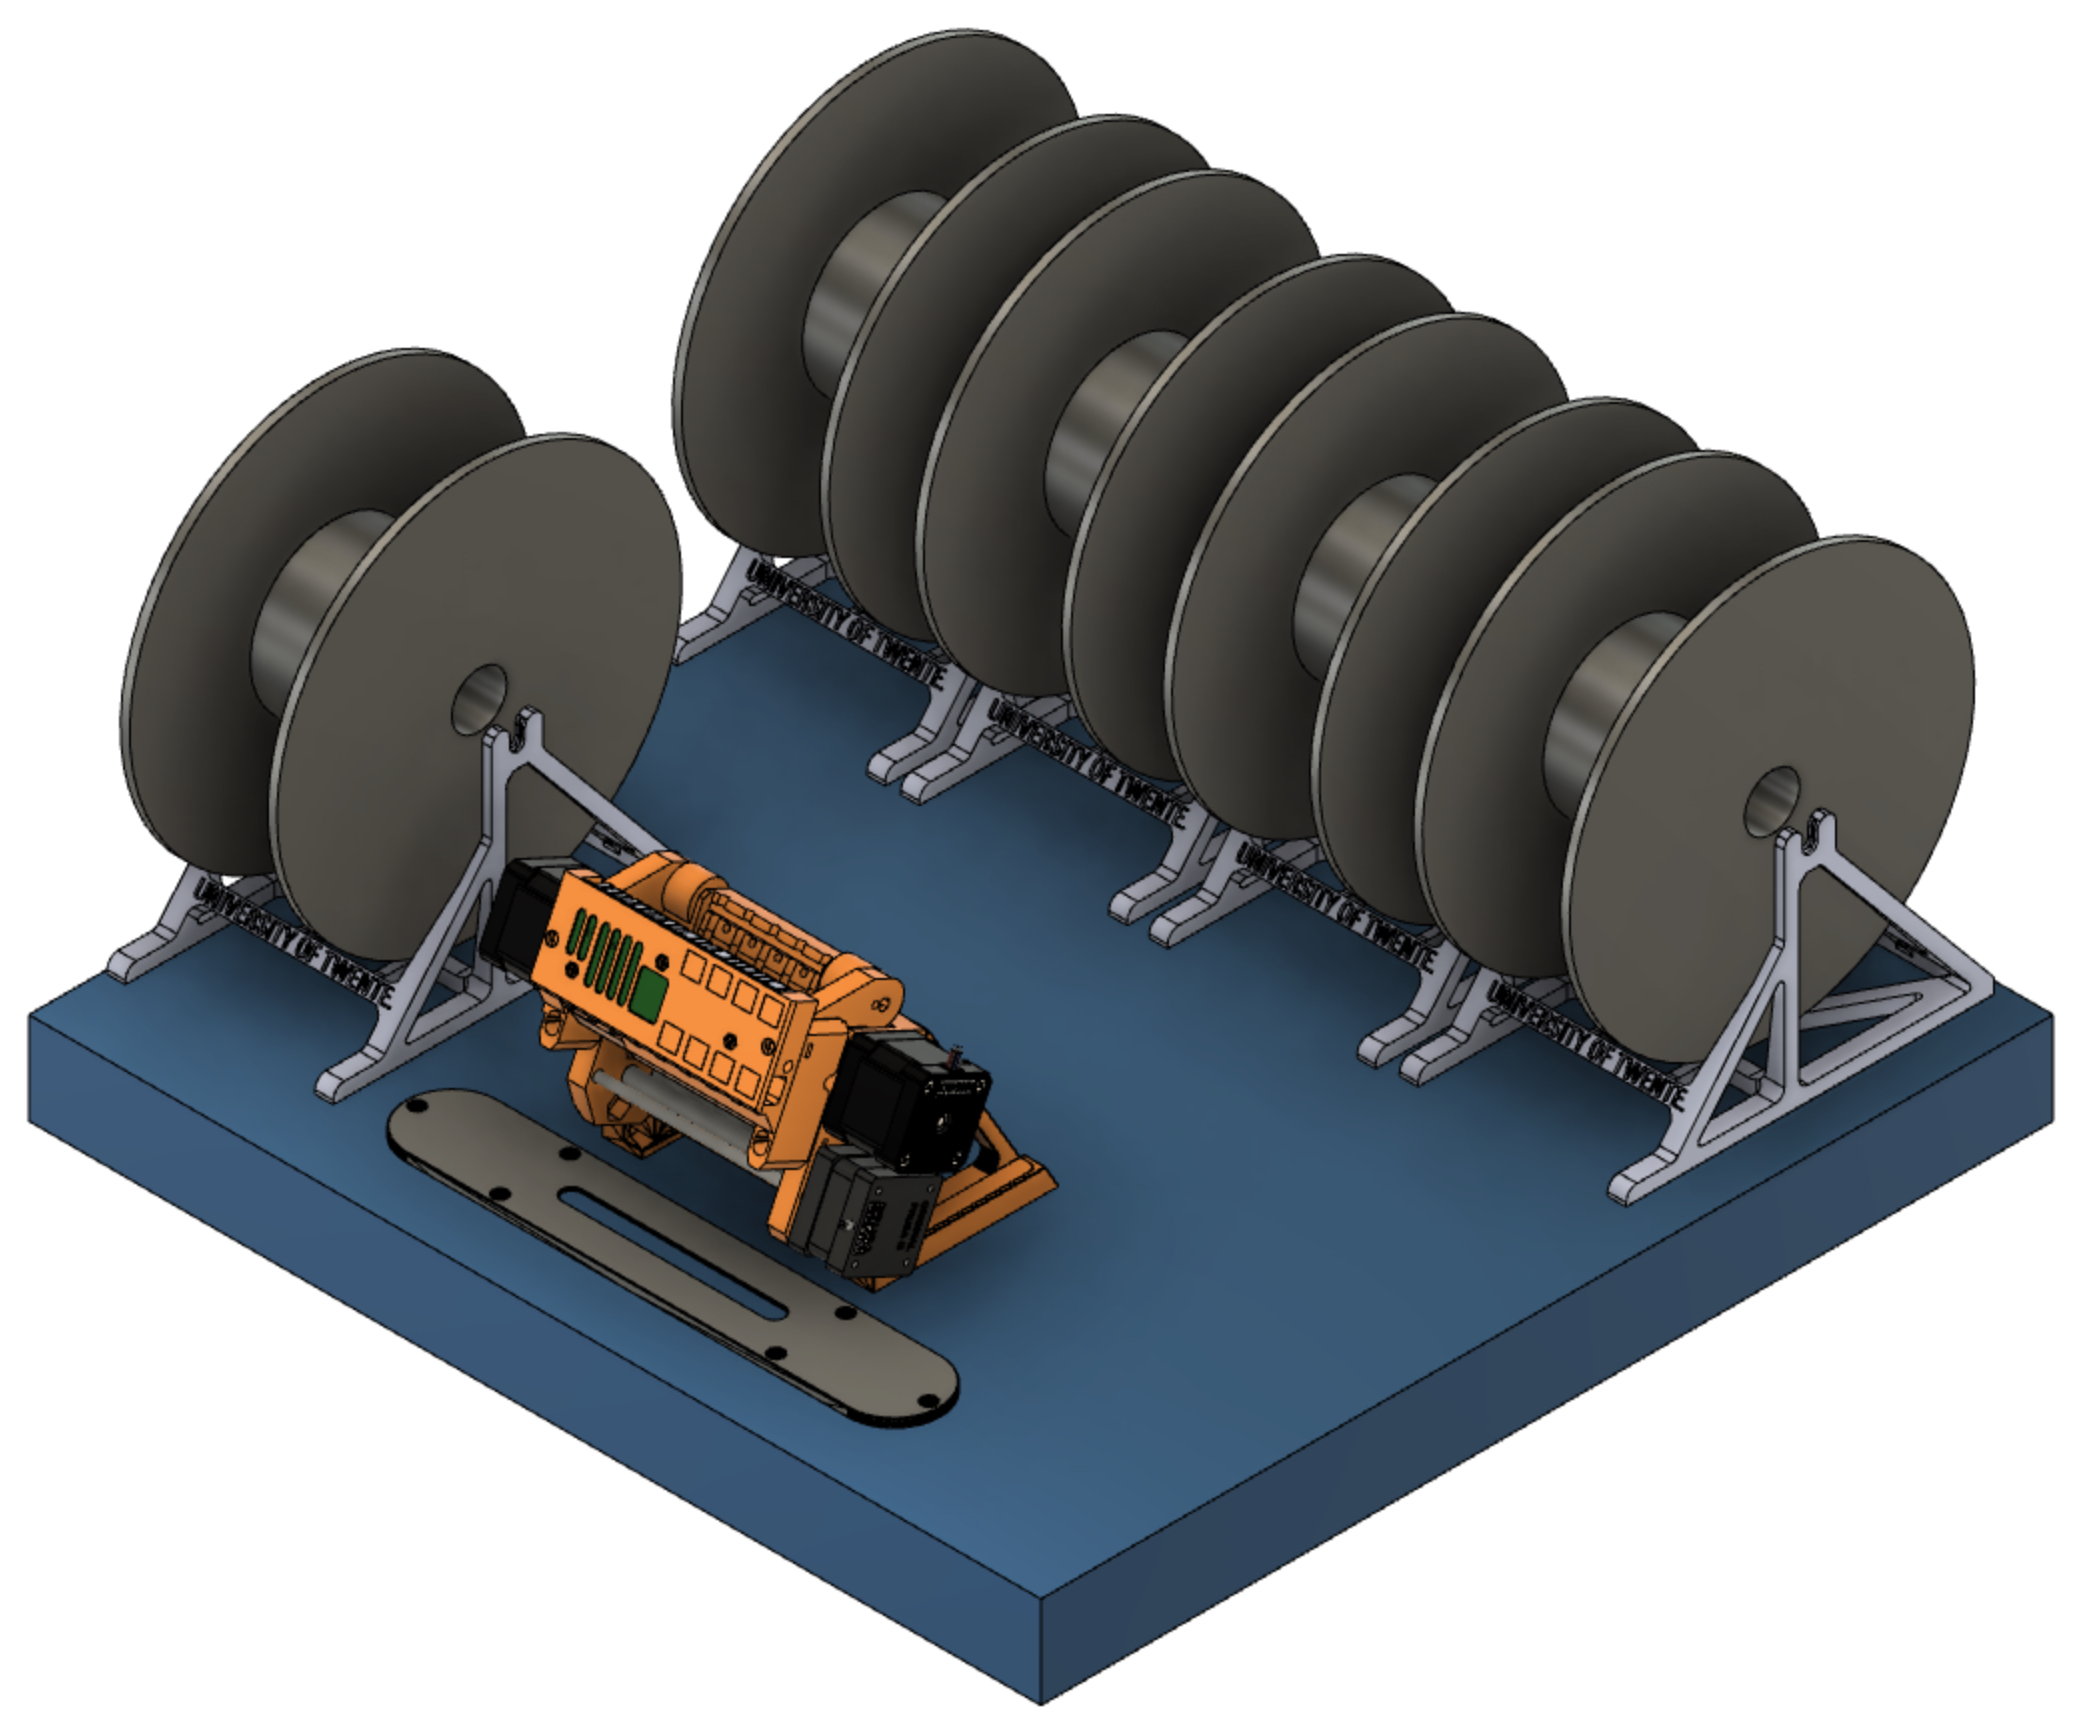
<p>I started to put my Prusa I3 MK3S into the <a href="https://www.printables.com/de/model/17-original-prusa-i3-mk3-enclosure-ikea-lack-table-pr">standard printer enclosure</a> published and provided by the Prusa guys.</p><p>I then bought the MMU2S multimaterial extension and was reading a lot on how to place this somewhere at or in my enclosure.</p><p>I saw many good ideas but some of them I personally did not like and others appeared to me to be too much work. </p><p>Honestly, I do not know if what I have done now is less work, but finally I did what I think I could and I finalized it.</p><p>Skimming through all that material, I found an idea publicized by KalleKnall ( .. <a href="https://www.printables.com/de/model/7499-prusa-mmu2-moving-filament-passage-22mm-ikea-plats">https://www.printables.com/de/model/7499-prusa-mmu2-moving-filament-passage-22mm-ikea-plats</a> .. ) who did separate the MMU2S from the original printer – with the argument, that he didn’t want to have that heavy part sitting on the sensitive printer frame. This to me immediately was plausible and I was following his approach. I created a remix for his filament guide through the Lack top surface ( <a href="https://www.printables.com/de/model/103666-remix-prusa-mmu2-moving-filament-passage-50mm-ikea">https://www.printables.com/de/model/103666-remix-prusa-mmu2-moving-filament-passage-50mm-ikea</a> ) </p><p>Next, I wanted to avoid to have a too strong bend of the PTFE tube when the extruder for example was reaching the top off the Z axis. Having no experience, I decided to raise the top of my Lack enclosure by 15 cm.</p><p>Also I did not want to have kind of a weird disordered arrangement of filament Spools and I also - excuse me, Prusa guys – I did not like the filament buffer provided in the shipment of the MMU2S.</p><p>So I needed to find spool stands and a sufficient auto rewind functionality. I decided and tested on <a href="https://www.printables.com/de/social/46-vincent-groenhuis">Vincent Groenhuis</a> (... <a href="https://www.printables.com/de/model/168-universal-auto-rewind-spool-holder-mm">https://www.printables.com/de/model/168-universal-auto-rewind-spool-holder-mm</a> ) Spoolstands.</p><p>Each gravity-based solution turned out to consume too much space on top of the Lack.</p><p>The MMU2S is placed slightly off center, so that the fifth school stand finds its place left to the tool.</p><p>The resulting challenge from this arrangement is, that when unloading filament, I need to be able to retract 72 cm, which is the distance between the SFINDA of the MMU2S and the filament sensor on top of the MK3S extruder.</p><p>Vincent’s modular be directional spring does this job perfectly, but I didn’t like the tension in the other direction, caused by the bi- directionality of his spring – so I decided to either find a different design or to create my own.</p><p>I ended up in reusing the concept of <a href="https://www.printables.com/de/social/78971-drtomflint">DrTomFlint</a> (... <a href="https://www.printables.com/de/model/36011-rewinder-spring-redux">https://www.printables.com/de/model/36011-rewinder-spring-redux</a> … ) with a springhouse able to replace the springs and reuse the house – and improved it by a tiny little hole opposite of the click position of the springhead in order to enable easy replacement.</p><p>Thanks to the provisioning of a Autodesk Fusion360 F3D file for a spring design A.R.S.H by <a href="https://www.printables.com/de/social/460-peter-larsen">Peter Larsen</a> (... https://www.printables.com/de/model/34014-one-way-spring-arsh-auto-rewind-spool-holder… ) finally did find a way to design a good spring ( parametrized ) with a small number of revolutions and a reasonable spring thickness and a pretension before the spring comes into Tom Flint’s spring house.</p><p>The last challenge was to fix the school stands, so that they are not moving around and being pulled towards the end of you, when the spring tension increases.</p><p>Caused by the very small free space, I did not find it suitable, to use the PTFE tube holder originally provided by Vincent, sticking to the Spool axis.</p><p>As a result I created – the parts can be found in this article – a set of combinable/clickable guards to host the sports dance and two as well host the PTFE tube holder, so that the schools freely can be removed or exchanged and the PTFE tube stays where it is-see picture.</p><p>As I did not want to use too much support while printing, I did create a connector between the guard base and the PTFE tube holder. The base allows rotation by 30° but is protected against self rotation ( PTFE Tube has an own strong will ;-) ) via a tooth wheel approach on the BasePin – sea explosion picture of guards.</p><p>Final remark on this, but this is still under recognition and decision, is that the arrangement would allow me to place all the schools and the MMU2S under a glass hood.</p><p>+-----+</p><p>My A.R.S.H springs will be published soon</p><p>+-----+</p><p>I did print all dovetail parts with a brim … avoids warps,</p><p>Also for the small tube standing ( to avoid support ) </p><p>All PLA Prusament</p>
With this file you will be able to print Five Spools + MMU2S on TOP of Prusa Ikea Lack Enclosure with your 3D printer. Click on the button and save the file on your computer to work, edit or customize your design. You can also find more 3D designs for printers on Five Spools + MMU2S on TOP of Prusa Ikea Lack Enclosure.