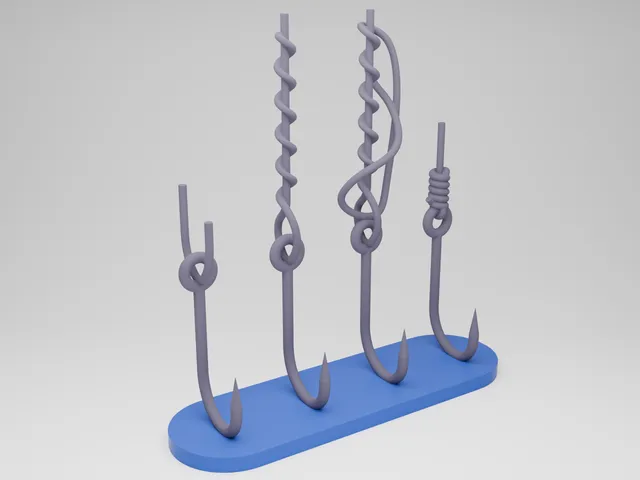
Fisherman's Knot (Improved Clinch Knot) - 4 steps
prusaprinters
New to fishing and want to learn an effective knot? Or can't remember how to tie the knot? Or are you an expert that knows it by heart? - Either way this 3D Visualization of the 4 steps to tie the "Improved Clinch Knot" might be for you!Perfect for beginners, a quick refresher for seasoned anglers, or a teaching aid for instructors. Download and print your own today to ensure your knots are tied perfectly every time. Enjoy!About the knot:The "Improved Clinch Knot" is one of the most reliable and strongest knots, but still quite easy to learn. It is one of the first knots every fisherman needs to know to get started. You can find a 2D visualization of the steps to tie the knot in the image down below:Image source: https://clickbaits.de/blog/angelknoten-der-verbesserte-clinch-knoten/Note:Because of the complex geometry of this model, you need quite a bit of custom support structure to ensure a clean finish of your print. I already did a lot of testing - my print profile in the 3mf file includes the settings I had the best results with (use BambuStudio as the slicer if your slicer can't load the custom setting of the 3mf file). To remove the tree support, I recommend using some kind of clipper like in the picure down below. Carefully remove each branch of the tree support, don't rush when doing it because the model is quite fragile. You might also encounter a little bit of stringing. To remove any potential stringing, I recommend you to use a hot air gun, which removes the strings instantly (optional).
With this file you will be able to print Fisherman's Knot (Improved Clinch Knot) - 4 steps with your 3D printer. Click on the button and save the file on your computer to work, edit or customize your design. You can also find more 3D designs for printers on Fisherman's Knot (Improved Clinch Knot) - 4 steps.
