First/second layer pattern magic
prusaprinters
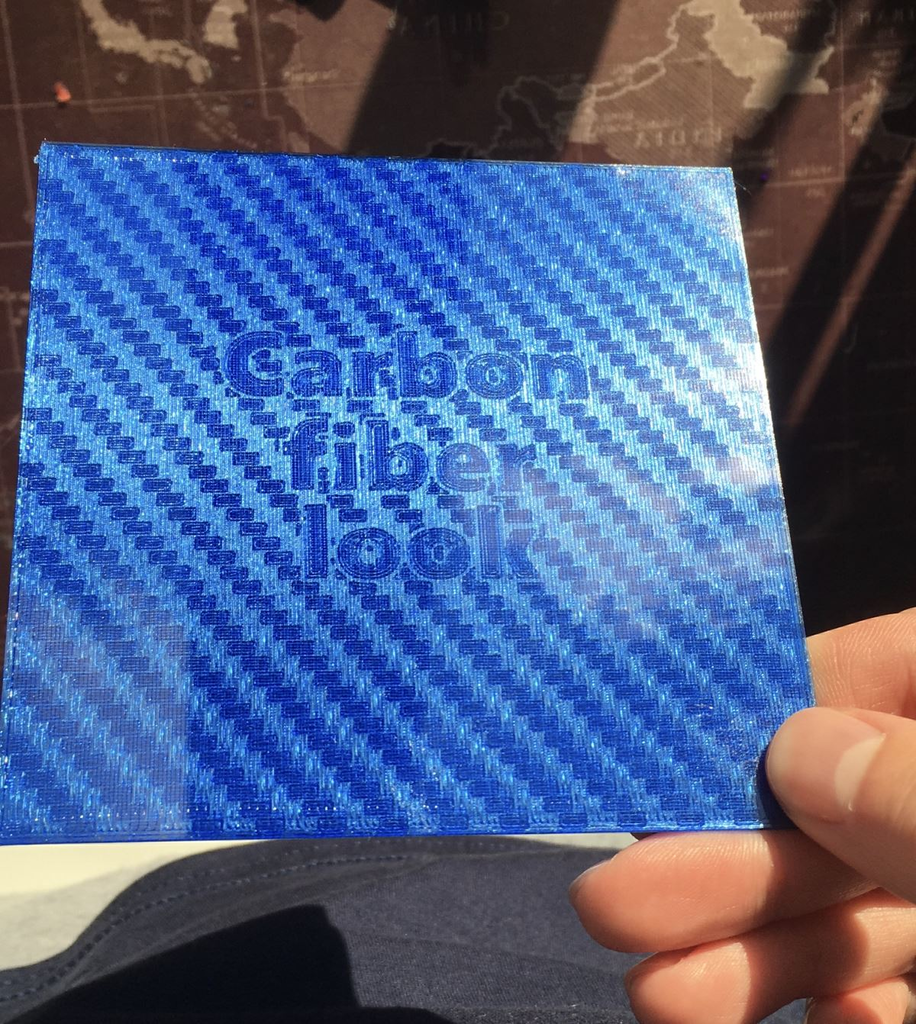
<h3>Side note:</h3> <p>The "Download All Files" button seems broke on thingiverse. Just single download every file, and you are good to go....</p> <hr/> <p>Dear thingiverse community,</p> <p>since I am printing on a glass bed and got some PETG (transparent) from a manufacturer to test out, I got an idea of designing something special to shine through the first layer to enhance my prints.</p> <p>On the pictures/gifs you can see my first attempts.</p> <p>I really love the carbon fiber look, so I tried to copy this first. And for my eyes, that worked out very well. Soon I tried some other pattern, like a christmas tree and some squares like a chess board.</p> <p>I am uploading this, to give you the idea and possibility to create your own pattern and enhance your visual design prints. I hope you really like my idea and will share it with your friends.</p> <p>If you use this method, please tag me so I can proudly see your results :)</p> <p>HINT: Downloading the .zip file does not work for some reason. Just download file by file.</p> <hr/> <h3>How does it work?</h3> <p>Cura (my slicer, but i guess every slicer works that way) will change its</p> <p>bottom/top line direction every layer. This means, if layer 1 is printed horizontally, the next layer will be printed vertically, the next layer will be printed horizontally and so on...</p> <p>Since this direction change, also changes the direction of the reflected light, it appears darker/ligher depending on its point of view.</p> <p>I am using this strategy to create a pattern on the second and third layer, which shines thorugh the first layer of the filament (transparent/translucent).</p> <hr/> <h3>How to design this?</h3> <p>First of all, this can be applied on new designs but also on existing ones. Only requirements are a bottom number bigger than at least 3 layers and a kind of translucent/transparent Filament. I used PETG for this.</p> <p>Step 1: Use a 3D modelling program (i used Fusion 360)</p> <p>Step 2: Create a solid layer which is as thick as your first layer (0.2mm for example)</p> <p>This first layer will be the layer which touches the print bed. I used a glass bed for almost perfect glossy, mirroring look.</p> <p>Step 3: Now we will create our pattern on the second layer which means, we have to design something on top of that first layer (like some christmas trees in my example on the gif).</p> <p>Step 4: On top of this pattern layer, we have to create a background layer. This layer has to be solid again, because we want to force the slicer to print this whole layer in one direction.</p> <p>Then you can go on designing your thing, but this time you will have a slightly different bottom.</p> <hr/> <h3>How to print this?</h3> <p>The slicer settings are very important for this project to achive best results.</p> <p>Step 1: Make sure, you are printing in the right direction inside your slicer. For example inside cura, you have to rotate your thing by 45 degrees, because cura slices the bottom and top layer in an angle like this. See picture.</p> <p>Step 2: For bottom and top layers, use "Lines" pattern.</p> <p>Step 3: For best results, use just 1 "Wall line count". We need this, to ensure that most of the pattern will be printed as the bottom/top for our visual effect.</p> <p>Step 4: Happy printing.</p> <hr/> <p>To test out this method, I have uploaded a carbon fiber style test print so you can see if your printer can achieve some good results and if your slicer settings are done right.</p> <p>I will definitly go on working on this method to improve it. I will try to make the steps required more easy. Maybe one day, we could get a plugin within our slicers to create such a bottom pattern style.</p> <p>If you want to see more of my daily printing hobby, you can add me on instagram: enovation_prints</p> <h3>Examples</h3> <p class="detail-image"><img src="https://cdn.thingiverse.com/assets/20/26/f8/f7/07/2.gif"/></p> <p class="detail-image"><img src="https://cdn.thingiverse.com/assets/9a/cc/25/15/ce/3.gif"/></p> <p class="detail-image"><img src="https://cdn.thingiverse.com/assets/4d/09/e0/28/76/6.gif"/></p> <p class="detail-image"><img src="https://cdn.thingiverse.com/assets/44/33/9f/7a/b0/4.gif"/></p> Category: 3D Printing Tests
With this file you will be able to print First/second layer pattern magic with your 3D printer. Click on the button and save the file on your computer to work, edit or customize your design. You can also find more 3D designs for printers on First/second layer pattern magic.
