First Layer Calibration Test Remix
prusaprinters
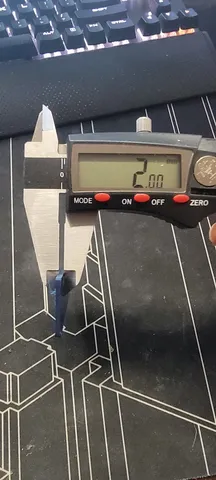
Remix of TaylorsMake's fantastic z-offset calibration tool, please go check them out.DescriptionPermissions on the google sheet are read-only; you can copy/download to use. I would advise you to take a screenshot of your original settings if they are currently working for you before undertaking the test. Here's the linkhttps://docs.google.com/spreadsheets/d/1kx25NIu-YKnb9TnnRBuu6h6LD0HHRZgZwjHNRlo-ZFA/edit?usp=sharingFeedback is always welcome! Cheers This is a Live z-height test to help get an accurate first-layer height tuned in.The 02mm model steps up from 0.20 mm in 0.20 mm increments up to 1 mm in height.The 04mm model steps up from 0.40 mm in 0.40 mm increments up to 2 mm in height.Print instructionsWarning User discretion is needed here. You will need a baseline z height set already to do this test, so just get it reasonably close by eye then take this test.Instructions:.20 mm version:Slice the model in 0.20 mm layer height in your chosen material. Ensure the first layer height is set to 0.20 mm. .40 mm version: Slice the model in .40 mm layer height in your chosen material. Ensure the first layer height is set to .40 mm.Calculating offset:Print the model, take a caliper or micrometer measurement in the middle of each square and note these down. You then plug your values into the formula so EXPECTED VALUE - ACTUAL VALUE = VARIATIONYou then average your variation over the five heights to give you the overall interpretation. You then take your CURRENT LIVE Z +- VARIATION (This depends on whether you need to go up or down)to give you your new z height. If you get your new z height within, saying, 0.05 or 0.10 of the height of the square, I would stop here and use caution, so you don't scratch your print bed. User discretion is advised here. E.g., Your first square should measure very close to 0.20, the second square 0.40, and so on.I use the new feature to set different sheets up on the printer. So you can set up a custom sheet for each material so you'll never have to mess around with the z heights when swapping materials. Once you have your new z height amount and you have set up your materials in the HW menu, make sure you have the correct sheet turned on, then go into settings > live to adjust z > enter in new amount and repeat the test. Remember to get close enough but monitor the surface, so you don't damage your nozzle or bed.Notes: I would recommend ensuring your print surface is level before running this calibration since unlevel beds are the devil. I prefer to measure from the walls of the model rather than the middle since the top/bottom layers may get pushed slightly up and skew the results and the wall height seems more consistent. The .40 mm model should take about 10 minutes or less to print. If you share this please give credit to the original creator.
With this file you will be able to print First Layer Calibration Test Remix with your 3D printer. Click on the button and save the file on your computer to work, edit or customize your design. You can also find more 3D designs for printers on First Layer Calibration Test Remix.
