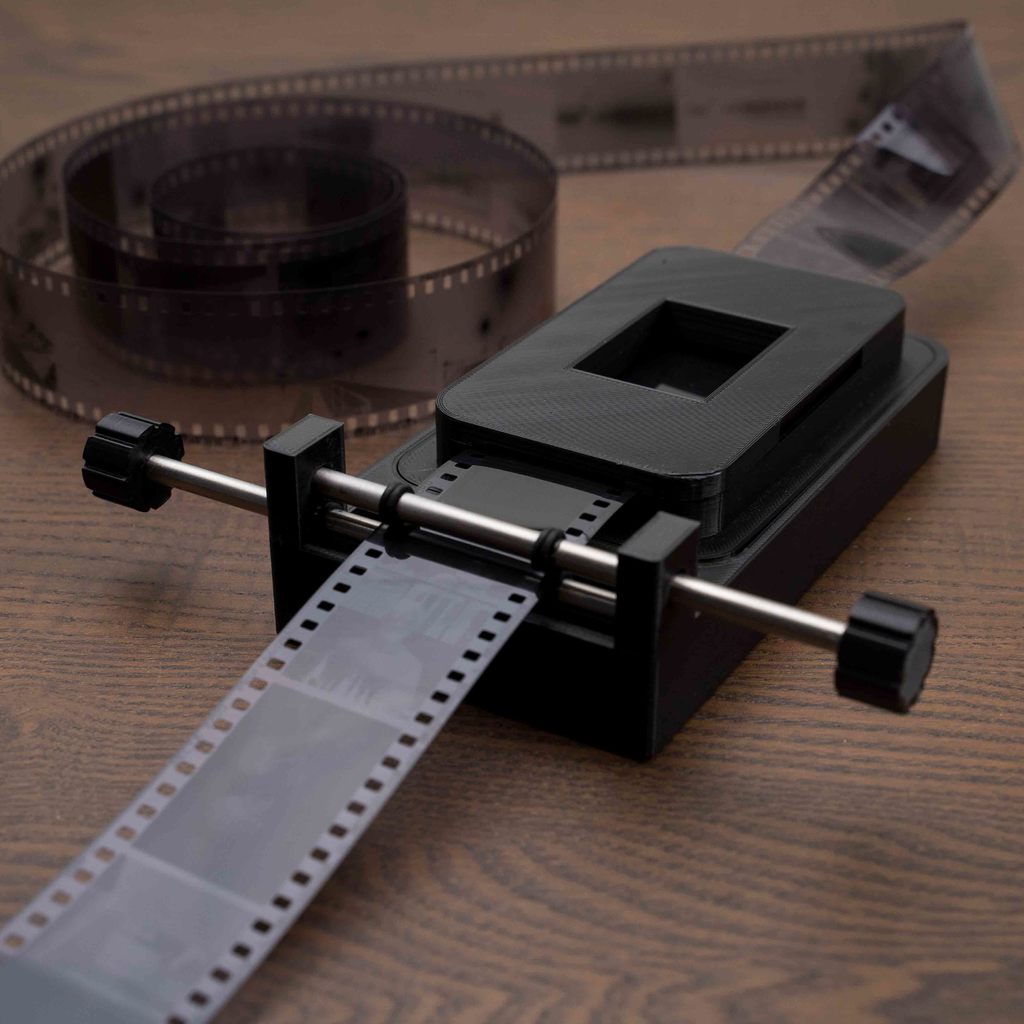
Film Scanner base for 35mm and 120 film
thingiverse
UPDATE: ADDED 35mm holder for scanning images with borders Extra parts: - 6 x ( d=5 mm x h=3 mm ) magnets for the holder ( https://www.ebay.co.uk/itm/262409989613?var=561207509378 ) - 4 x rubber stickers for the base up to 10 mm diameter (https://www.amazon.co.uk/gp/product/B07B4Y41Q1/ref=ppx_yo_dt_b_asin_image_o04_s00?ie=UTF8&psc=1) - 5 mm diameter metal rods for the advance mechanism 1 x 400 mm lenght ( https://www.aliexpress.com/item/4000186787300.html?spm=a2g0o.9042311.0.0.13504c4dKSNmgH ) 2 x 100 mm length (https://www.aliexpress.com/item/1005001279496068.html?spm=a2g0o.9042311.0.0.27424c4dMVXAAW) - 7mm OD x 1.5mm thickness rubber rings ( https://www.aliexpress.com/item/1005001565587772.html?spm=a2g0o.9042311.0.0.13504c4dKSNmgH ) Instructions: THERE ARE TWO VERSIONS OF THE BASES WITH ADAVANCE SYSTEMS. 1) The 'BASE WITH ADAVANCE SYSTEM' which is the 1st version uses metal rods wth the rubber bands. You will need 8 x 7mm external diameter for advaning the film and 4 smaller ones to hold the rods in place.*see picture below 2) The ' BASE V2.1' which is the 2nd version was designed to be used with the 3d printed 'ROD V2.1' and ' CAP V2.1'. This Base has holes on both sides and the cap has to be glued on the rod after 4 rings are placed on each rod.*picture below - SUPPORTS: 1) BASE BASIC 2) BASE WITH ADVANCE SYSTEM 3) BASE WITH ADAVANCE SYSTEM V 2.1 4) 120 FILM HOLDERS 3) When you are ready to place the magnets on the holders, place the holders next to each other and number each whole with a number( PICTUR EBELOW) .I used super glue to secure the magnets in place for the first holder and let them dry fully. I then used a piece of paper on the first holder and placed it on top of the magnet corresponding to number 1. I then placed another magnet on top of tha paper so i could see which orientation is correct and then i placed it on the other holder with the corresponding number(in this case number 1). Then follow for the rest of them. *Keep in mind to glue the magnets in a way that the most recent glued one is not close to the one you are attching now, because it might attract it and move it from its place. A good sequence to follow is first number 1 then 6,3,8,5,2,7,4. FOR BASE WITH ADVANCE SYSTEM: 1) Insert the 100 length rod from the one side half through, place 6 rubber rings. 4 of those will be used to advance the film (2 on each side next to each other and the rest will be squeezed at the end of the rod so it wont be able to come out of the holes. Do ths first for the lowest positioned rod and then for the top one. UPDATE: I designed an alternative method instead of using the metal rods. You can now print the rods. The 2 extra files are named ( " CAP V2.1 & HANDLE V2.1)
With this file you will be able to print Film Scanner base for 35mm and 120 film with your 3D printer. Click on the button and save the file on your computer to work, edit or customize your design. You can also find more 3D designs for printers on Film Scanner base for 35mm and 120 film.
