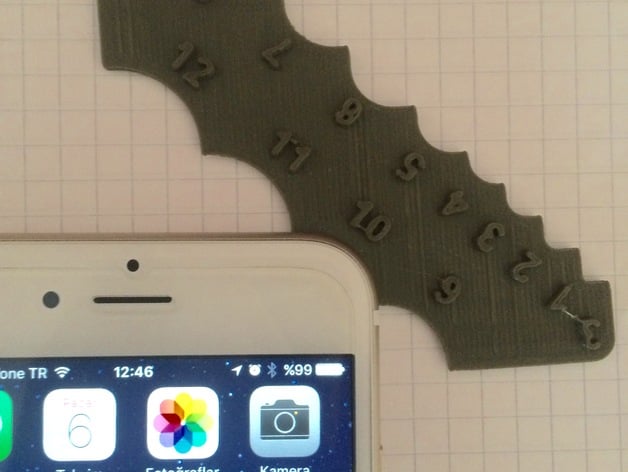
Fillet Gauge
thingiverse
Update: I have now created an Inch version for those who prefer not to use metric! You can find it in the remixes section. The other day I was watching Noe Ruiz from Adafruit's Layer by Layer, as he designed a case for the Apple TV remote. He had trouble measuring the fillet precisely and had to guess. I have faced this same issue when designing items with curved edges myself. I thought, why not create something to solve that problem? With my printer and computer, making something from scratch was definitely doable. So, I set out to make a simple design for a fillet gauge that anyone could use. It's meant to measure the most curved areas on objects, such as the corners of a phone. This tool should be super helpful for people trying to create items that fit snugly onto an object. Plus, it's incredibly easy to operate. Print Settings Printer Brand: Printrbot Printer: Simple Black Rafts: It doesn't matter. Supports: No Resolution: Doesn't matter either. Infill: Choose whatever you like. How I Designed This Simple Designs Were Key I began by making a straightforward sketch with fillet sizes ranging from 1 to 12 mm. Next, I extruded the design at 2 mm thickness for a clean finish. Finally, I added numbers to the gauge which were then engraved on the design. However, upon printing, the engraving was difficult to read. So, I ended up re-extruding them and voila - now they are crystal clear! Design Process The Project Details Are Here Project Overview Design Tips For The Win Objectives: -Learn cutting-edge designing techniques. -Design objects with curved edges using reference images. -Gain experience in design software like Fusion 360. -Familiarize yourself with vocabulary terms such as fillet, arc, corner, and their usage in design programs. Target Audience This project is perfect for those starting to learn advanced modeling softwares, particularly when designing objects from references with curved edges. Additionally, students in grades 5-10 can use this tutorial to learn essential designing tips for more complex objects with curved edges using reference images. Preparation To complete this task successfully: -Access to a computer with internet and a 3D modeling software. -A mouse is recommended, but not necessary - you're a digital pro! -Prior experience with design softwares is required. You should be comfortable creating simple designs from references. -Collaborative environment: Team up with fellow students for measurement challenges. Steps To Success 1: Choose An Object Of Interest Pick any object that has curved edges, and use it as reference while designing. 2: Measure Up Take precise measurements of the object's curves using a caliper gauge. 3: Pick Something To Design Create an object that relates to your chosen reference image in step 1. 4: Get Designing! Use basic tools like sketch, extrude, fillet, and modify to create your design. 5: Bring It To Life! 3D Print Your Design And Share With Friends. Final Outcome By the end of this project, students should have: A beautifully printed design that complements an object Gained new skills: -How to create objects with curved edges by referencing physical objects, -Measuring fillets accurately, -Creating complex designs in 3D modeling softwares, -Essential designing tips and commands like sketch extrude fillet, modify.
With this file you will be able to print Fillet Gauge with your 3D printer. Click on the button and save the file on your computer to work, edit or customize your design. You can also find more 3D designs for printers on Fillet Gauge.
