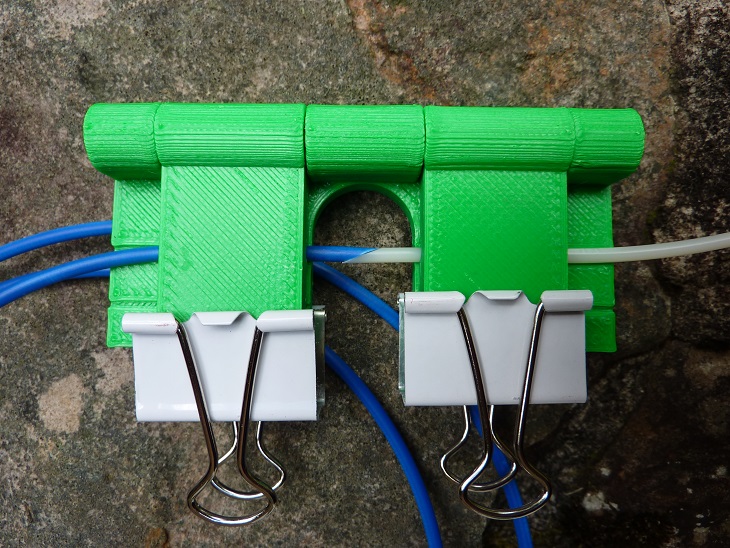
Filament Splicing Clamp and Angle Cutter Guide
prusaprinters
<p>If you do any reasonable amount of 3D printing you will accumulate short pieces of filament from the ends of rolls. The pieces will be too short for another print job but too long to throw out. This filament splicer jig allows pieces of ABS and other material to be rejoined into useful lengths and/or rearranged for interesting colored patterns in printed objects.</p><p>Print the “Filament_Splicer.stl” platter that includes the Cutter Guide. Clean out the hinge holes using a 3/16” (5mm) drill for the base and a 7/32” (5.5mm) drill for the two top pieces. Cut a section of 3/16” (5mm) dowel the length of the base for the hinge pin and press it into place connecting the base and the two top pieces. If the dowel is loose in the base, a drop of glue on the end of the dowel should hold it in place nicely. A pair of binder clips will be used for the clamps. Clean out the filament holes in the Cutter Guide using a 1/8” (3.2mm) drill for the 3mm hole and a 5/64” (2mm) drill for the 1.75mm hole. (If you have a numbered drill set or a metric set that could be a better option).</p><p>Using the “Cutter Guide” a controlled 75 degree cut can be made in the end of the filament piece. When splicing, it’s useful to rotate the filament so the natural curl from the roll will tend to hold the cut faces together. Cut the ends of the two pieces to be joined. A single edge razor blade is used for cutting. It may be useful to tap the razor blade through the filament using a piece of wood or a mallet.</p><p>Slide the filament into the clamp with the cut faces lined up and clamp with the binder clips. Then using a toothpick add a drop of acetone to the joint. Flip the clamp over and add a drop to the other side. Let the splice set while the joint fuses and dries. </p><p>Note: The spliced joint won’t be as strong as a continuous piece of Filament so take care when handling a spliced piece. The splices do feed through the extruder nicely.</p><p>Note: I’ve only tested the splicer with 3mm ABS, but it should also work well with 1.75mm ABS and other materials.</p><p>This design is also posted on Thingiverse:</p><p><a href="https://www.thingiverse.com/thing:1052283">https://www.thingiverse.com/thing:1052283</a><a href="#_msocom_1">[D1]</a> </p><p>Some of the comments from Thingiverse indicate that you can splice PETG using Toluene, Acetone doesn’t work for PLA, and that you can fuse any kind of filament using a lighter after a bit of practice.</p><p>One last comment about switching filament during a print:</p><p>I’ve replaced the extruder on the hand built Delta printer with a “Zesty Nimble”. This allows for a light weight direct filament drive at the hot end using a remote stepping motor.</p><p><a href="https://zesty.tech/">https://zesty.tech/</a></p><p>After a “panic” watching the last of the filament from the spool start to disappear into the extruder I found that the square cut end of the next spool could be manually inserted and continue feeding without a skip. But, you have to be quick to track the movements of the Delta hot end.</p><p> </p>
With this file you will be able to print Filament Splicing Clamp and Angle Cutter Guide with your 3D printer. Click on the button and save the file on your computer to work, edit or customize your design. You can also find more 3D designs for printers on Filament Splicing Clamp and Angle Cutter Guide.
