Filament roller experiment
prusaprinters
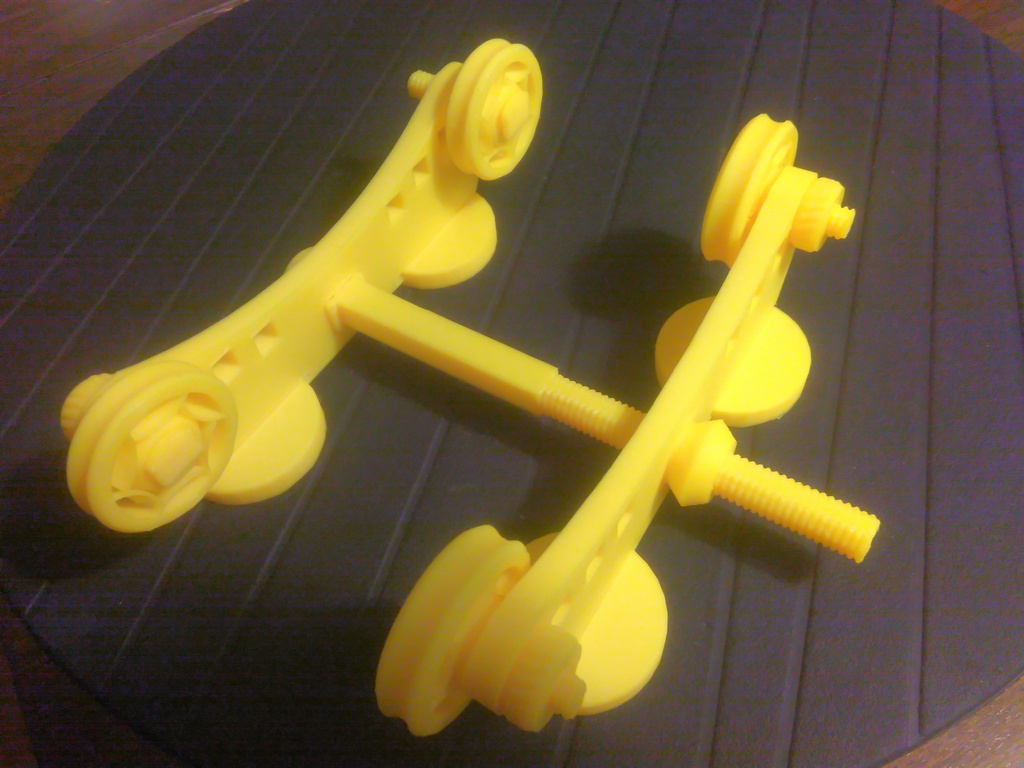
<p>Update: I updated the rollers due to problems with almost empty filament rolls; they aren't heavy enough and the friction just tops them off the holder.</p> <p>The new rollers are based on bearing idea I saw in Thingiverse some time ago. I didn't find the thing, but modeled my own. Rolling just fine. The model has tolerance of 0.1mm. Use horizontal compensation. feed rate etc. to make them print properly.</p> <p>Wanted to test some ideas and needed better, adjustable filament roller. Soo I tested my ideas by creating this filament roller.</p> <p>The roller parts need some lubricant, I used PTFE spray and/or some silicon grease. Still they don't roll too well in this application so I might replace them with something else. Doesn't seem to matter, filament rolls glide on them so it still works fine.</p> <p>Highlights:</p> <ul> <li>only printed parts</li> <li>adjustable for different size spools</li> </ul> <p>BOM:</p> <p>4x axle.stl</p> <p>4x washer.stl</p> <p>4x nut.stl</p> <p>4x roller.stl</p> <p>4x foot.stl</p> <p>1x big_nut.stl</p> <p>1x frame_parts.stl</p> <p>1x frame_nut.stl</p> <p>1x shaft.stl</p> <p>Assembly:</p> <ul> <li>slide the feet to the frame parts. They can be quite tight, so use file or knife to remove materila if needed.</li> <li>the rollers have their center printed as separate parts. Add some lubricant (PTFE spray) and pop them inside the rollers</li> <li>same goes to the frame_nut, it uses same mechanism</li> <li>install the long shaft using the big nut. Fasten it to the frame part that doesn't have the roller center</li> <li>the frame part with the nut can be threaded on the shaft, moving the frame</li> <li>each roller is to be fixed on the frame with axle, washer and nut. Washer should be in between the frame and roller</li> </ul> <h3>Print Settings</h3> <p><strong>Printer:</strong></p> <p>Prusa i3 MK2</p> <p class="detail-setting rafts"><strong>Rafts: </strong> <div><p>Doesn't Matter</p></div> <p><strong>Supports:</strong></p> <p>No</p> <p class="detail-setting resolution"><strong>Resolution: </strong> <div><p>0.2mm</p></div> <p><strong>Infill:</strong></p> <p>15%</p> <p><br/> <p class="detail-setting notes"><strong>Notes: </strong></p> </p><div><p>I used brim, but this depends how well your bed adhesion works. If using brim, the axle and shaft threads need to be cleaned well for the nuts to fit.</p> The threaded parts are to be printed on their side, as this makes them much more robust. <p>Current models have a gap of 0.15mm/side and that works well on Prusa i3 (some more for the threads). If parts don't seem to fit, you can try scaling or using the horizontal compensation feature to create extra gap.</p> <h3>How I Designed This</h3> <p>I used OpenSCAD and everything is my own design.</p> </div></p></p> Category: 3D Printer Accessories
With this file you will be able to print Filament roller experiment with your 3D printer. Click on the button and save the file on your computer to work, edit or customize your design. You can also find more 3D designs for printers on Filament roller experiment.