Filament Roller
prusaprinters
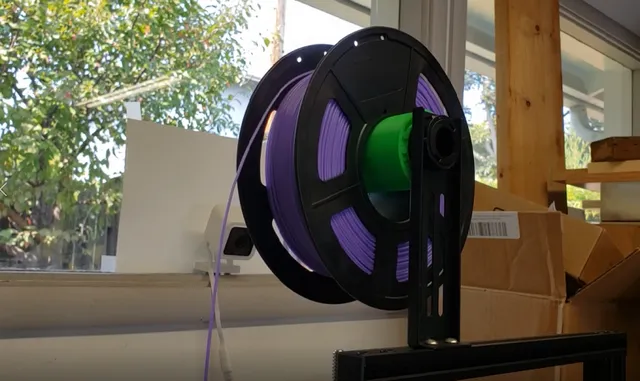
Filament Roller BearingHere is a novel method for reducing the friction of rotation of the filament spool on 3D printers. It's essentially a wide linear bearing with an inner shell and outer shell separated by arrays of captive needle bearings on each end. The object is entirely print-in-place and no other parts are needed. On my Ender-3, this prints in ~8 hours with only ~50g PLA. It is quite effective and I can hardly imagine using the printer without it anymore.Please see my demonstration video belowSome benefits of reducing roller friction are:less chance of delicate filaments like TPU snappingless wear on the filament ingress guide holemore force available to push filamentless crimping of the filament by the gear teethI've included the STL and source files for three versions of the roller:V2 (FreeCAD), suitable for filament spools with inner diameter minimum 55mmV3 (FreeCAD), handles spools with smaller diameter down to 52mmV4 (OpenSCAD), highly customizable, with larger flange only on outside endAfter printing, please prep the roller according to the Post Printing instructions below.All but one of my filament spools are accommodated by the 55mm version. I use this one when possible since the internals have better clearances than the 52mm version, allowing it to spin somewhat better.V4 increases the size of the flange so the filament roll is less likely to walk off, with the realization that a flange is needed only on one side. Note that if the flange diameter exceeds the spool inner diameter, it's necessary to install the roller an spool together.Instructions for OpenSCAD:Open the .scad file in OpenSCAD version 2021.01 or laterPress F5 to view the modelMake sure Windows -> Hide Customizer is not checkedReview/modify the Parameters in the CustomizerPress F6 to render to STL, then press F7 to save the STL.One of the customizer parameters is a checkbox to show a cross-section view (see image above). There is also a checkbox to test-print the bottom bearing only.Print SettingsNo supports, brims or rafts are necessary. Any PLA should work. I've had luck with 0.2 mm layer height and 20% infill. I recommend wall line count 3. The roller mostly comprises walls.To avoid the unlikely event that some of the needles get knocked loose during printing, I use Cura's feature "Z-hop when retracted", but it probably doesn't really make a difference.Post-PrintingPreparations for minimal frictionRemove the print from the bed carefully, as there is a polar array of small needles stuck to the bed between the inner and outer shells. I've never had a failure for any of the versions.The roller won't turn very well initially. Its parts stick together because of tight clearances, but tight clearances are necessary for the best results.Use a small tool like a watch screwdriver carefully to free up all of the needles so they aren't stuck to each other or to the shells. The top set of needles must also be freed from the small internal scaffold they're printed on.Work the bearing round and round, back and forth, side to side, turning and squeezing and pressing to break off any internal stringing and soften any seams. It should keep improving over the course of a few minutes until no more binding points are felt.Critically, apply a few drops of a Teflon-based lubricant to each set of needles and work it in. At that point it should spin freely with momentum.How I Designed ThisOriginally this was my first project in FreeCAD. In order to create the final part for export to STL, a boolean union (Fusion) is used to merge the three main parts together (inner shell, outer shell, and needle array).For V4, I redid it using OpenSCAD for much better customizability.Category: 3D Printer Accessories
With this file you will be able to print Filament Roller with your 3D printer. Click on the button and save the file on your computer to work, edit or customize your design. You can also find more 3D designs for printers on Filament Roller.
