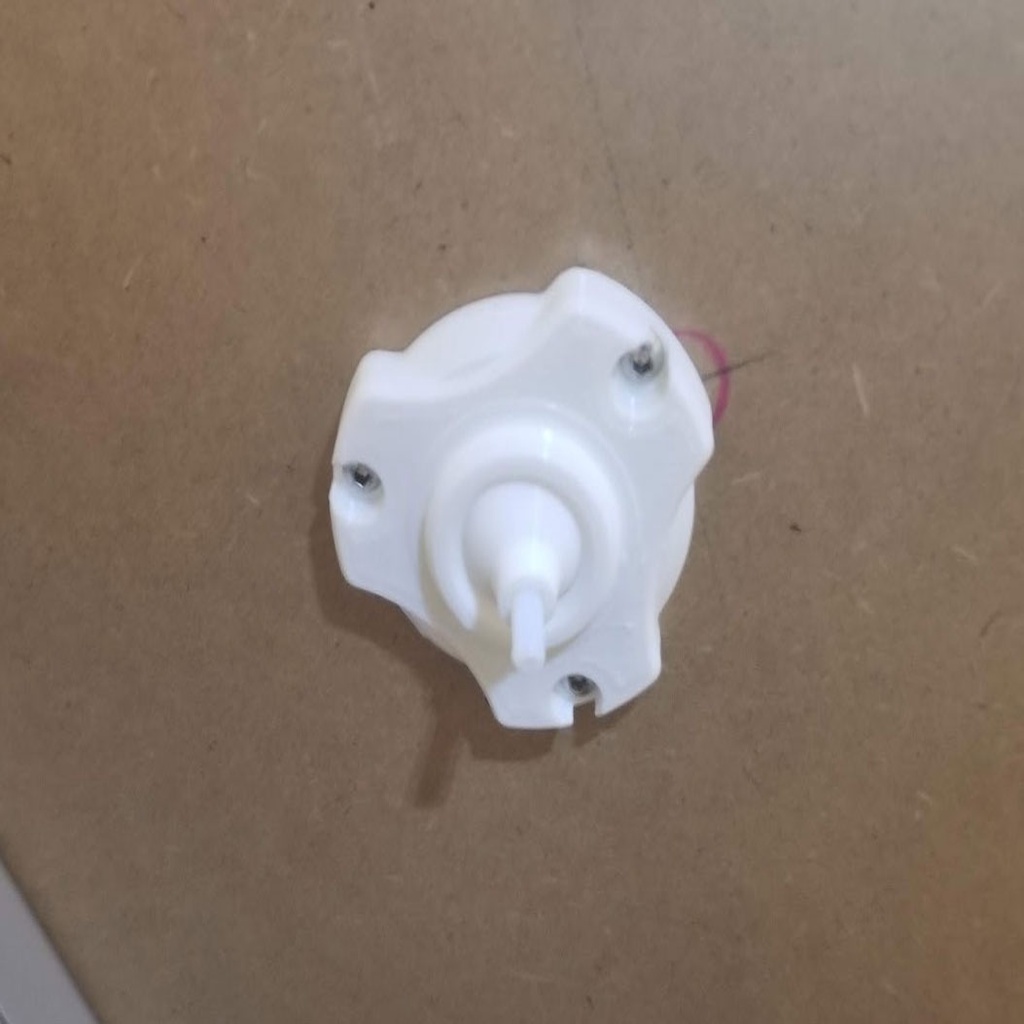
Filament Passthrough for an Ikea (TINGBY) based enclosure
prusaprinters
<p>This is a filament pass through for a printer enclosure. It was designed for my enclosure which is based on an Ikea TINGBY coffee tables. I'm pretty sure there are few if any folks out there using the same, so this is a very niche design right now. If you can provide exact dimensions for say a Lack enclosure's thickness, and want to try this (and will provide feedback), I can probably remix it to fit that style as well.</p> <p>It required the following parts:</p> <p>3x M3x45mm screws<br/> 3x M3 nuts<br/> 1x P18 17.8 x 2.4mm O-ring (for the ball)<br/> 1x 22 x 3mm or 22.1 x 3.5mm O-ring (for the cap)<br/> I used an older version (91512) of the following O-ring kit from Harbor Freight which has the required parts:<br/> <a href="https://www.harborfreight.com/397-piece-metric-o-ring-assortment-67580.html">https://www.harborfreight.com/397-piece-metric-o-ring-assortment-67580.html</a></p> <p>Everything should print with supports touching the buildplate, and they should be rotated to minimize supports.</p> <p>If you make one please post it, any questions let me know.</p> <p>STEP file is included for easy remixing too, but I noticed that the "INSIDE" part is munched in that file, I've tried several things to correct it. but could not get it to export without the problem. The other parts in the STP look correct however.</p> <p>Due to the difficulty of aligning holes and such, I made 2 templates. One template is a basic drill guide, and the other has a stop - and is the one I used on my enclosure. I used a 1 3/8 Forstner bit to cut the hole. I will add some pics showing the installation as well, but the hardest part is alignment of the holes.</p> <h3> Post-Printing</h3> <h3> <p class="detail-caption"><strong>This is the template I used. It was aligned with a mark on the edge of the top, and then pilot holes were drilled through. The process was repeated on the bottom side. In the pic, I had already drilled the holes in the bottom and used a small allen key to verify the alignement though the center hole, before I drilled the rest of the holes in the top.</strong></p> <p class="detail-image"><img src="https://cdn.thingiverse.com/assets/4b/74/f3/a9/84/filament-pass-through-5E-G.jpg"/></p> <p class="detail-caption"><strong>This is just a pic of the 1 3/8" forstner bit I used to drill the large hole. I repeated this on the bottom side. I would not recommed drilling any of the holes all the way through from the top since that is almost guaranteed to cause some misalignment and blow out.</strong></p> <p class="detail-image"><img src="https://cdn.thingiverse.com/assets/49/29/45/45/a7/filament-pass-through-5E-H.jpg"/></p> <p class="detail-caption"><strong>This is after drilled all the holes from both sides and fitting the M3 x 45mm screws. It is much easier to get the screws in if the center "tunnel" part is not yet installed, but I used a vaccum to make sure no dust was still in the hole before doing this.</strong></p> <p class="detail-image"><img src="https://cdn.thingiverse.com/assets/14/aa/5d/3b/3f/filament-pass-through-5E-I.jpg"/></p> <p class="detail-caption"><strong>Finsihed guide shown from below (inside the enclosure). I added some PTFE tube which is just a friction fit.</strong></p> <p class="detail-image"><img src="https://cdn.thingiverse.com/assets/0c/e0/e5/62/cd/filament-pass-through-5E-J.jpg"/></p> <p class="detail-caption"><strong>Finished pass through show from the top (outside the enclosure). The cap can be screwed on when it is not in use.</strong></p> How I Designed This</h3> <p>This was designed with ViaCAD V9</p> Category: Other
With this file you will be able to print Filament Passthrough for an Ikea (TINGBY) based enclosure with your 3D printer. Click on the button and save the file on your computer to work, edit or customize your design. You can also find more 3D designs for printers on Filament Passthrough for an Ikea (TINGBY) based enclosure.
