Filament Holder with Bearings - Stock mount
prusaprinters
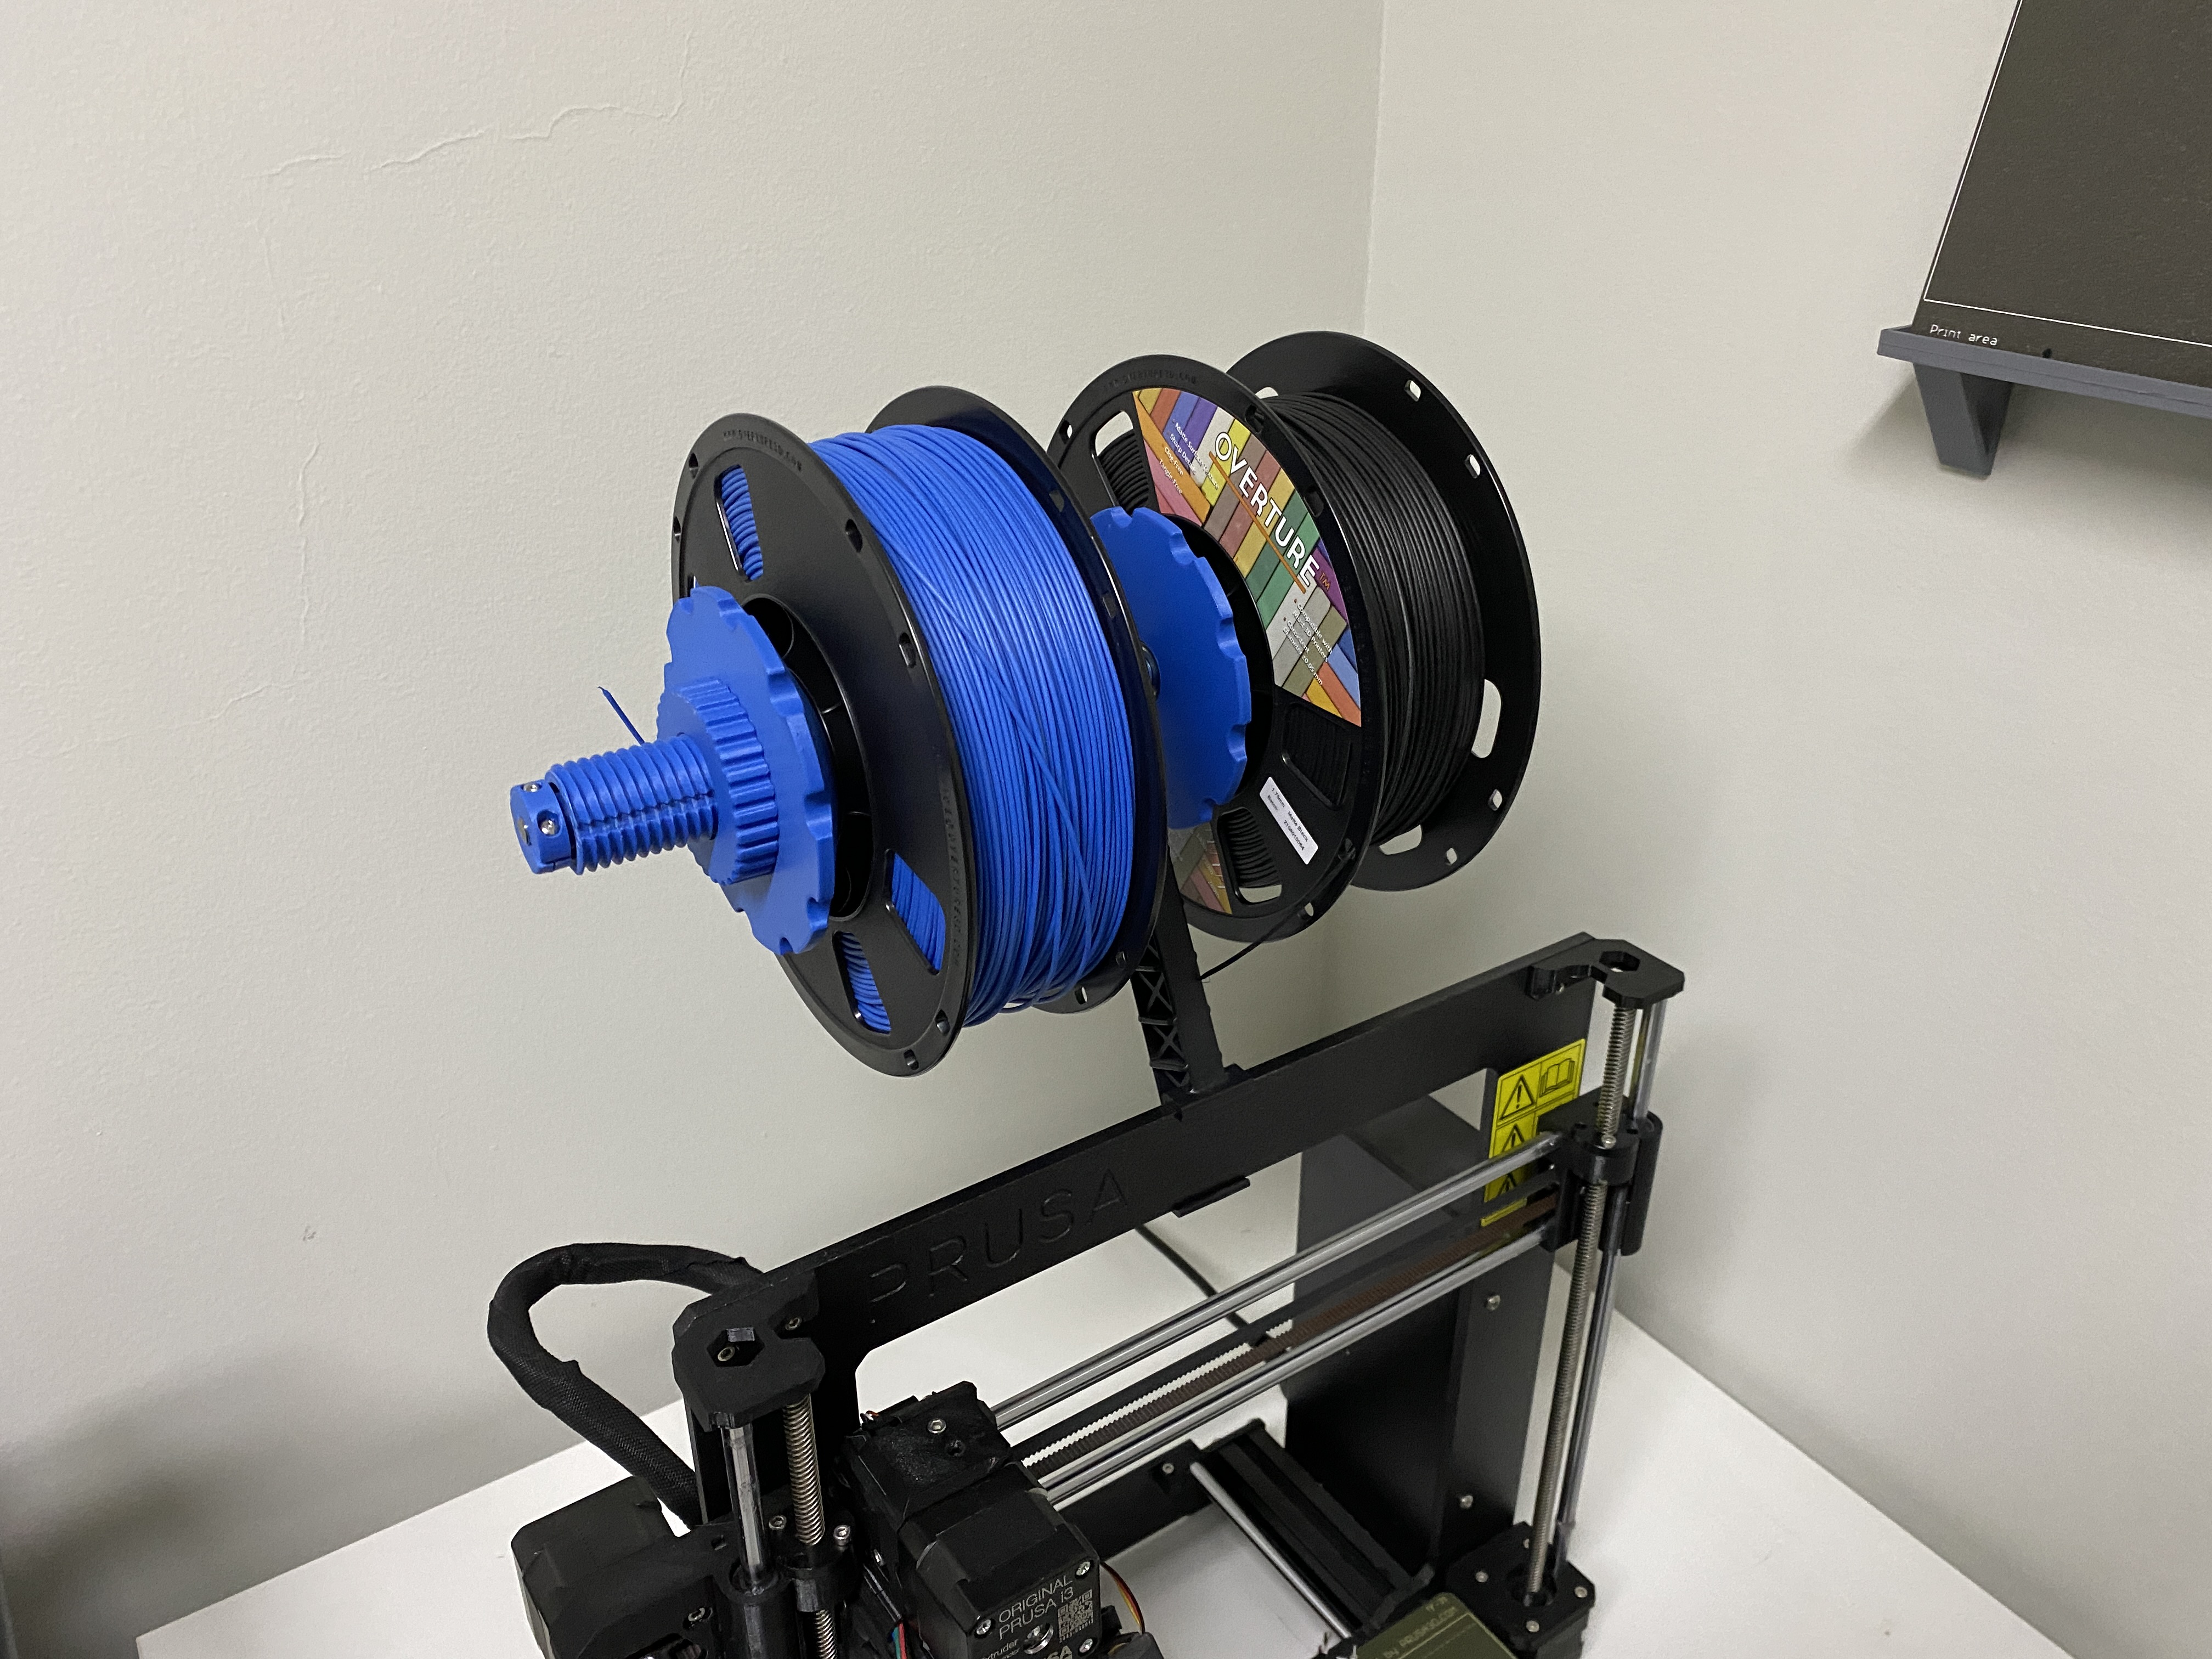
<p>Another spool holder design, do you need such a thing? Well, what is a 3D printer other than an excuse to 3D print more stuff for your 3D printer…</p><p>On this design, I'm using the stock Prusa arm that attaches to the Z axis upright of the Mk3s and it doesn't require drilling or modifying the arm parts like in other bearing based designs I've seen on prusaprinters.org </p><p>This design uses a standard X axis rod (8mm OD) as the center axle to hold the spool cones, I had a spare one lying around from when I had some bearings fail on my Mk3 but if you don't have an extra one, they can be had for cheap on <a href="https://www.amazon.com/gp/product/B085NVDN8T/ref=ppx_yo_dt_b_search_asin_title?ie=UTF8&th=1">Amazon</a></p><p>The bearings that I used for this project can be found here: <a href="https://www.amazon.com/gp/product/B07X5X9XZF/ref=ppx_yo_dt_b_asin_title_o05_s00?ie=UTF8&psc=1">Amazon</a> - each spool holder set will take four bearings so a pack of eight will be enough for both sides.</p><p>You'll also need 2x M3x16 (or M3x18) socket cap screws and 2x M3 nuts to attach the ‘RodTensioner’ to your X-Rod.</p><p>I've included the Fusion 360 file here for folks who want to modify the design for different X-rod or bearing sizes, see the user parameters for some quick edits.</p><p><strong>How to put this thing together:</strong></p><p>Print two of the ArmBushing, you'll want to test the fit on this one. There should be a tight friction fit between the ID of the ArmBushing and the X rod - and a tight friction fit between the OD of the ArmBushing and the Prusa arm.</p><p>Then tap the X rod into the ArmBushings (one on each side of the arm) with a mallet until the X rod is centered in the bushings.</p><figure class="image image_resized" style="width:75%;"><img src="https://media.prusaprinters.org/media/prints/125182/rich_content/34d9aa56-f4f2-4e42-ad68-7c38b4a24006/img_0617.jpg#%7B%22uuid%22%3A%22b003e171-0d0b-4451-989e-aac2fc3f4bfe%22%2C%22w%22%3A3024%2C%22h%22%3A1911%7D"></figure><p> </p><p>On the rest of the parts, the tolerances are not so critical for the InnerCone, OuterCone, and RodTensioner and BearingSet but the OuterConeNut and OuterConeSleeve should be printed on some smaller layer heights (e.g. .2MM) and on quality settings so the threads fit together smoothly.</p><p>The bearings are tapped into position from the outside with the BearingSet tool and mallet. The InnerCone and the OuterConeSleve will take two bearings each, there is an inner ridge that acts as a stop when the bearings are fully seated into position</p><figure class="image image_resized" style="width:75%;"><img src="https://media.prusaprinters.org/media/prints/125182/rich_content/8ea79b30-fc6f-4d78-a0a1-7dbd20993ed7/img_0611.jpg#%7B%22uuid%22%3A%22d3152dcb-d666-4fa5-aba4-12c03a7082ce%22%2C%22w%22%3A2879%2C%22h%22%3A3569%7D"></figure><p> </p><p>Slide the InnerCone onto the X Rod then slide the OuterConeSleeve onto the X rod and then mount the RodTensioner. Tighten the cap screws (you may need to pull the nuts into position beforehand a la Mk3 assembly instructions). </p><figure class="image image_resized" style="width:75%;"><img src="https://media.prusaprinters.org/media/prints/125182/rich_content/3d4abd49-ada9-4139-b79c-e1e1f9895334/img_0627.jpg#%7B%22uuid%22%3A%227fb539e9-38d0-49e4-b7c1-05a1bc6a0f13%22%2C%22w%22%3A4032%2C%22h%22%3A3024%7D"></figure><p> </p><p>I thought that some green thread-locker might be necessary to keep the inner bearing races from spinning about the X-rod but that doesn't seem to be happening on my setup and probably wouldn't matter at these speeds and loads anyway.</p><p>Now you're ready to slide a spool on, then the OuterCone, securing by threading on the OuterConeNut. When tightening down the OuterConeNut, its best to support the spool with your other hand to wiggle it into place being concentric with the cones.</p><figure class="image image_resized" style="width:75%;"><img src="https://media.prusaprinters.org/media/prints/125182/rich_content/7b987ecc-37cf-469b-9a3a-33ab7cd44b54/img_0629.jpg#%7B%22uuid%22%3A%22eb53cb8c-40f3-404f-b112-6f6f9332b95f%22%2C%22w%22%3A4032%2C%22h%22%3A3024%7D"></figure><p> </p><p>Then you're good to go. I've only tested this on standard 1KG spools but the design would probably work with larger spools if both sides were reasonably balanced.</p><p>.3MF files included here were dialed in for PLA printing on my Mk3s with .4MM nozzle.</p><p> </p>
With this file you will be able to print Filament Holder with Bearings - Stock mount with your 3D printer. Click on the button and save the file on your computer to work, edit or customize your design. You can also find more 3D designs for printers on Filament Holder with Bearings - Stock mount.