Filament guide for IKEA Lack enclosure
prusaprinters
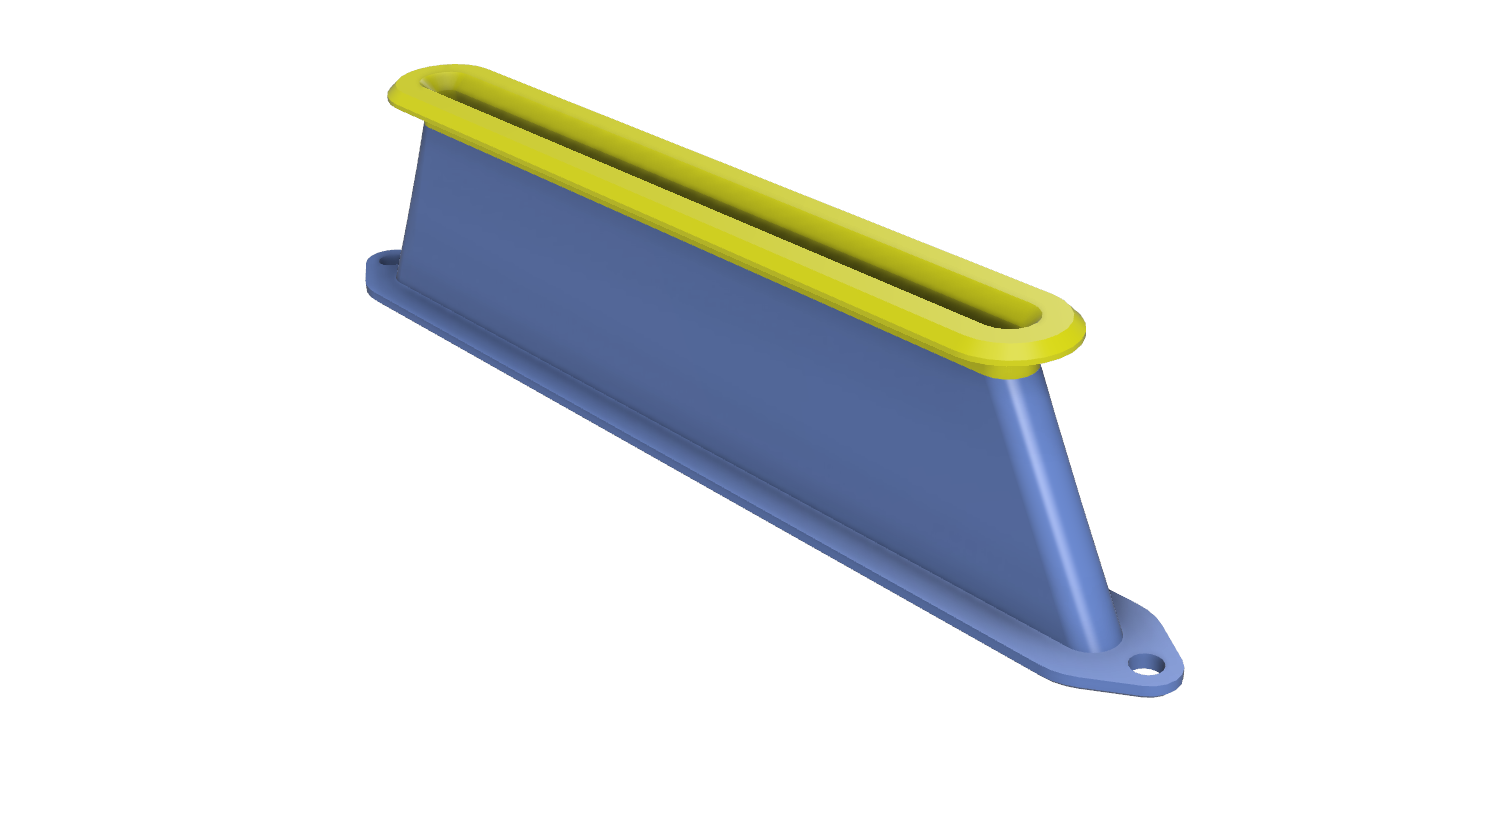
<p>A filament guide for IKEA Lack enclosure allowing the filament to smooth following the X-carriage while it moves along the X-axis.<br/> Internal dimensions (5 mm width) allows use of ø4 mm PTFE tube from e.g. dry box to extruder.</p> <h3>Print instructions</h3><p>Installation:<br/> First measure where the filament enters into the extruder. It depends on how the printer is placed in the enclosure and is likely somewhat closer to the front than the back.<br/> This will give the depth position of the filament guide, draw a thin line on top and bottom of the table. Make sure the lines is aligned.</p> <p>Then mark the position for the four ø11 mm holes to be drilled, 2 on each top and bottom side of the table.<br/> For the top part the distance (for hole centre) is 160 mm and for the bottom part it is 200 mm.<br/> Drill the holes, but not through the table.<br/> Then use a fine tooth saw to remove then part between the holes.<br/> The table’s paper infill cut by a knife.</p> <p>Verify the two part aligns when they are fitted into the table. The extrusion on the top part must fit into the slot on the bottom part.<br/> When the alignment is verified the bottom part is attached to the table by two wooden screws.</p>
With this file you will be able to print Filament guide for IKEA Lack enclosure with your 3D printer. Click on the button and save the file on your computer to work, edit or customize your design. You can also find more 3D designs for printers on Filament guide for IKEA Lack enclosure.