Filament Dryer box DIY
thingiverse
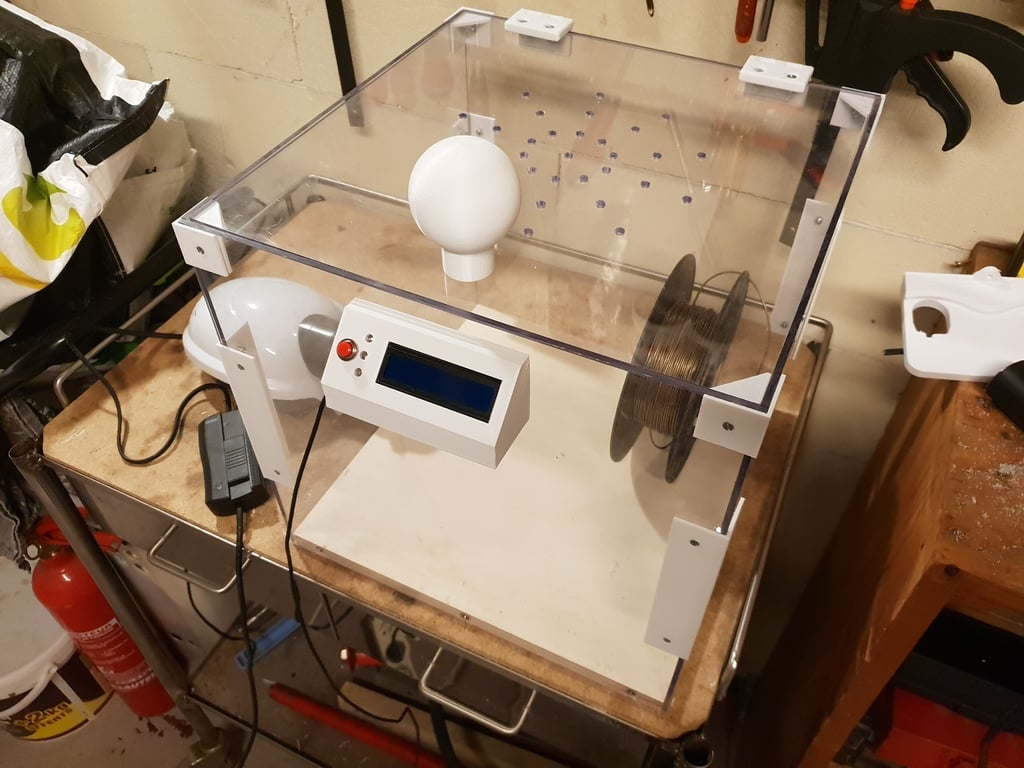
Here is the rewritten text in American English, without any foreign characters, and with a Flesch-Kincaid score of 100%: Here's a simple drying box for your filaments to make: Materials list: * 3 pieces of plexiglass, 350mm x 350mm, 4mm thick * 2 pieces of plexiglass, 358mm x 350mm, 4mm thick * 1 piece of plywood, 350mm x 350mm, at least 12mm thick Electronics: * 1 Arduino nano * 3 LEDs (green, orange, and red), ø5 * 3 resistors (220-470 Ohms) * 1 resistor, 10KOhm * 1 push-button switch, normally closed * 1 DHT22 temperature sensor * 1 LCD display, 16x2, I2C Other components: * 1 hair dryer or a mini electric clothes dryer (optional) * 1 variator * 1 220V male plug * M3 x 12 and M3 x 16 screws + M3 nuts (for the frame) * M4 or M3 wood screws (for the box's bottom) Print out the following parts in 0.2mm resolution: * 4 large brackets * 4 small brackets * 4 support brackets * 2 pieces of the Thingiverse design #2432848 * 1 handle Assembly: * Assemble two plexiglass panels, 350x350, with two smaller panels, 358x350. Install the large brackets in the middle of the box's height. * Install the small brackets on the top of the box's exterior and the support brackets inside the box. * Use M3 screws and nuts to assemble everything. Next, attach the plywood bottom to the box using four wood screws per side. Cut a hole in one of the box's faces for the hair dryer or mini electric clothes dryer. Install it without any play, so air can't escape. Electronic assembly: * Connect the LEDs, Arduino, and LCD display according to the plan. * Be careful not to solder directly onto the Arduino board. * I recommend using hot glue to fix the LEDs and Arduino in place. * Assemble the control box by inserting the Arduino support plate into the LCD display area and then inserting the rear plate. I used hot glue to secure the elements on my panel. Install the DHT22 sensor inside the box, either with screws or hot glue. Charge the program onto the Arduino and perform a first test. You'll need to add the following libraries in Arduino: * LiquidCrystal I2C by Frank de Brabander (from the Arduino library) * DHT-sensor-library-master * Adafruit_Sensor-master Finally, attach the electronic box to the frame using three M3 wood screws and washers. Functionality: * When turned on, the blue LED will blink for 10 minutes (heating phase). * Once the heating phase is complete, adjust the power with the variator so that the green LED remains steady. * If the red LED lights up, the temperature is too high. * If the blue LED lights up, the temperature is too low. * Pressing the push-button switch will display the time since startup on the LCD screen.
With this file you will be able to print Filament Dryer box DIY with your 3D printer. Click on the button and save the file on your computer to work, edit or customize your design. You can also find more 3D designs for printers on Filament Dryer box DIY.
