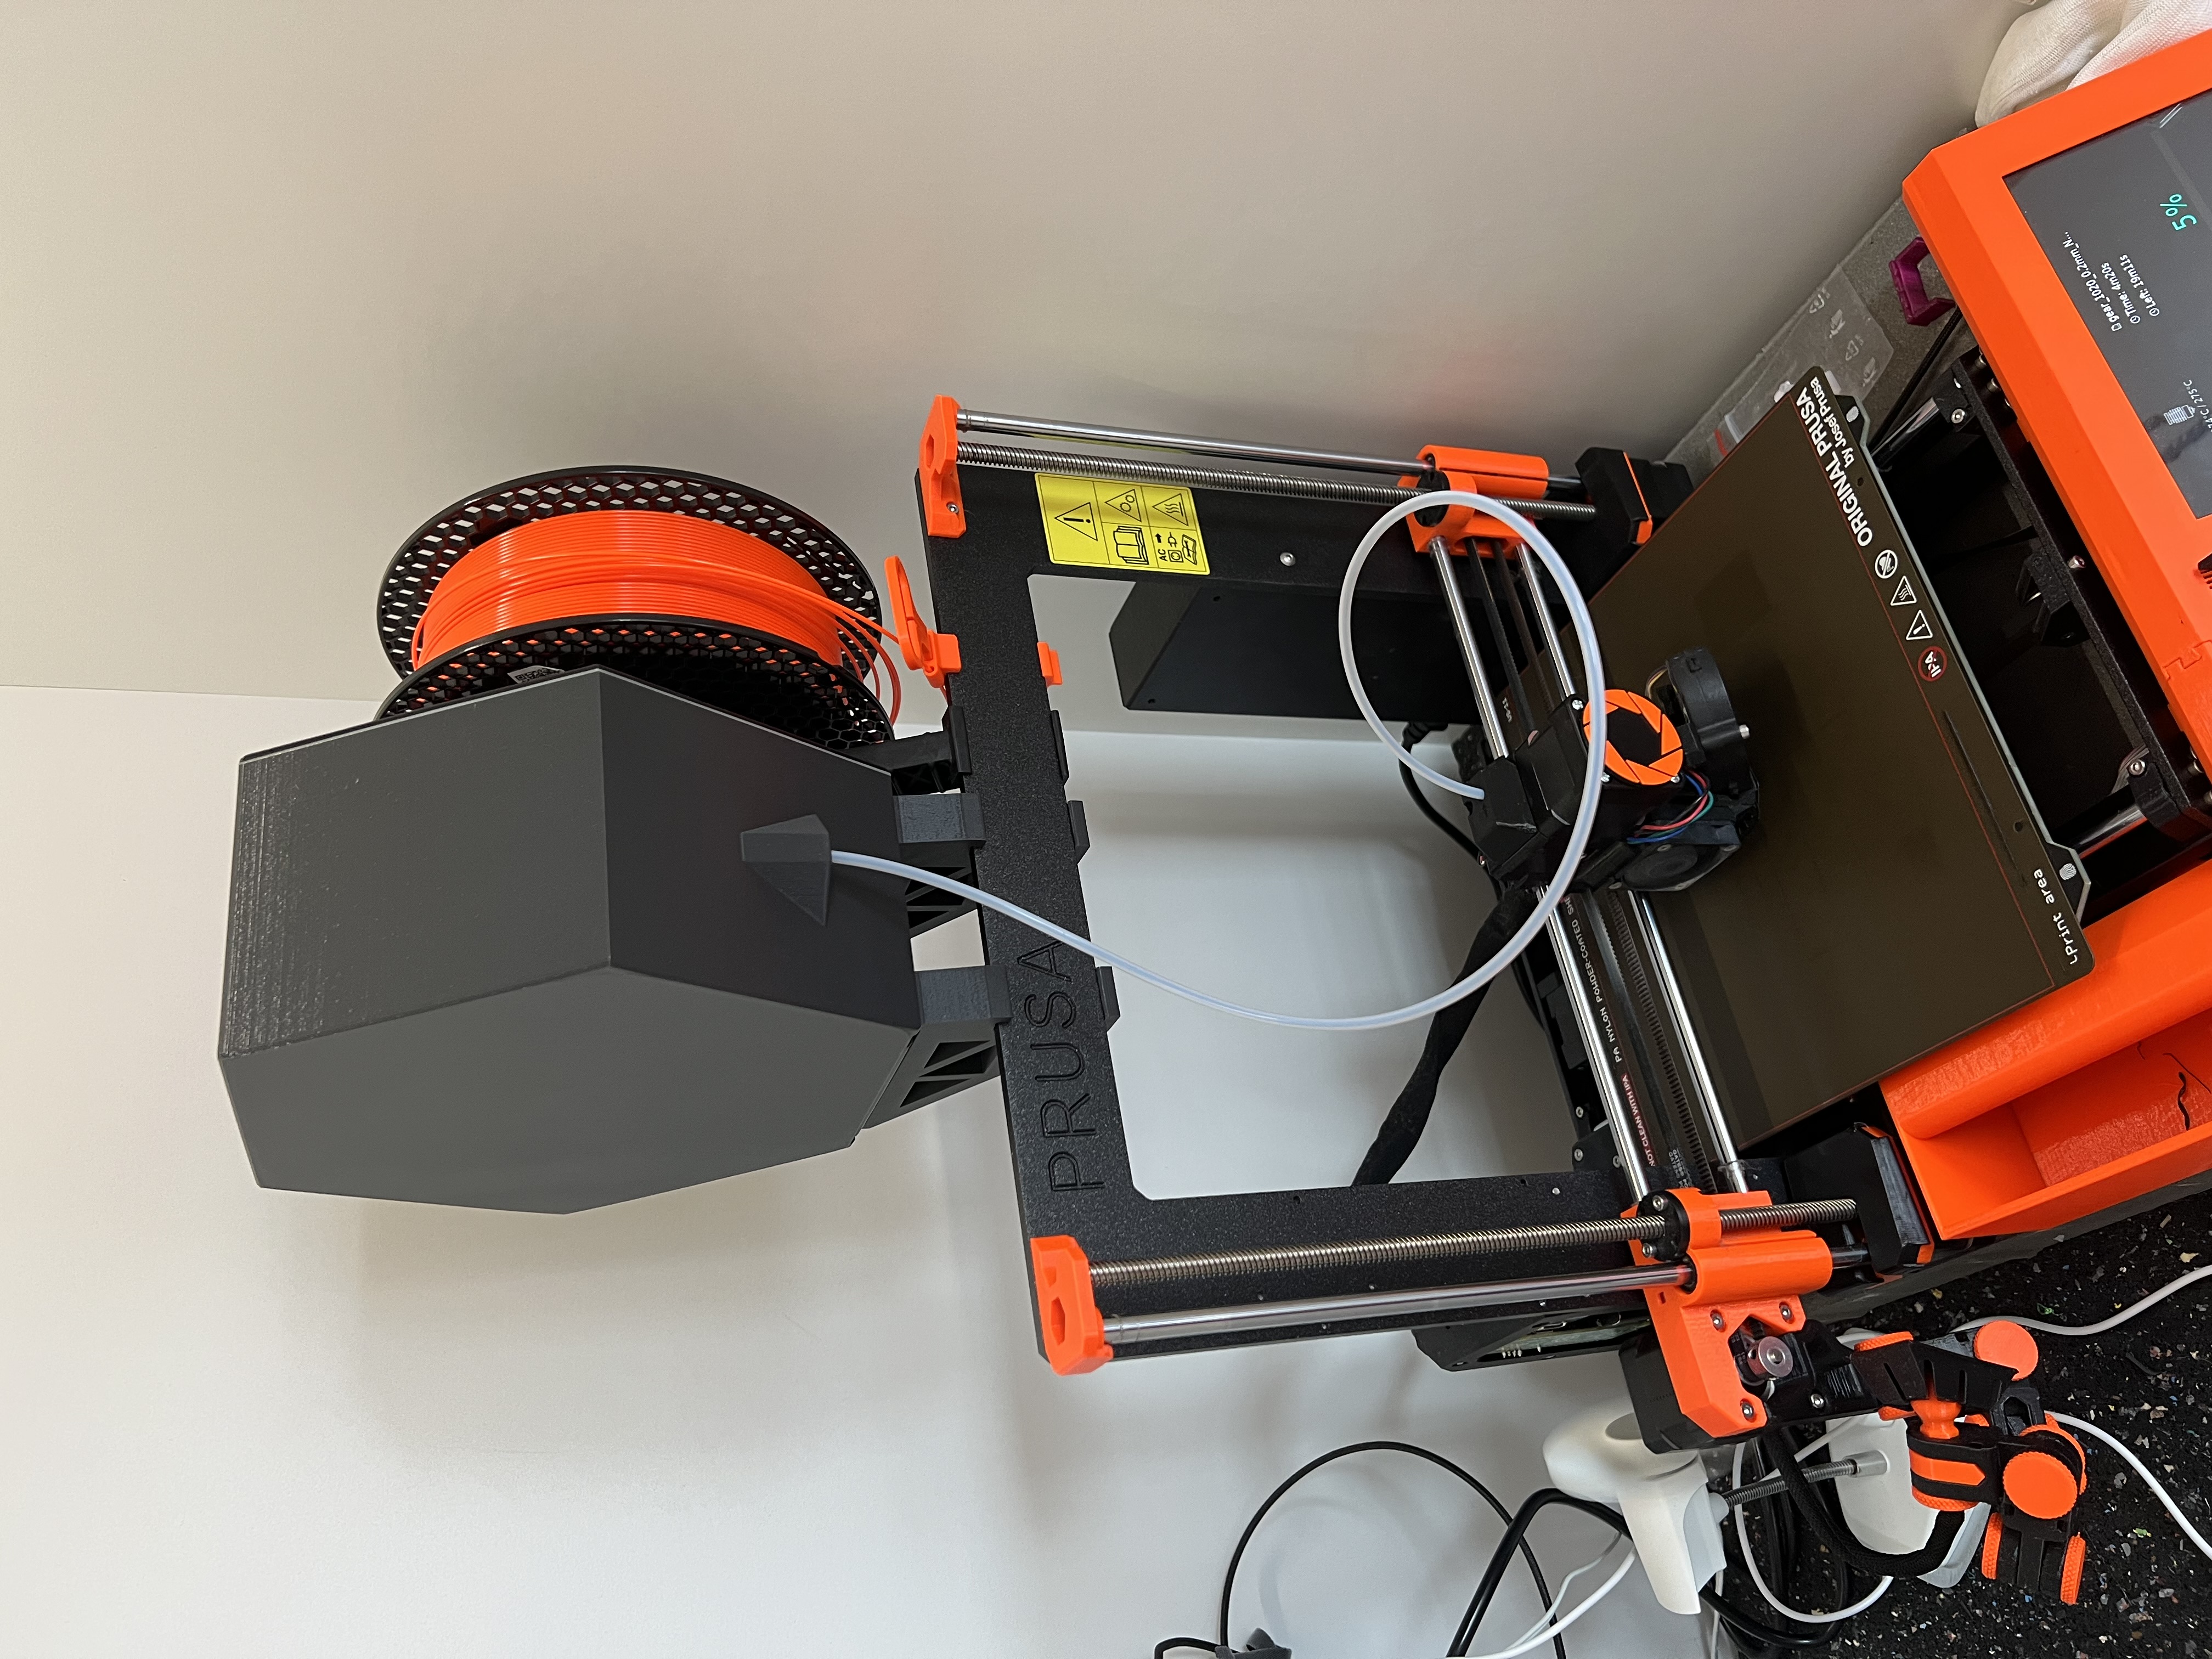
Filament drybox with MK3S frame mount
prusaprinters
<p>I didn't like any of the existing MK3S-mounted dryboxes so I designed my own - fully printed and less ugly.</p><p>You can optionally connect a 4mm PTFE tube for to protect the filament between drybox and extruder. For MK3S+, I recommend my <a href="https://www.printables.com/model/267956-mk3s-filament-sensor-cover-for-4mm-ptfe-tube">fs-cover remix</a>.</p><p>In the shaft, there's space for silica gel (loose or in packets), and <a href="https://www.aqara.com/us/temperature_humidity_sensor.html">Aqara temperature and humidity sensor</a>.</p><p>Fits on MK3S bed. Currently fits a 1kg Prusament spool inside, but you can raise the MaxSpoolWidth parameter in Fusion 360 to make it even bigger.</p><p>I expect to make minor improvements to the design as I use it. (For example, I'd like to make easier taking out the spool and also inserting filament through the opening.)</p><p>Leg model remixes for more mounting options welcome.</p><h3>Models</h3><ul><li>Box, Cover<ul><li>PETG, 0.3mm layers, 20% infill, no supports</li><li>print without skirt, otherwise it won't fit on the MK3S build plate</li><li>for access from the left side, mirror the Box model (other parts will fit either way)</li></ul></li><li>Leg: print twice<ul><li>PETG, 0.3mm layers, 20% infill, no supports</li></ul></li><li>Desiccant tray<ul><li>PETG, 0.2mm layers, no supports</li></ul></li><li>Gasket, Nose seal<ul><li>TPU, 0.2mm layers, 40% infill, no supports</li></ul></li><li>Nose plug<ul><li>optional (plugs the filament opening when not printing)</li><li>TPU, 0.2mm layers, 20% infill, no supports, </li><li>tricky to print - set fan to 100 % and Filament → Cooling → Cooling thresholds → Min print speed to 1 mm/s (or use the attached gcode)</li></ul></li></ul><p>Always orient the model the flat side down.</p><h3>Assembly</h3><ol><li>Press ‘Nose seal’ into it's space inside the box. This step is tricky and may involve some cursing. I recommend placing the shorter top edge first, then pressing the longer edge until it snaps. Also you can probably skip this step, especially if you're going to use a PTFE tube.<br><img class="image_resized" style="width:50%;" src="https://media.printables.com/media/prints/267965/rich_content/5aec55cd-25c5-4ef2-9cab-5a7085bc3d15/image.jpeg#%7B%22uuid%22%3A%22182902ae-dcc3-42c4-917d-d678d1496125%22%2C%22w%22%3A3024%2C%22h%22%3A4032%7D"></li><li>Attach the gasket to the box. Press its tongue into groove on the box edge.</li><li>Slide the legs into the box grooves</li><li>Snap the cover onto the box</li><li>Attach to MK3S frame</li></ol><h3>Usage</h3><ol><li>Pull the cover off</li><li>Optional: Insert wireless humidity sensor</li><li>Either fill the desiccant tray with silica gel, or take a silica gel packet, then insert it into the shaft</li><li>Insert filament end through the opening</li><li>Insert spool inside the box</li><li>Put the cover back</li></ol><p>To connect a PTFE tube, press it firmly into the filament opening.</p><p>To plug the filament opening when not printing, first insert the filament end into the ‘Nose plug’, then push it into the filament opening. This way you won't need to open the box to fish the filament out the next time you print.</p><p> </p><p> </p>
With this file you will be able to print Filament drybox with MK3S frame mount with your 3D printer. Click on the button and save the file on your computer to work, edit or customize your design. You can also find more 3D designs for printers on Filament drybox with MK3S frame mount.
