Filament Dry Box
prusaprinters
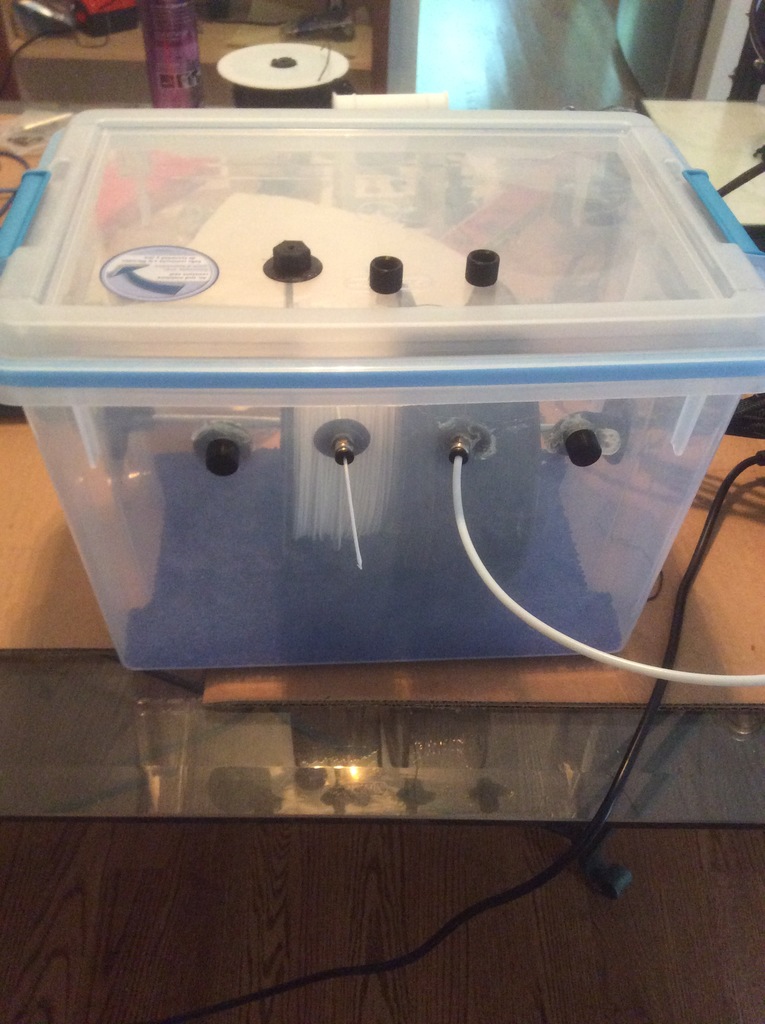
<p>Like everyone else who has designed a dry box, this one was based on materials I had available to me at the time. It uses a Sterilite 20 quart plastic airtight box, and some PTFE tune push fittings with M10 threads.</p> <p>Let me first say that Thingiverse SUCKS in that the first time I wrote these directions, the editing UI reported that my token had expired and, proceeded to lose all my entered data. So much for responsive website design. This is why these directions may appear more terse than I would otherwise provide. Also, for some ridiculous reason it won't let you reorder the sections on the page, so be sure to consult the Materials List lower down on the page, first.</p> <h3>Print Settings</h3> <p><strong>Printer Brand:</strong></p> <p>Prusa</p> <p><strong>Printer:</strong></p> <p>Prusa Clone</p> <p><strong>Resolution:</strong></p> <p>0.2</p> <p><strong>Infill:</strong></p> <p>8% - 20%</p> <h3>Materials</h3> <p><strong>Required:</strong></p> <ul> <li>1x Sterilite 20 quart plastic box (Target $6.99) <a href="http://bit.ly/sterilite-20qt">http://bit.ly/sterilite-20qt</a></li> <li>1x 1' 5/16" threaded rod (Home Depot $1.17) <a href="https://j.mp/HomeDepot-ThreadedRod">https://j.mp/HomeDepot-ThreadedRod</a></li> <li>PTFE Tube Push Fittings (Amazon $6.99) http://amzn.to/2GavGNk</li> <li>Glue Dots Double Sided Adhesive sheets (Amazon $2.99 - $8.99) http://amzn.to/2Dvs3A4</li> </ul> <p><a href="https://www.amazon.com?linkCode=ll2&tag=thingiverse09-20&linkId=e4759bff1fa9a55a0f897d801ce2d765&language=en_US&ref_=as_li_ss_tl">Amazon</a> are affiliate links. Others are not, but more importantly, don't spend more than $18.14 on this project. Consider the optional items only if you have them already available, or need them for other purposes.</p> <p><strong>Optional:</strong></p> <ul> <li>Some reasonable length of 4mm PTFE tubing (Amazon $7.75) http://amzn.to/2DGThXK</li> <li>Silica Gel or other Desiccant (Amazon $12.99) http://amzn.to/2Gc6rdF</li> </ul> <h3>Post-Printing</h3> <p><strong>Assembly:</strong></p> <p>First, mark the target positions for your threaded rod brackets. The tolerances are such that you can push-fit the rod and brackets into place, and they'll remain positioned (not under load) long enough for you to mark the desired positions, using a (dry erase) marker on the inside end walls of the Sterilite box. Using a straight edge, mark 4 (or however many passthroughs you're going to utilize) equidistant points along a line formed at the base of the vertical protrusions along a long side of the plastic box. Drill a 9mm hole at each point, and screw in the PTFE push fittings, completely, then unscrew them until the threads protrude slightly from the interior wall of the box.</p> <p>Cut pieces of the double sided adhesive sheets to fit each of the two brackets, and four passthroughs, taking care to cut out the centers of the pieces meant for the passthroughs so the adhesive doesn't obstruct the filament path or threads of the PTFE push fittings - these pieces will have a doughnut shape to them. Remove the protective paper from each piece of adhesive, applying it to the part for which it was sized. Remove the paper from the other side, and firmly press the part against the interior wall of the plastic box in the marked locations, making sure that for the brackets, the U shaped rod holder is facing up, and for the passthroughs, that each is entered on the hole, where the threads of the PTFE push-fitting are slightly protruding.</p> <p>Using two adjustable wrenches, with one, hold the nut-shaped printed passthrough in place (avoiding torque on the just-applied adhesive) and screw in the PTFE push fitting from the outside of the box, until it threads into the passthrough, further securing it tightly against the interior of the plastic box. Repeat for remaining passthrough/push fitting pairs.</p> <p><strong>Installation:</strong></p> <p>Insert one of the printed spindle spacers into each side of the filament spook centers, for each spool to be placed in the dry box. Insert the threaded rod through the centers of the spindle spacers, making sure the filament path is over-slung rather than under-slung, when you then insert the rod, now with spooks of filament on it, back into the brackets in the dry box.</p> <p>You now have several options. You may elect to insert pieces of PTFE tubing into the push fittings, then slide the ends of the spooked filament from the interior of the dry box, through the adjacent passthrough, such that it extends just beyond the PTFE tubing, run the filament through the passthrough without PTFE tubing, or simply cap the push fittings with the printed caps, to seal the dry box, until those passthroughs are needed.</p> <p>Place whatever desiccant you've selected, at the bottom of the box, whether that's silica gel packs collected from filament spools as shipped from manufacturing, or silica gel beads, or some other solution, then secure the lid to the box and you're good to go.</p> <h3>Next Steps</h3> <p><strong>Desiccant Containment</strong></p> <p>There are a variety of containers meant to hold desiccant beads/crystals rather than simply pouring them into the bottom of the dry box. My issue with these is that if they aren't form-fitting and installed securely to the box, they'll likely interfere with the filament spools. For the moment, I just poured a quarter pound of desiccant beads into the bottom of the box, below the lowest point of the largest filament spool, but may later design a more elegant solution.</p> <p><strong>Bowden Style Filament Feed</strong></p> <p>It may be worthwhile to manage filament paths directly from the dry box to the extruder of the target printer. To accomplish this, place a filament clip sized to accommodate a 4mm PTFE tube, near your extruder, to achieve the target filament path. Optionally, a clip that can house one of your extra PTFE push fittings would offer a handy quick release solution, as you move from filament to filament or printer to printer (beyond the 4 printers this dry box design can accommodate already).</p> <h3>Version History and Updates</h3> <p><strong>Version 1.01</strong></p> <p>It became clear that the tolerances of the spindle spacers was too ambitious. New versions have been uploaded with 9mm diameter centers, and with center fillets. If the version you dowloaded does not have the fillets, please download the new version that will fit the 5/16" rod with less friction, and also prints faster, using less material.</p> Category: 3D Printer Accessories
With this file you will be able to print Filament Dry Box with your 3D printer. Click on the button and save the file on your computer to work, edit or customize your design. You can also find more 3D designs for printers on Filament Dry Box.