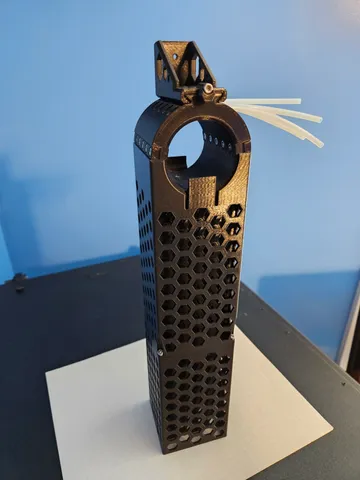
Filament Buffer
prusaprinters
04 SEP 2023 - Since an updated buffer came out For the MMU3, I made one to work with the Cassettes it uses. https://www.printables.com/model/572528-mmu3-cassette-compatible-buffer01 APR 2023 - An update will be coming…This is a filament buffer that I've rolling around in my head for awhile. I did most of the design over the new years break, followed by some test and then procrastination and now that I finally printed it I figured I should get the first attempt out for some feedback.Hardware requirements:Qty. 15 - M3x8 SHCSQty. 10 - M3 Hex NutsTubing from the MMU2s Kit (or whatever you happen to have)The main part needing some more functional testing is the Buffer Head as the rest of the models are pretty straight forward.Notes:.3mf Files: These were exported from CAD with a high triangle count..gcode Files: I'm new enough to 3D printing that these settings may not (likely not) be the most optimal.Buffer Small Parts: I split these out cause it seemed to make sense. Note that 4 of the tube end clamps are slightly longer then the rest, these are the 4 end pieces (yes, I will fix that the next iteration). There is also a small part that goes to the Mounting Bracket that is used to keep the head from sliding out.Buffer Mounting Bracket: Just a quick bracket made to hang it by but then then I used it used it upside-down. I'll be making some more options… or you can.Buffer Upper and Lower Skirts: I already have a list of things to do to these, like strengthen the tabs that hold the Upper Skirt to the Buffer Head or even changing the way the two connect. Making the hexagons go up further on the Upper Skirt and maybe rotate them so the point is at the top for cleaner printing. I feel like I've made the walls a bit too thick and that unnecessarily drove up the print times.Buffer Head: Basically, the tubes will be inserted from either side at the top and then wrap around to the clamp and then be secured. Originally I had planned to have one tube that would follow the helical path all the way around and make it so the filament would always be riding on the inside tubbing when the filament is being pulled and trimming the bottom half of the exposed tube in order to still allow the filament to buffer when unloaded (it makes sense in my head, I promise). This could still be done but I don't think it is necessary at this time. There is however some sliding friction caused by the tube stop on the clamps that I will address in the next run but it doesn't seem to be too bad. I have modeled this in such a way that it is easy to change the entrance and exit angles of the tubbing and the diameter of the whole head but I wanted to get some feedback before I made a bunch of configurations that may not be needed.I hope you enjoy, thanks,Paul P.S. As your eyes age don't use black for prototyping, it makes it hard to see the details 😉. I also included a photo of a bunch of my test parts.
With this file you will be able to print Filament Buffer with your 3D printer. Click on the button and save the file on your computer to work, edit or customize your design. You can also find more 3D designs for printers on Filament Buffer.
