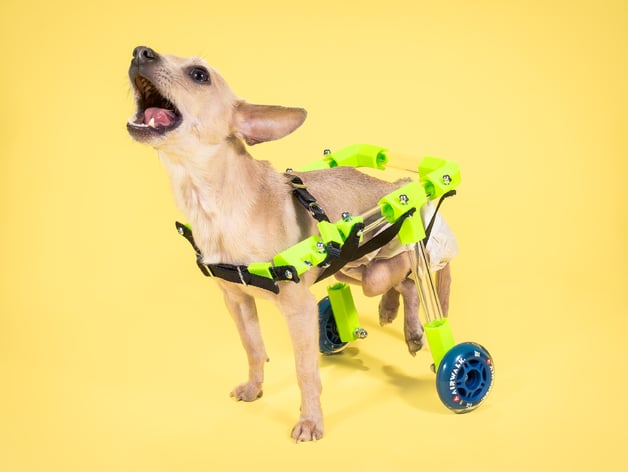
FiGO | Rear Support Pet Wheelchair
thingiverse
The instructions for building a wheelchair for dogs are quite detailed and lengthy, but here's a summarized version: **Step 1-5** * Print the necessary pieces (A-E) using a 3D printer * Assemble the frame by connecting the A pieces to each other and then to the length tubes (C) * Add the B pieces to the length tubes, making sure the tabs are facing outwards * Repeat the process with the C pieces * Cap the D pieces on the ends of the length tubes **Step 6-10** * Place the height tubes in the B pieces and set the frame aside * Connect the E pieces together (or not, depending on the dog's size) * Attach the wheels to the E pieces and secure them with screws and acorn nuts * Add the straps to the chair, making sure they are securely attached to the tabs on each joint piece **Notes** * Consult with a vet if you have any questions or concerns about the fabrication or fit of the wheelchair * Dogs may take time to get used to their wheelchair, so be patient and let them approach it at their own pace * Update log: March 2016 - FiGO 2.0 Release
With this file you will be able to print FiGO | Rear Support Pet Wheelchair with your 3D printer. Click on the button and save the file on your computer to work, edit or customize your design. You can also find more 3D designs for printers on FiGO | Rear Support Pet Wheelchair.