Field Repair Backpack Buckle (locking adjuster) 20mm
prusaprinters
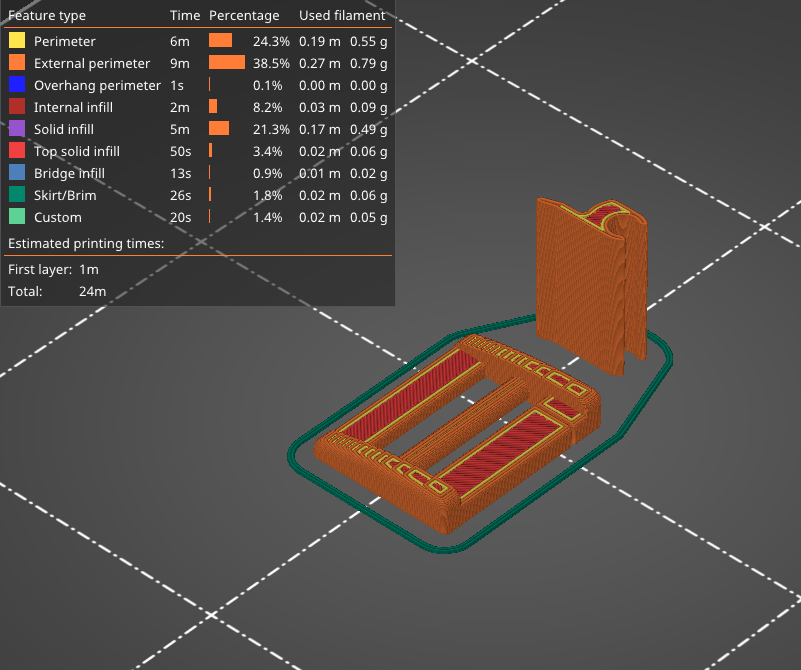
<p>Print in orientation shown for maximum strength (layer orientation optimisation), then snap together with the latch orientated upwards. Remove the old buckle (use pliers to break it if you need to), and insert the longer bit of the split holder through the loop. Wiggle it around to make sure it is fully inside the loop, without pinching the belt, then secure it with an M2x20 screw (ideally, you can use shorter ones as long as it engages across the split). Pull the other belt through from below and secure it by pushing the latch down.</p><p>If you print the buckle in something strong (ABS, ASA, polycarbonate, nylon etc…) it is strong enough (I used polycarbonate, didn't do long-term tests yet). It holds the belt very firmly, in fact stronger than the original buckles - after installing I had to break off the (still intact) original one and replace with this one because the original slipped and mine didn't, causing imbalance.</p>
With this file you will be able to print Field Repair Backpack Buckle (locking adjuster) 20mm with your 3D printer. Click on the button and save the file on your computer to work, edit or customize your design. You can also find more 3D designs for printers on Field Repair Backpack Buckle (locking adjuster) 20mm.