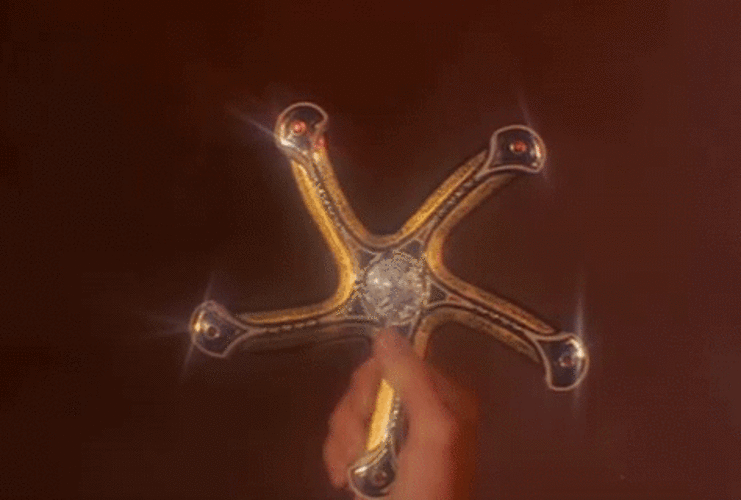
Fidget Glaive Spinner
pinshape
I have many fond memories of movie nights with family growing up. Krull seals a spot as one of my favorites of all time. With all the craze over fidget toys cropping up, I was inspired to create a spinner of my own based on the infamous glaive. Like in the movie, I wanted to add a bit of magic; fortunately, you don't have to insert your hand into molten lava for this one! Stuff You Need: (5) 3/16" x 1" Woodruff keys (polish them if you want shiny blades) (5) .11" x .3" Neodymium disc magnets (1) 608 Skate bearing Super glue You will need to pause your print at various heights during your print to assemble. Insert magnets at 5.8mm. Dab some glue in each hole to prevent the magnets from popping out during print (let the glue set). Also, I pull from the stack without flipping them so the poles are all facing the same direction. Note: you may want to shut off your heat bed as it will interact with the magnets and cause them to vibrate or flip profusely. Insert Woodruff keys at 7mm. Prior to inserting the keys, I recommend cleaning out any debris or imperfections from printing in the channels for them to slide with ease. The idea is to get the blades (keys) to retract on their own. If you have Simplify3D, use multiple processes to assist and only print what process you need for the next assembly layer. I used 5 processes total, see if you can figure out what I did! See it in action!
With this file you will be able to print Fidget Glaive Spinner with your 3D printer. Click on the button and save the file on your computer to work, edit or customize your design. You can also find more 3D designs for printers on Fidget Glaive Spinner.
