Fennec For V6 hotend
prusaprinters
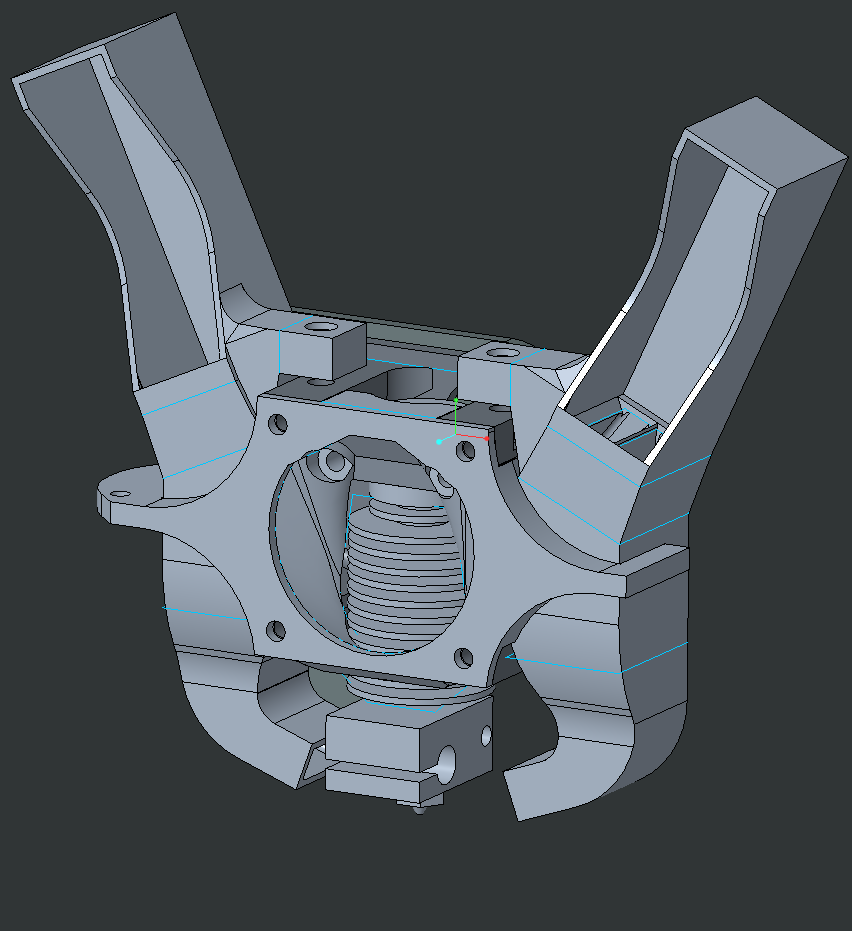
<p>Parts List:<br>5015 Fan * 2<br>4040 10 fan<br>M4 nuts * 2<br>M4 bolts * 2 max length 20mm min 10mm<br>M3 bolts (from stock machine) * 6: Two for mounting onto x carriage, 4 for mounting the fan Max is 12 mm in length</p><p>M3 Heated Inserts *2<br>Optional<br>BL touch, plus mounting hardware<br> </p><p>Printing tips:</p><p>Supports: required</p><p>For the fan ducts, use the flat face on the top of the duct so that the duct stands vertically, other orientations can work, but it is more consistent this way</p><p> </p><p>Build guide</p><p>Place the two Heated inserts located on the edge of the mounting collar for the v6</p><p>Remove everything from the x carriage, and mount the back plate</p><p>Install the hotend, and place the two m4 nuts into the little slots on the upper arms</p><p>start to screw in the M4 nuts into the holes on the top arm. </p><p>Take the two fan ducts and place the slots around the head of the m4 bolts</p><p>For Bl touch: </p><p>Take the cover plate and mount the Bl touch to the two holes make sure the connector for the bl touch is facing away from the hole in the center of the cover plate</p><p>X offset: 45.55</p><p>y offset: 2</p><p>Your z offset is going to vary greatly, depending on hotend choice and your nozzle choice, a recommended starting place is going to -4.5</p><p>take the cover plate and line it up with the back plate, Screw in the two bolts that line up with the 2 heated inserts</p><p>Mount the 40mm fan into the 4 holes on the front of the cover plate and screw until tight</p><p>You Can now adjust the fan duct height using the m4 bolts</p><p>Have fun Printing </p>
With this file you will be able to print Fennec For V6 hotend with your 3D printer. Click on the button and save the file on your computer to work, edit or customize your design. You can also find more 3D designs for printers on Fennec For V6 hotend.