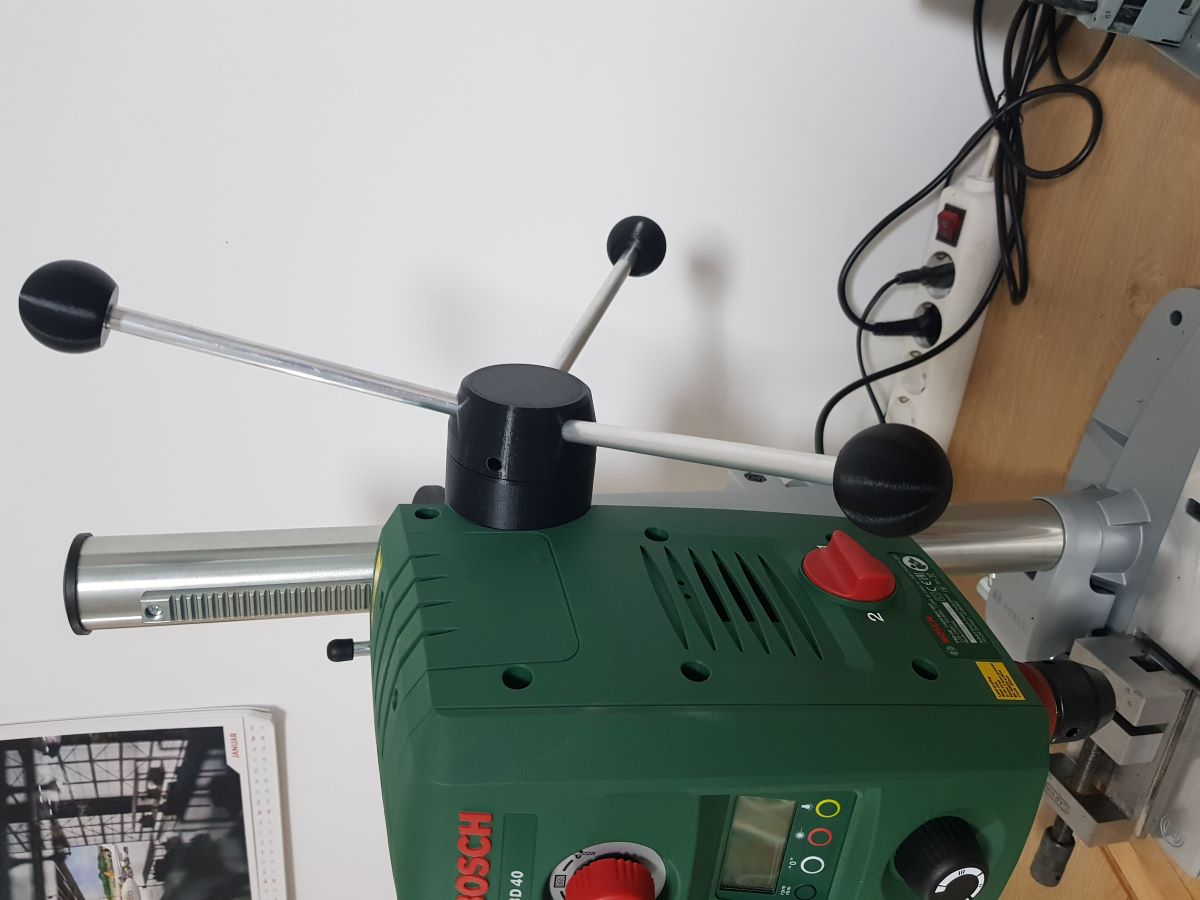
Feed Lever for Bosch PBD 40 (Hebelkreuz)
prusaprinters
<p>This is a sturdy hand feed lever for my new Bosch PBD 40.</p><p><strong>Design</strong></p><p>All my design done in Autodesk Fusion 360: <a href="https://a360.co/3L7jFKj">https://a360.co/3L7jFKj</a></p><p>The 3mf files include all settings. I opted for 6 perimeters and 30% infill for stability. The ball has an M6 threat built in.</p><p>In the hub and the ball I introduced a new method that I learned on YouTube to avoid support. A 0,2mm thick bridge layer that will be opened / removed later. You can see that on the cutaway pictures. This is strong enough to support the smaller diameter on top. Just amazing and vey easy to remove.</p><p>As I did not want to cut an M6 thread in the center hub I used the method of sliding in nuts that I learned when I assembled my PRUSA MK3s printers. Such a cool idea and so easy to do.</p><p><strong>Bill of Material</strong></p><ul><li>1 x Center hub (3D Printed)</li><li>1 x Spacer (3D Printed, replaces the conical Spacer that comes with the machine)</li><li>3 x Ball (3D Printed)</li><li>4 x M6 Nut</li><li>1 x M6 x 6mm to 10mm grub screw or set screw</li><li>3 x 180mm M6 threaded rod</li><li>3 x 160mm x 10mm x 1mm Aluminum tube</li></ul><p><strong>Printing</strong></p><p>Material: Prusament PLA Jet Black. </p><p>Settings: The 3mf files include all settings. I opted for 6 perimeters and 30% infill for stability.</p><p><strong>Assembly</strong></p><p>Unscrew the grub screw of the original hand wheel and remove it.<br>Remove the conical plastic spacer.</p><p>The spacer can be added without extra work. Just push it on the axle.</p><p>Remove the bridge layer in the hub and test fit it on the machine. In my case there was no play at all and it fitted really nicely. If it does not move up to the spacer, deburr the inside.</p><p>Insert the 4 M6 nuts in the central hub. In my case the fitting was just perfect. Needed a little force to push them in. They did not fall out. </p><p>Insert the M6 grub screw that fixates the hub on the axle.</p><p>Insert the three remaining M6 nuts into the slots. Push with a 3mm allen key (or screwdriver) to make sure the thread of the nut is visible from the outside.</p><p>Test fit the aluminum tubes in the holes in the hub and in the balls. In my case it was a strong tight fit. I reamed it a bit with a 10mm drill. Not much, though. A tight fit is good.</p><p>Attach the three balls to one end of each threaded rod. Than attach the aluminum tube until they cannot move further.</p><p>Screw each of the three levers in the center hub. Make sure that the threaded rod is not in the way of the axle. If this is the case: shorten them.</p><p>Finally attach the hand feed lever to the machine and tighten the grub screw.</p><p>Done!</p>
With this file you will be able to print Feed Lever for Bosch PBD 40 (Hebelkreuz) with your 3D printer. Click on the button and save the file on your computer to work, edit or customize your design. You can also find more 3D designs for printers on Feed Lever for Bosch PBD 40 (Hebelkreuz).
