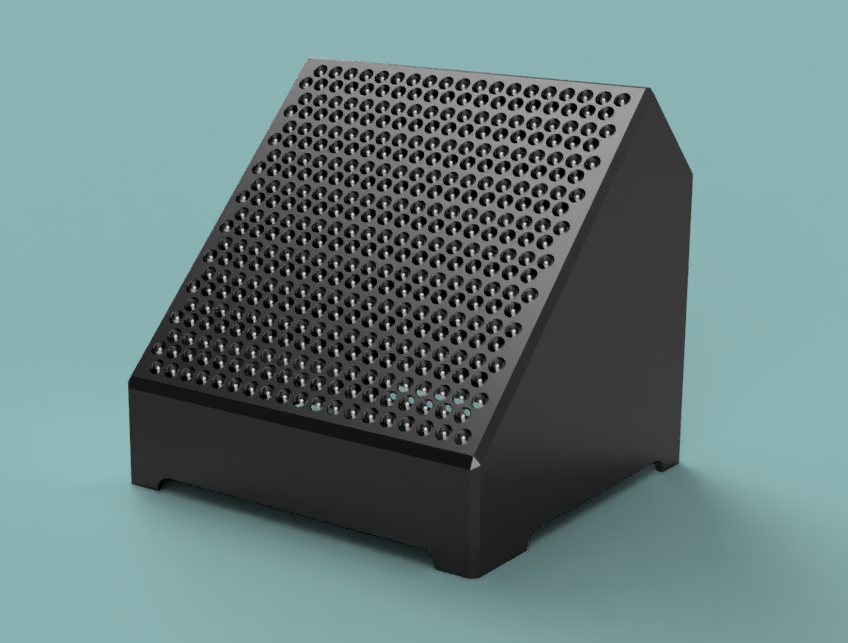
FanProject - another soldering fume extractor with a MacPro-grill
prusaprinters
<p>TL;DR first:<br/> This is very taxing on your printer!<br/> The mesh consists of a lot of intersecting shapes, and so this means a lot of movement and retractions.<br/> Be advised that you should make sure that your printer is maintenanced properly. Also im not responsible for any damage your printer takes while printing this files.</p> <p>That said, i fixed anything on this model, and it is very much printable as is, you just may have to add holes for your hardware manually, or take the f3d-file and redesign it to your liking.</p> <p>Happy printing!</p> <p>A few days ago i stumbled upon the "The Fumagator" by KH.<br/> He designed a solderfumeextractor around the famous MacPro-grill.<br/> <a href="https://www.prusaprinters.org/de/prints/21788-the-fumagator">https://www.prusaprinters.org/de/prints/21788-the-fumagator</a></p> <p>That sparked my interest, but i had a few ideas i would like changed, and he even had the f3d-files added, but then... i rather thought i start from scratch.<br/> Also, i wanted to know how to do the grill myself in Fusion 360.<br/> For the grill i watched this Fusion360-Tutorial from andy pugh:<br/> <figure class="media"> <oembed url="https://www.youtube.com/watch?v=OfaQbrQO2AQ"></oembed> </figure> </p> <p>That took probably 6h from start to finish, and i named this "FanProject" (as its a project with a fan).</p> <p>So, whats different then?</p> <ul> <li>first, as im soldering a lot, i like my fumeextractor a tad higher, so this one is angled upward 60 degree</li> <li>as i dont want the fumes to get blown back to me, even when filtered, i pulled a hidden wall down behind the front opening of the design, to hinder the fumes coming directly back at me. Thats of interest because not everything will be filtered out.<br/> For the same reason the opening in the back is a tad bigger.</li> <li>i liked the sleek front, and didnt wanted any buttons or the DC-connector on the front. At the moment i have no holes (!) added for mounting anything, but i will provide the fusion-files to edit that for your own plugs and switches</li> <li>i think that even with fan and plug/switch added it wont be heavy enough to not slide on the table, so i added 4 rised places on the edges for small rubberfeet (10mm diameter).<br/> (weight of the base alone is 145g, printtime around 15h more or less)</li> </ul> <p>More Details:</p> <ul> <li>Everything is, just as the original, printable without supports.</li> <li>for the fan are 4 parts that you screw onto the fan, insert the fan, and then turn into recess holes in the base, to easily secure the fan</li> <li>the filter to be used is a basic active charcoal filter for solderfumes, which youll find everywhere under "ZD-153" or "153-A", and needs to be cut down on one side to 120mm (the filter is 130x130)</li> <li>the filter is hold in with 2 "bridges", which have recess holes on both sides of the main body</li> </ul> <p>--- the provided gcode-file is for one of my very specialized Cantilever-printers, and will probably not function on your printer ---</p> <p>EDIT: This is also a torture test for your printer.</p> <p>You have to print at a pretty low layerheight to get all the details, and that together with the interesting layout of the mesh means tons of very fine movements and retractions.<br/> I printed this on a cantilevered 3D printer, which hadnt seen maintenance in about 1000h of printing, and this test was so stressful for that poor 3D printer, that he began to show all kinds of weird stuff on the print right as it was done with the mesh.</p> <p>The first 3mm of mesh where printed @0.04mm layerheight, and took so 10h alone (!).<br/> The rest of the print continued in a larger layerheight, and so in the end it was roughly 20h of printing.</p> <p>Furthermore, you need a beefy fan to pull air through the mesh, as the mesh is kinda restricting.<br/> Theoretically you could use less and larger cutouts for the mesh, so you get better airflow, but for them to work youll need also a thicker grill.</p> <p>In the end i decided to not reprint this, and just add a hole on the back and glue a proper connector in there.</p>
With this file you will be able to print FanProject - another soldering fume extractor with a MacPro-grill with your 3D printer. Click on the button and save the file on your computer to work, edit or customize your design. You can also find more 3D designs for printers on FanProject - another soldering fume extractor with a MacPro-grill.
