Fan extender for RAMPS 1.4
thingiverse
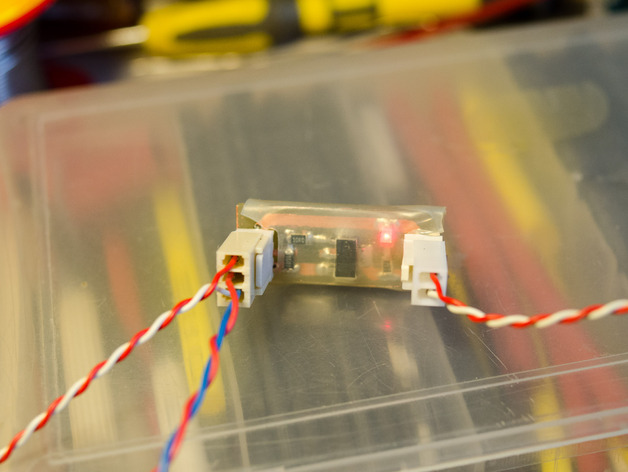
A Quick Upgrade to Add a Second Fan to Your RAMPS 1.4 Controller For example: the first fan is connected to D9 and cools down your prints the second fan is wired to a fan extender and cools down the printing head The schematic for this modification matches what you'll find on the RAMPS board (for D8 to D10). A small LED indicates when the fan is running. Upgrades THE CIRCUIT The files needed can be read using Eagle 7, which is free and available online. Print your custom PCB on single-sided material and gather these essential components: R1: a 10 ohm resistor in SMD 1206 size R2: a 100 kohm resistor in SMD 1206 size R3: an 1800 ohm resistor in SMD 1206 size LED1: a small red LED in SMD style T1: a BSP126 (or another suitable N-MOSFET) JP1, JP2: standard 2.54mm connectors Adding a capacitor between +12V and GND can help improve stability (use 100nF). Simply solder it onto the back of JP1 below your PCB. WIRING To get started, connect two 12v lines on your RAMPS board together with a 3-pin connector, similar to a servo wire. Then create a y-cable that joins this line with JP1 on your PCB (see drawing for clarification). Exercise extreme caution when connecting these cables as you may experience a short circuit if connected improperly. SOFTWARE I personally use a fan extender like this one to keep my prints and extruder head at the right temperature. To accomplish this modification, in Marlin's configuration_adv.h, make these changes: #define EXTRUDER_0_AUTO_FAN_PIN 4 #define EXTRUDER_AUTO_FAN_TEMPERATURE 50 #define EXTRUDER_AUTO_FAN_SPEED 255 //this represents max fan speed Lastly, flash the new firmware settings.
With this file you will be able to print Fan extender for RAMPS 1.4 with your 3D printer. Click on the button and save the file on your computer to work, edit or customize your design. You can also find more 3D designs for printers on Fan extender for RAMPS 1.4.