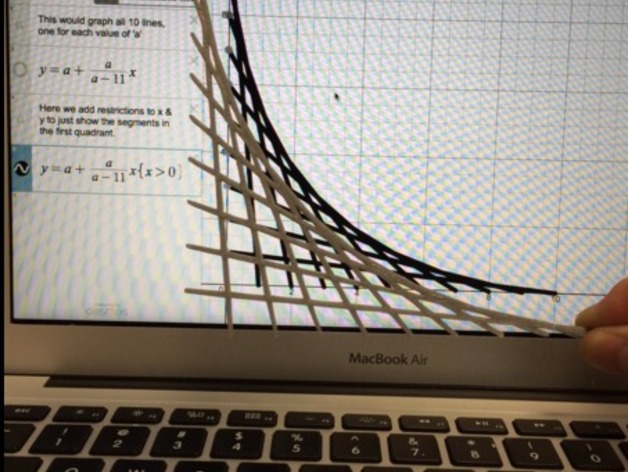
Falling Ladder via Desmos
thingiverse
Human: Falling Ladder design was created from a Desmos.com graph and converted to an STL. Read the full details at http://designmaketeach.com/2016/02/18/3d-printing-graphs-with-desmos/. This thing is a 3D rendering of a 2D graph example in Desmos.com that is named Lists: Falling Ladder https://www.desmos.com/calculator/xdpigkjalg. The purpose is to provide a model demonstrating the end product of the conversion of 2D graph in Desmos to a 3D model. As kitwallace points out in the comments, this would be an incorrect solution to a falling ladder problems as the lines are regular intervals. Please feel free to share a correct solution. Update: New model with x & y axis added. This thing was converted with Tinkercad. Edit it online https://www.tinkercad.com/things/0XCYFUUkgQE. How I Designed This Graph to 3D Print -Create graph at Desmos.com or use one of the provided examples. -Set graph color to black. –Graph Settings: Click Projector Mode. –Graph Settings: Turn off grid and axis. -Take a screenshot of the graph area OR Login to Desmos and save the image. Share Graph → Image. -Convert image to SVG using Online-Convert http://image.online-convert.com/convert-to-svg. -Download SVG. -Import SVG into Tinkercad (Try 10% scale and 2mm height). -Scale model and download STL. -3D Print. Advanced – graph manipulation -Import screenshot or graph image to Inkscape. -Path > Trace Bitmap. -Select graph and Edit Paths by Node. -Modify stroke style to create thicker lines for printing
With this file you will be able to print Falling Ladder via Desmos with your 3D printer. Click on the button and save the file on your computer to work, edit or customize your design. You can also find more 3D designs for printers on Falling Ladder via Desmos.
