Faceted Bowl and Vase
thingiverse
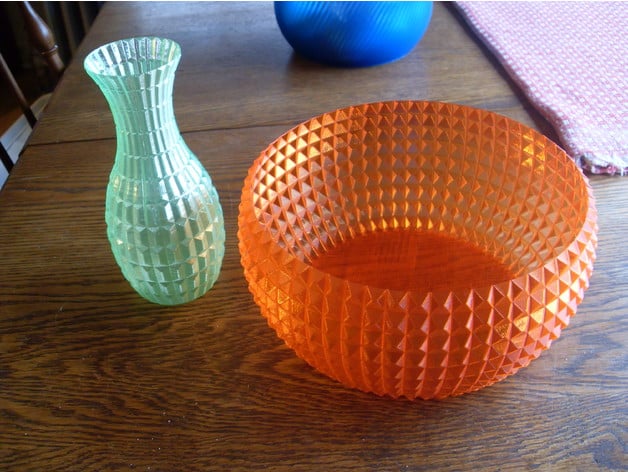
When I crafted this bowl and vase, I aimed for a 'cut glass' appearance. Both were printed on my FlyingBear P902 printer using transparent PLA filaments. The bowl measures 165 mm in diameter at its base, expands to 196 mm at the top, stands 100 mm tall, and reaches a maximum diameter of 217 mm. The vase is 56 mm in diameter at both the top and bottom, stands 170 mm tall, and has a maximum diameter of 78.5 mm. UPDATE 12/26/2019: I made a few minor adjustments to the STL model of the bowl. (The new file is called 'Faceted Bowl 2'.) In this revised model, the overhang angle of the lower faces on the second and third row of facets is slightly steeper, which should improve print quality. Also, the bowl is no longer lying flat. Otherwise, the new design is identical to its predecessor. Note that the STL models are solid; they don't have any hollowed-out sections. To print them correctly, you must use the 'spiralize' or 'vase-mode' settings in your slicer. This setting will not add any infill or top layer but will create a bottom (If you're unsure how to access these settings, search for instructional sites and videos on Google). I created these models using my 2012 copy of Alibre Design, while Cura 2.4 served as my slicer – which I'm growing to appreciate. Given its maximum diameter of 217 mm, the bowl pushed the XY limits of my FlyingBear print area, a 220 mm square space. I discovered that my Cura slicer wouldn't even attempt to slice the print unless I disabled the skirt function under 'Build Plate Adhesion'. This occurred despite the fact that the size of the skirt (three lines, 3mm from the 165 mm diameter base) would have fit within the build plate area. To me, this seems like a software glitch. Besides activating Cura's 'spiralize' setting, I set my layer height to 0.3 mm, line width to 0.6 mm, and bottom thickness to 0.9 mm (or three layers). To eliminate a z-hop bug that occurs when using 'spiralize' with Cura 2.4, I also adjusted the 'Outer Wall Wipe Distance' to 0. If your printer has a smaller build area than my FlyingBear (220 x 220 x 270 mm), simply scale down the models with your slicer so they fit within your print space. One thing worth noting is that on one of my first vase prints, I increased my usual print speed from 60 mm/sec to 80 mm/sec. The result was an okay-looking print, but the facets didn't appear as sharp as I would have liked, and there was some 'ringing' in the facets as well. When I returned to a print speed of 60 mm/sec, the facets looked significantly sharper, and the 'ringing' became less noticeable. The walls also appeared more transparent. As I'm typing this, I'm printing the vase at 40 mm/sec to see how much it improves. So far, it's looking quite a bit better. It's possible that since I'm using a transparent filament, these issues show up more than normal. Who knows, maybe someday I'll learn how to create models in my CAD software so they don't lie on their sides when posted on Thingiverse. But apparently, not today. If you have any questions about either of these creations, please post them in the comments, and I'll do my best to answer.
With this file you will be able to print Faceted Bowl and Vase with your 3D printer. Click on the button and save the file on your computer to work, edit or customize your design. You can also find more 3D designs for printers on Faceted Bowl and Vase.