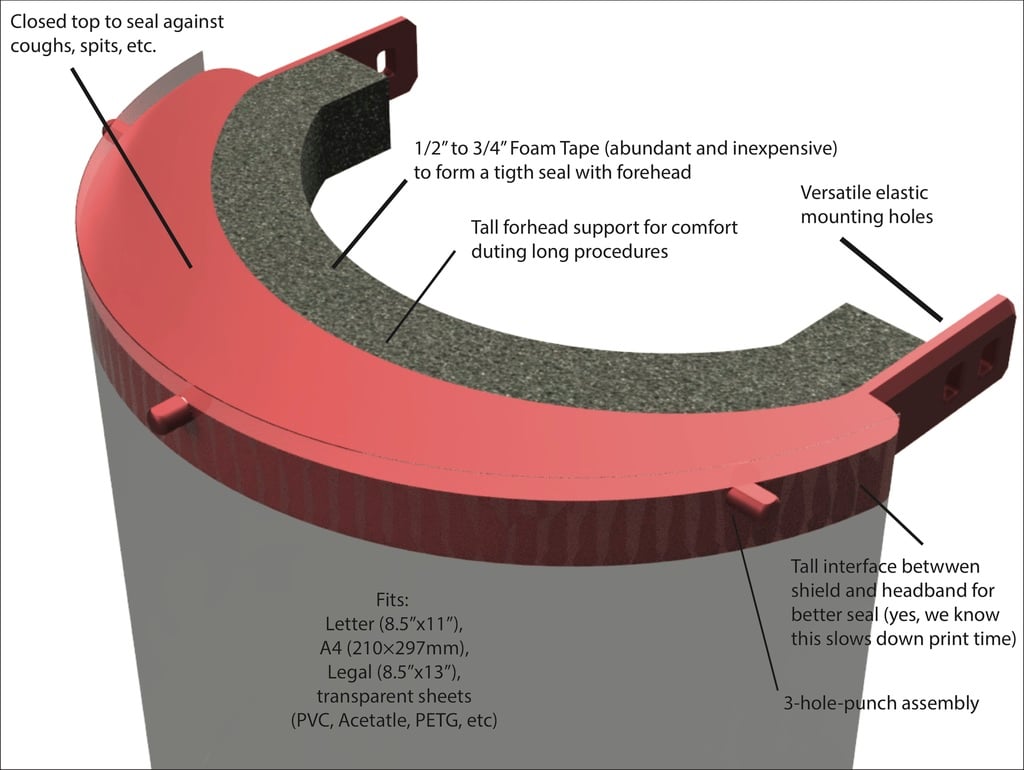
Face Shield with Sealed Top (Foam Tape + 3-hole punch)
thingiverse
This is a comprehensive guide on how to assemble face shields for healthcare workers during the COVID-19 pandemic. It includes instructions, materials lists, and variant information. **Materials:** * M-D 10-ft x 3/4-in Gray Window Seal Foam Window Weatherstrip * Transparent films (available in various thicknesses and sources) * Small Zip Ties (4") * Elastic Band (3x5mm Natural Latex Rubber Band Tube) **Instructions:** 1. Cut about 10" of elastic band and tie it to the headband. 2. Cut about 10" of foam tape and glue to the headband. 3. Make 3-holes on the clear plastic sheet using a 3-hole punch. 4. Cut about 2" in diagonal on each of the bottom corners of the clear plastic sheet. 5. For v12-v19, just stretch the shield to fit into the headband pegs. For v3 Attach the plastic sheet to the headband using zip-ties (pro tip, insert the zip-tie through the headband first) and cut the remainder. **Variants:** * 3-hole punch pegs (v19): Print Time 52 mins, 18 g. * 3-hole punch pegs (v12): Print Time 1:50, 40 g. * 3-hole punch holes (v3): Print Time 2:15, 40 g. **Credit:** This guide is an adaptation of the Prusa Face Shield RC2, NIS approved design, and snap-on design.
With this file you will be able to print Face Shield with Sealed Top (Foam Tape + 3-hole punch) with your 3D printer. Click on the button and save the file on your computer to work, edit or customize your design. You can also find more 3D designs for printers on Face Shield with Sealed Top (Foam Tape + 3-hole punch).
