Face Frame Door Installation Guide
prusaprinters
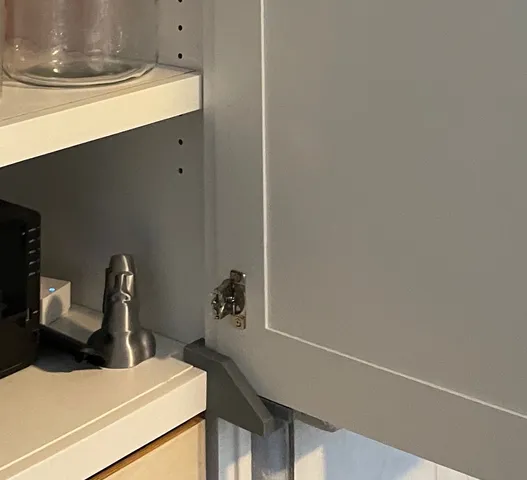
I needed a third hand to install my cabinet doors during a kitchen redesign. I had planned for a ¾ inch overlap with the bottom of the cabinet opening. These guides allow you to sit the door onto the support that is held on by the face frame. Inserts are placed on top to adjust the alignment to either ¾, ½ or 5/8. The spacers have the resulting overlap amount printed on the front of them for easy reference. Other spacings could easily be added. This worked extremely well and allowed me to install my doors by myself quickly and keep them perfectly aligned. Place the guide with the insert you need. Install the top most hinge while the door sits on the guide. Remove the guide and install the remaining hinges. The inserts have a tab that allows you to slide the spacer out thus removing the weight of the door from the guide that can then easily be pulled out. You can see in the full door picture that the guide is at the bottom with the door weight on it and the top most hinge was installed. The door now just sites there even if the remaining hinges are not installed yet. When placing the guide to the face frame if it is loose you can add a small shim to the back to make sure it is tight and stays square to the cabinet. I am keeping my guide which I printed in PETG since I have a few more cabinets to do. You can print the entire thing with-out supports when placed on their sides since all angles are 45 degrees.
With this file you will be able to print Face Frame Door Installation Guide with your 3D printer. Click on the button and save the file on your computer to work, edit or customize your design. You can also find more 3D designs for printers on Face Frame Door Installation Guide.
