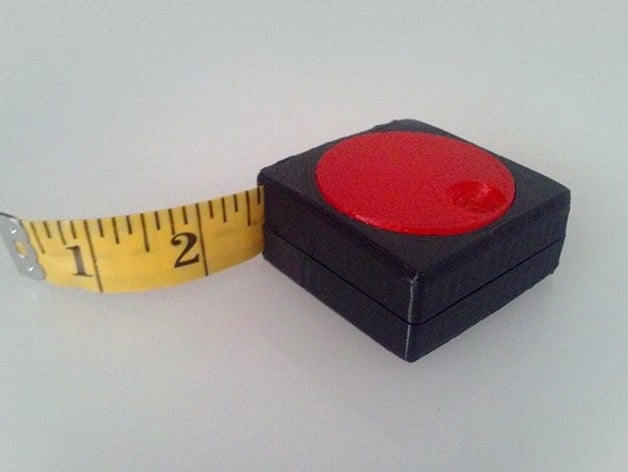
Fabric Tape Measure Spooling Case
thingiverse
Turn your ordinary fabric measuring tape into a full-on tape measure with this fabric tame measure spooling case! No glue or fasteners are necessary; it all snaps together! I designed this project around a 120-inch/305mm tape with a width of 20mm. The .scad file is included and has handy variables at the top, allowing you to adjust sizes as needed. ASSEMBLY: Print the case and roller. The case requires no supports and should have an infill of at least 40% for durability. The roller needs supports since it has overhangs but can be printed with a lower infill. I printed mine at 5% and it works great! Fold the tab at the end of the tape and insert it into the T-shaped notch in the roller, ensuring that the high number end of the tape is used so that the zero end comes out of the dispenser. Also, make sure you have the numbers upside down as shown in the picture since this piece will be inverted in the coming steps. Place the spool into the case and thread the tape through the mouth near the corner of the case. Snap the case together! Crank the roller to gather the tape onto the spool! Printer Settings: Printer Brand: Solidoodle Printer: Solidoodle 4 Rafts: No Supports: Yes Resolution: 0.3mm Infill: 5% for roller, 40% for case Notes: The roller needs supports but the case does not. The roller can be printed with lower infill (I did 5% and it works great!) but I'd stick to the default 40% infill for the case just for durability. Post-Printing: Remove support material from the roller, and sand/file the case as needed so the roller moves smoothly within.
With this file you will be able to print Fabric Tape Measure Spooling Case with your 3D printer. Click on the button and save the file on your computer to work, edit or customize your design. You can also find more 3D designs for printers on Fabric Tape Measure Spooling Case.
