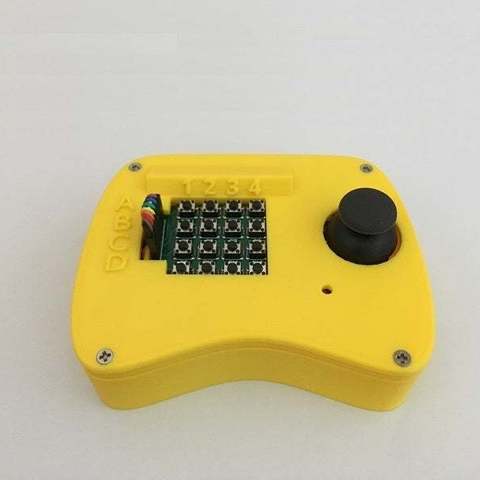
Ez Arduino Gamepad for Robotics Project
cults3d
This gamepad is specifically designed for robotics projects. It runs on a 3.7V 18650 lithium battery and has sufficient 5V output pins to power each component. The use of a lithium battery provides reliable and strong power to components, making it an ideal choice. Furthermore, the battery can be recharged easily by plugging in a 5V power source into the USB port on the board. Robot locomotion is controlled by a joystick switch, while a 16-button matrix switch allows you to bind robot functions. To demonstrate its capabilities, we developed Arduino sketches using this gamepad to control our designed robots. The codes are open-source and freely distributable, serving as references for implementing gamepad control code in your projects. Videos demonstrating the gamepad's functionality include: * Ez MiniKame Mk2: https://youtu.be/mUIyPMDtPAU * Ez Spidey: https://youtu.be/LLlxMSZ1ZfE Software: Arduino sketches on GitHub can be found at uploads Test.ino to check wiring correctness of matrix switch and joystick switch first. Open the Serial Monitor to see button and joystick switch responses, then modify this program to fit your robotic application. * Upload Ez-GoBLE-Gamepad.ino for controlling Ez MiniKame Mk2 and Ez Spidey * Upload Ez-OpenCat-Gamepad.ino for controlling Ez OpenCat Electronics: To build the gamepad, you will need the following components: * HuaDuino and Game Switches Combo kit: This Arduino Nano-compatible board has enhanced features, integrates everything on a single PCB, and is ideal for robotics projects. It also includes an embedded battery charging circuit, making it convenient to charge batteries. * 2 HC-05 Bluetooth modules: One set to master mode, as described in the tutorial, and the other remains in slave mode, with baud rate matching the setting in the robot code * A buzzer * A 18650 lithium battery, held in place by a battery clip * 8 M2x6 tapping screws * 4 M3x14 screws * 13 dupoint wires Wiring: The connection of components to the board is as follows: Joystick switch: VRX_PIN -> A0 VRY_PIN -> A1 SW_PIN -> A2 VCC -> 5V GND -> GND 4x4 matrix switch: C1 -> D2 C2 -> D3 C3 -> D4 C4 -> D5 R1 -> D6 R2 -> D7 R3 -> D8 R4 -> D9 Buzzer: Positive polar -> A3 Negative polar -> GND
With this file you will be able to print Ez Arduino Gamepad for Robotics Project with your 3D printer. Click on the button and save the file on your computer to work, edit or customize your design. You can also find more 3D designs for printers on Ez Arduino Gamepad for Robotics Project.
