Eyeglass Case - Magnetic Latch
prusaprinters
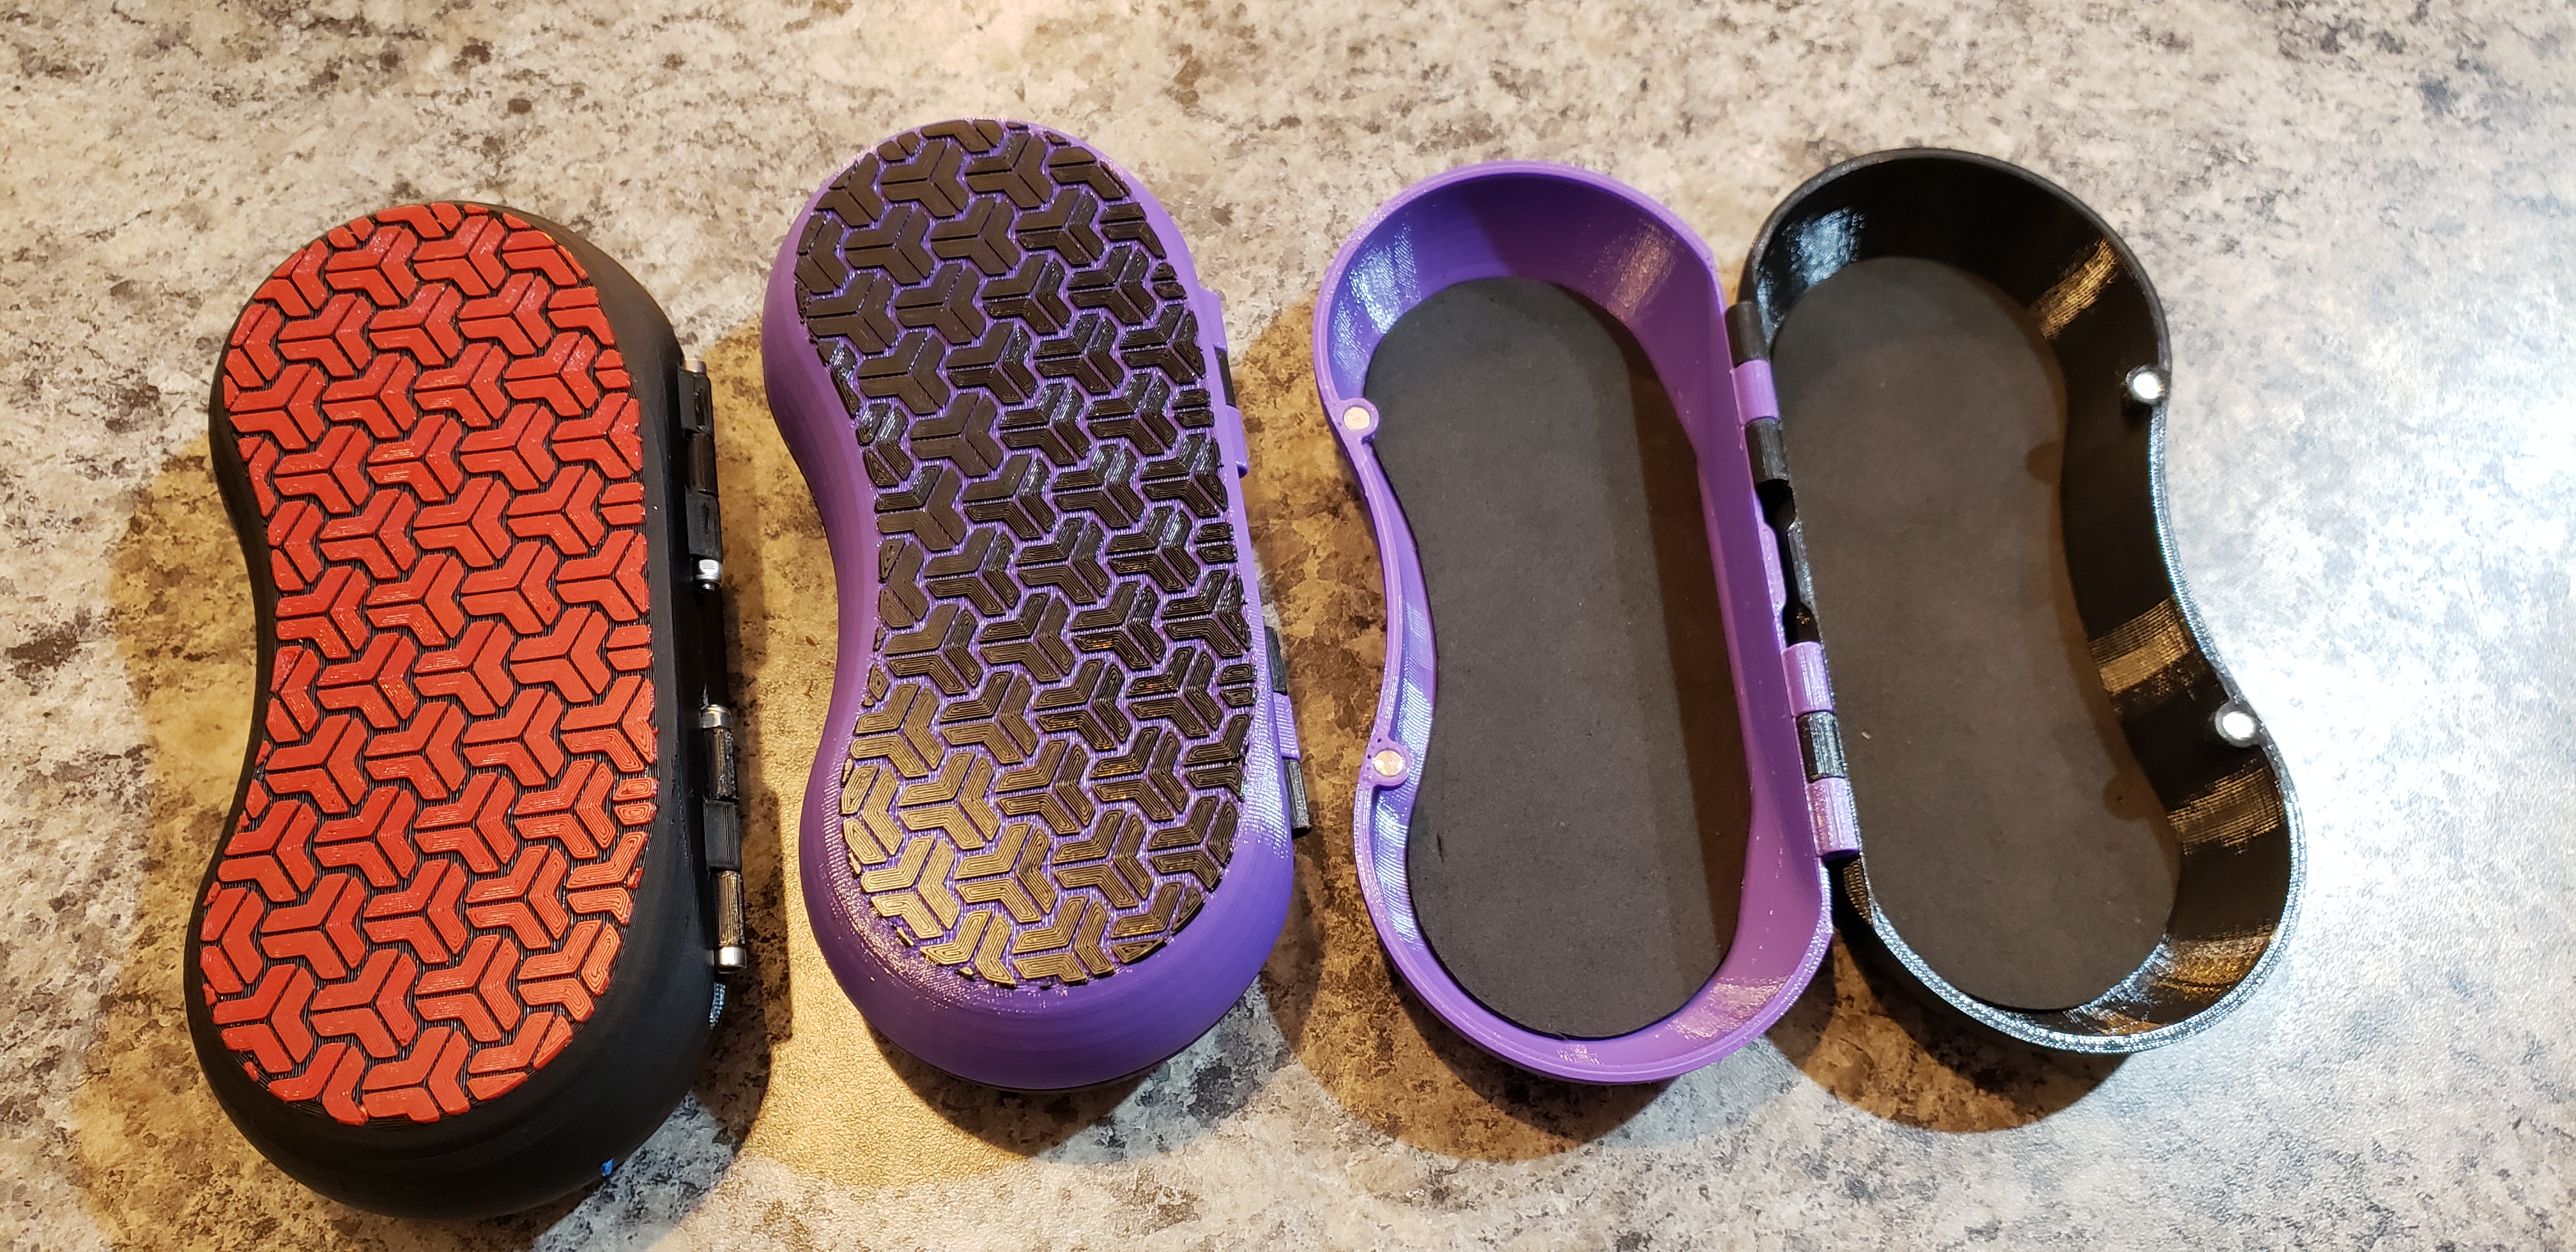
<p>I wanted an eyeglass case that was unique, so I designed one. I decided to use Ø5mm x 3mm neodymium magnets for the latch and two M3 x 40mm long screws with nylon lock nuts for the hinges. I used a thin foam sheet glued inside the case for lining and cut it using a printed template to match the shape of the case.</p> <p>Any combination of the two files can be used to make a case; the only difference is the design on the bottom.The file prints well with no supports ( I really would not use supports on the patterned area). I did a color change after .8 mm to make the pattern stand out, printed with the patterned side flat on the bed.</p> <h3>Print instructions</h3><p>PETG, any two colors.<br/> Print the first .8mm in one color and then do a color change.<br/> Layer height .15 - .2mm (finer is better for the hinges)<br/> 4 perimeters<br/> No Supports</p> <p>Post Processing:<br/> Print the template and use it to cut a foam sheet to line the bottoms of the case halves, glue in place.<br/> Glue a 5mm x 3mm neodymium magnet in each hole. Check that the polarity is correct first.<br/> Use two M3 x 40mm screws and nylon lock nuts for the hinges.</p>
With this file you will be able to print Eyeglass Case - Magnetic Latch with your 3D printer. Click on the button and save the file on your computer to work, edit or customize your design. You can also find more 3D designs for printers on Eyeglass Case - Magnetic Latch.
