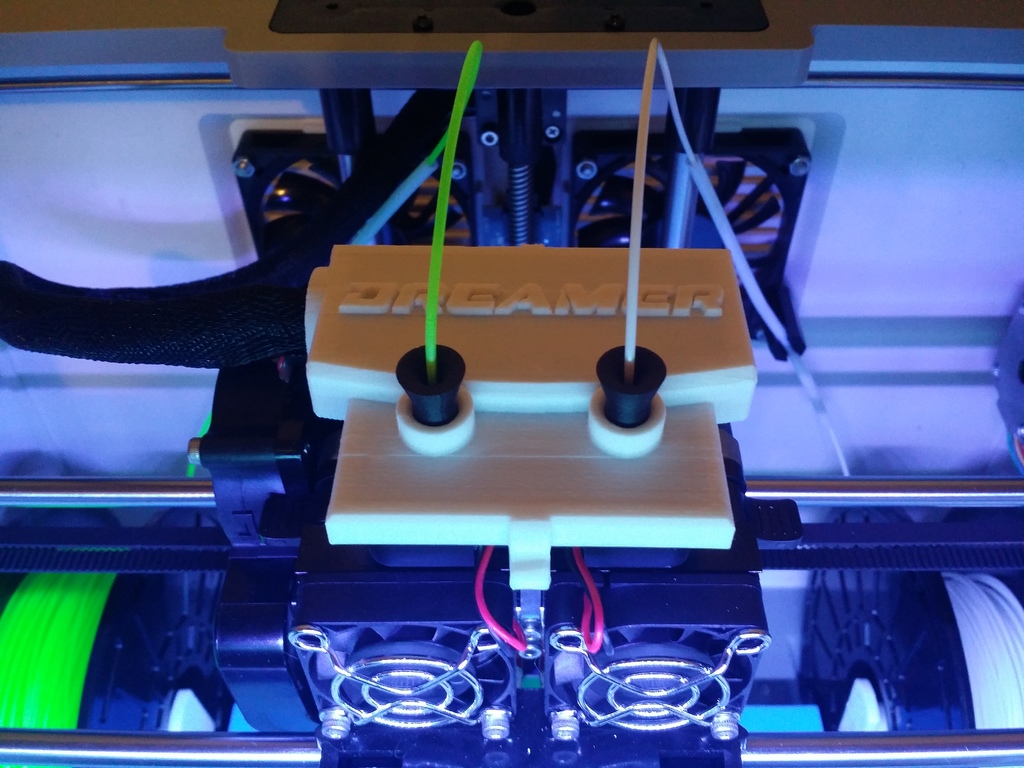
Extruder Cover/Guide
prusaprinters
<p><strong>UPDATE</strong> 5/10/17 v2.5 uploaded, fits much better, and easier to remove without breaking. Install this cover FRONT HOOK FIRST, and then slowly guide the rear hook in between the two stepper motors until in locks in. Make sure you have sufficient clearance between the rear hook and two motors. (If not, you can trim the rear hook with a razor blade) The motors do get hot, and could melt and cause issues with the rear hook now that its thicker. So make sure the rear hook isn't touching the motor housing. (ABS highly recommended for this print) To remove, simply put slight pressure on the top of the cover with both thumbs, and then use your index fingers to pull the back of the housing away from the rear of the stock cover, freeing up the rear hook. The rear hook now has a much smaller bite, making it easier to dislodge. Rock forward and remove. I plan on leaving the v2.0 files online just in case you may like it better. Enjoy! and I would love to hear your feedback and improvement suggestions.</p> <p><strong>UPDATE</strong> 5/7/17 Change log for v2.5, rear hook reinforced and reshaped for easier removal without breaking, left side cut for slightly more clearance for stock cover housing, "Dreamer" text removed and replaced with "DREAMER" (as seen on the front of the printer) to match the font that Flashforge used. I'll get v2.5 file added as soon as I get one printed and tested.</p> <p><strong>UPDATE</strong> 5/6/17 Had to remove cover to fix a jam, and it was almost impossible to get this cover back off, plus back hook tip broke on me during removal. Also on the left side where the wire comes in, its not quite the right dimensions and it rubs on the oem black cover. Fix coming soon, a little looser fit, reinforced rear hook, and modification to left side wire inlet.</p> <p>When I first bought my FF Dreamer, I didn't like how the filament entered the hot ends. When running more abrasive filaments, I was worried there would be tremendous wear and tear on the top of the extruder. So my solution was this, a snap on cover with easily replaceable "wearable" inserts. The original cover does not need removal, this cover is designed to snap over top of the stock cover. I recommend hooking the rear hook in first, and then the front hook second. Feel free to leave comments and feedback on what you think could be improved.</p> <h3> Print Settings</h3> <p><strong>Printer Brand:</strong></p> <p>FlashForge</p> <p><p class="detail-setting printer"><strong>Printer: </strong> <div><p>Dreamer</p></div><strong>Rafts:</strong></p> <p>Yes</p> <p><p class="detail-setting supports"><strong>Supports: </strong> <div><p>Yes</p></div><strong>Resolution:</strong></p> <p>.180</p> <p><p class="detail-setting infill"><strong>Infill: </strong> <div><p>40%</p></div></p> <p><strong>Notes:</strong></p> <p>I printed this with the "long hook" laying down against the bed with a raft, and then ran supports to fill the overhang. This cover works great at a 40% honey comb infill, and 3 shells for the perimeter walls. I ran 220°c on the extruder and 105°c on the bed. (Pretty much the stock "Dreamer abs" settings in Flashprint). Just dont forget to change your infill% and your shell count. It was tedious removing all the support material from the "DREAMER" text, but well worth the effort when I was finished. Make sure you use abs, pla may melt.</p> </p></p></p> Category: 3D Printer Parts
With this file you will be able to print Extruder Cover/Guide with your 3D printer. Click on the button and save the file on your computer to work, edit or customize your design. You can also find more 3D designs for printers on Extruder Cover/Guide.
