Extruder Carriage for Huxley
thingiverse
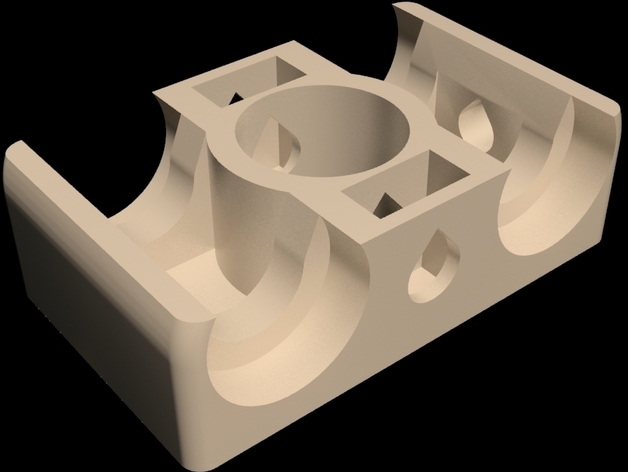
Experimenting with an x-carriage for Mendel, utilizing successful PTFE bushing placement on my build platform. A PTFE thermal barrier is secured using a M6 nut and grub screw. The design allows for compatibility with Huxley without modifications. Additionally, it complements my x-axis replacement (http://www.thingiverse.com/thing:4831). Follow my build log at strelly3d.blogspot.com. To assemble, insert a M6 nut into the slot for M6 bolt or grub screw placement, locking the thermal barrier securely in position. A shallow M6 hole on the thermal barrier can also locate the extruder head, potentially saving recalibration efforts during adjustments. Finally, use an M6x15 bolt to self-tap into the carriage side for timing belt attachment. For bushings, acquire 4x10mm PTFE pieces, 16mm in diameter, drilled with a 6mm hole (or US C-sized drill for optimal fit). Secure with glue and a M6 steel rod for accurate alignment.
With this file you will be able to print Extruder Carriage for Huxley with your 3D printer. Click on the button and save the file on your computer to work, edit or customize your design. You can also find more 3D designs for printers on Extruder Carriage for Huxley.