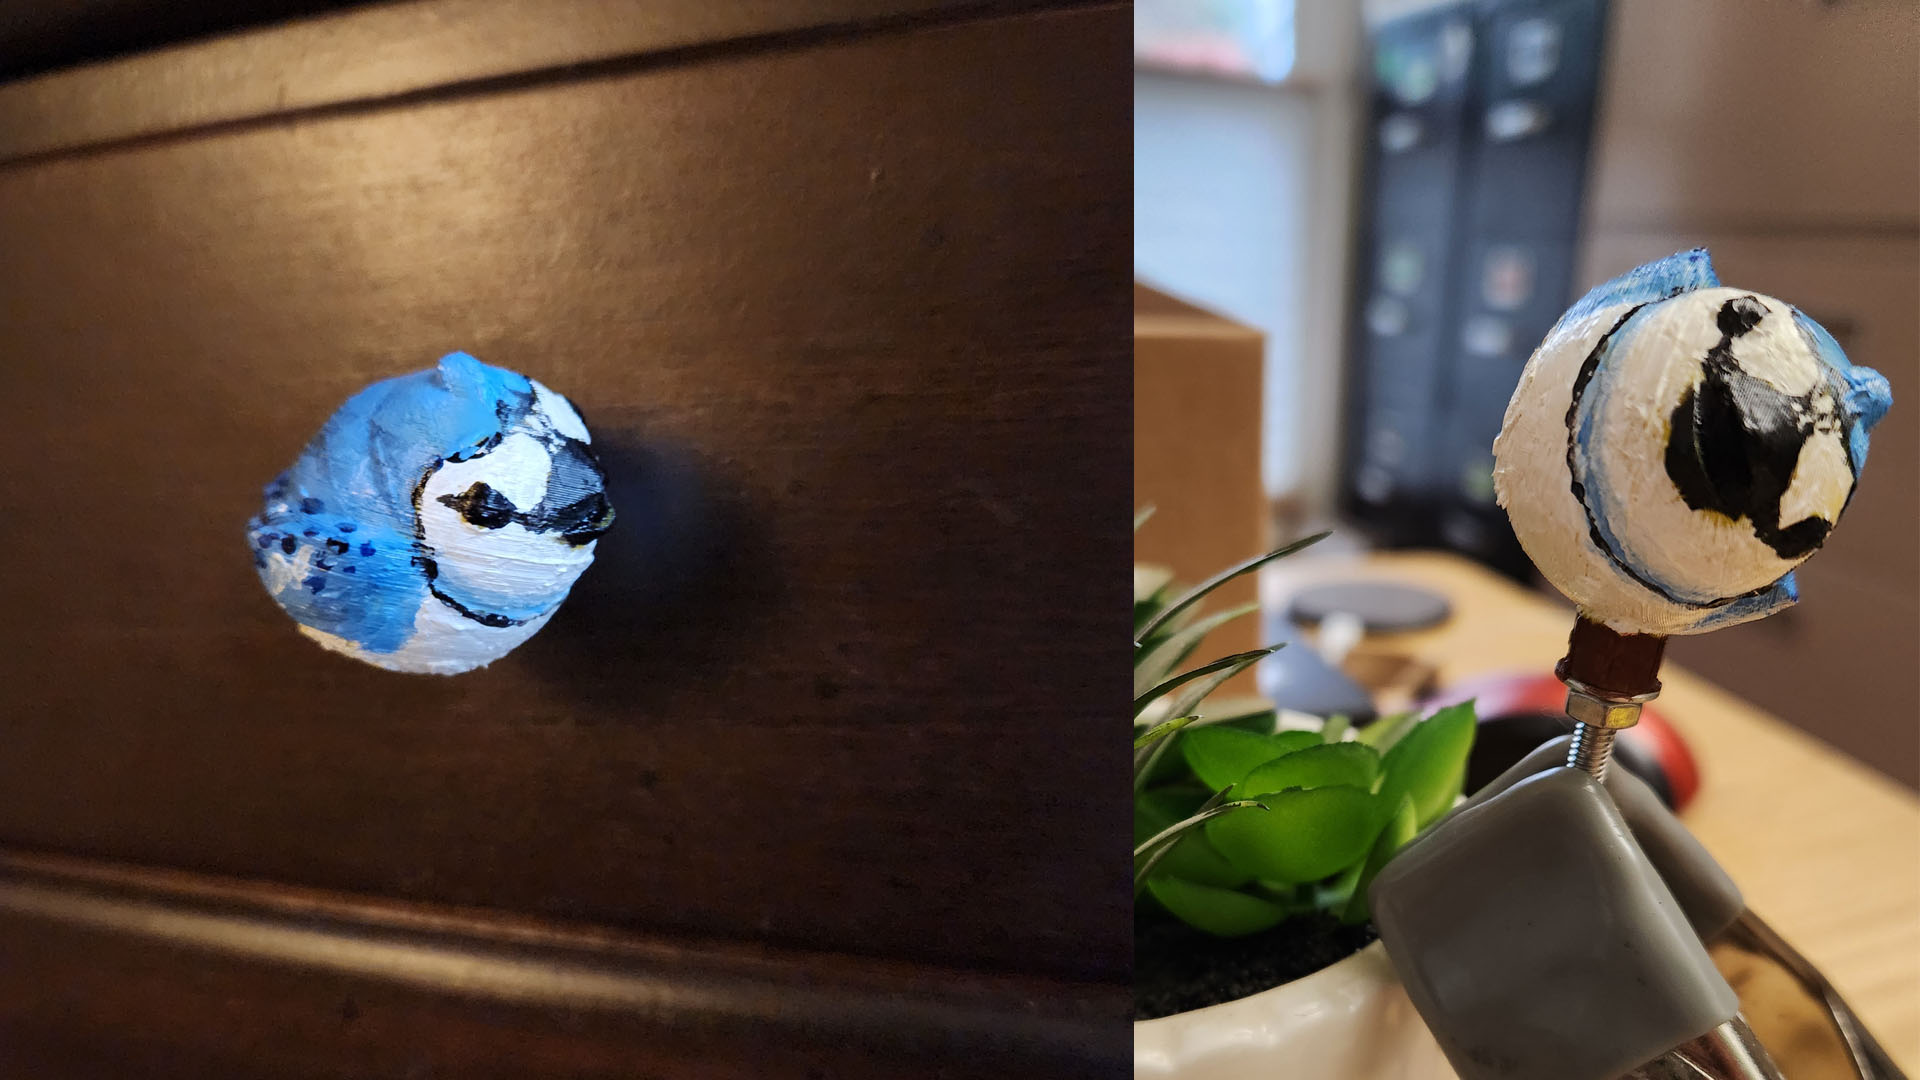
Expansive Ball Concept Knob: Fat Birds Edition V0
prusaprinters
<p><strong>===Welcome</strong></p><p>HEEEEEEEEEELO! Thank you for visiting this model's page. I hope you find this useful and fun - perhaps visually stunning! Go have a blast printing, possibly painting, and then using!</p><p> </p><p><strong>===why fat birds</strong></p><p>- aesthetics</p><p>- function</p><p>- use design curvature to create a touch-friendly interface for fingers and hands</p><p>- use design curvature to prevent damage to items when used as a hook</p><p> </p><p> </p><p><strong>===goals</strong></p><p>- First function, but also aesthetic. In terms of aesthetics however, I wanted more than a mere copy of the knob. I wanted to present a sense of wonder - similar to when we go out and experience birds in the wild. For this We needed large number of possible variations.</p><p>-We needed to introduce the ability to both manipulate the model to provide a number of variations as well as the ability to color - via 3d material or paint - for a limitless number of possibilities.</p><p> </p><p><strong>===concept</strong></p><p>-build a bird model centered about x,y,z so that we can easily rotate it about the origin while leaving the attachment beam and its voids intact for a better digital and tangible user experience.</p><p> </p><p>-I also wanted to be able to print this without supports by slicing the model in 2 parts but with a plethora of rotational options it would be very difficult to figure out where to slice for a gigantic amount of rotational possibilities. Therefore I omitted this function.</p><p> </p><p>-use a non-destructive method of attachment. I've never cared for TTT screws because I've they are destructive. Even so I was going to use this method of here. However, I decided to stick to machine screws and nuts because I didn't want someone to possibly be left with an unusable model they had worked long and hard on to paint just because the attachment interface failed due to poor method selection and a bit more work on my end.</p><p> </p><p>-Allow any maker to craft a unique bird - with some attention and devotion.</p><p> </p><p><strong>===specs</strong></p><p>-designed around a 28mm body with appendages and extras protruding a bit</p><p>-designed for an M4 screw but can be changed (view experimental extras below)</p><p> </p><p><strong>===options</strong></p><p><strong>Note: this model is created in openscad. If you would like to change the options the easiest way is to use the openscad program. URL: https://openscad.org/</strong></p><p><br>rotation -- we can rotate the bird in x,y, or z. Since the model rotates about the y axis in the physical world we only need to concern ourselves with digital modle rotations in the x and z axes. This should allow for 360 degs of rotation along the 3 axes creating a world of possibilites </p><p>[Line 58, within ba() module - rotation [x,y,z] function]</p><p> </p><p>crest -- some birds such as cardinals, titmouses, bluejays etc. have crests. We can turn this on and off by commenting this line on or off.</p><p>[Line 93, within birdBld() module - comment to turn off via “//” or use by removing “//”]</p><p> </p><p>beak - I recommend 2 configs...... there is also a comment on line 193-201 about this. If you would like more, you can also have a closed beak or any other options you choose. Play around and see what you like</p><p>[Lines 188, 189]</p><p> </p><p> </p><p>poly count - I made it so we could change the poly count on a number of differet parts if we wanted to mix it up a bit. This changes how round a sphere on the model looks.</p><p>[lines 28-33]</p><p> </p><p><strong>===experimental extras</strong></p><p>screw and nut voids - I desinged this for an M4 machine screw and M4 nut. However your M4 nut may be a bit different so check before printing.</p><p>[lines 61, 68, 71 using the translation functions]</p><p>scaling - we can scale the mode but we need to watch that the beam and its void do not get "swallowed" as the bird expands from the origin but the beam and screw void do not. To fix this you will need to move the screw and nut voids, and the beam further out using the translation functions for each object. Note: with the current config we can scale to 1.2 without any code mods.</p><p>[line 57]</p><p> </p><p><strong>===render notes</strong></p><p>if you decide to render a model (F6) in openscad, this model will possibly take a few minutes depending on your hardware. Attempt to use a preview (F5) to see the build prior to rendering. Once you like your preview, use F6 to create a render which you can then export as an *.STL file. </p><p><strong>===additional notes</strong></p><ul><li>Ese the “Scad” files provided to customize your bird knobs</li><li>Use"colorScad" to plan and aid in visualizing the color you may use</li></ul>
With this file you will be able to print Expansive Ball Concept Knob: Fat Birds Edition V0 with your 3D printer. Click on the button and save the file on your computer to work, edit or customize your design. You can also find more 3D designs for printers on Expansive Ball Concept Knob: Fat Birds Edition V0.
