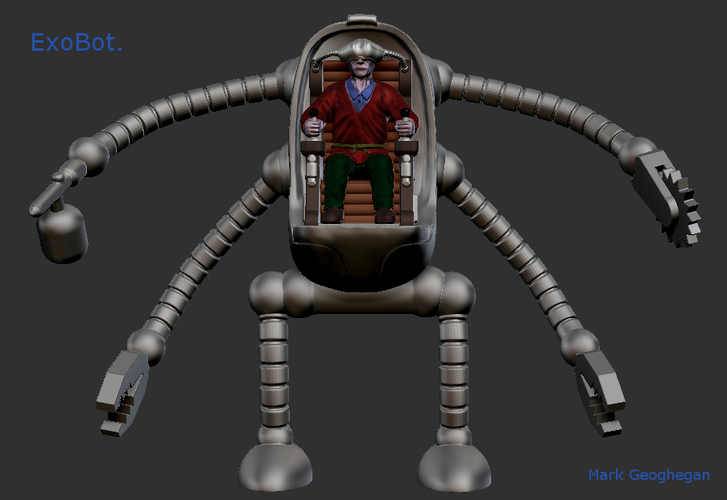
ExoBot
pinshape
The Story- Mark retreats into a virtual world where he constructs huge monuments in honor of his dead wife, feeling completely deaf to the world around him. Moving large masses of stone and steel with his powerful mind-controlled ExoBot, he experiences a sense of calm and strength that is impossible for him to find in reality. Inspiration and Design- Growing up in the sixties, I was heavily influenced by Magnus The Robot Fighter comics and my favorite movie, The Time Machine (original version). To incorporate these elements into my design, I drew inspiration from classic sixties robot designs and added a touch of time-traveler's flair. The tube arms and legs of the ExoBot are reminiscent of sixties robots, while the pilot seat and tools pay homage to the original film. As an artist, I tend to jump straight into sculpting, often skipping the design phase entirely. This time around, I decided to try using my friend's copy of ZBrush on his laptop, which proved to be a game-changer. I started by creating initial designs in my head and then moved on to sculpting with Sculptris and 123d. However, for this project, I wanted to push the boundaries of what was possible, so I decided to try using ZBrush Core. At first, it took some getting used to, but once I picked up the basics, I was able to create some truly impressive designs. Unfortunately, my friend took his laptop on holiday, leaving me without access to the software. Undeterred, I dipped into my savings and bought a copy of ZBrush Core, which allowed me to continue working on the project. However, when I discovered that the new software was missing a crucial brush, I had to get creative. Luckily, I had already completed the initial designs for the arms and legs, so they were what they were. To make up for it, I used Meshmixer to split the model into smaller sections, minimizing the amount of support needed during printing. Printing- To achieve the best results, I recommend using the following settings: * Legs: 0.2 mm, 3 perimeters, and 30% infill, with no support needed * Hip: 0.2mm, 3 perimeters, 30% infill, and support * Body halves: 0.2mm, 3 perimeters, 30% infill, support, and 4 top layers * Arms: 0.2mm, 3 perimeters, 30% infill, and support * Pilot: 0.1mm, 3 perimeters, 50% infill, and support * Claws and tools: 0.1mm, 3 perimeters, 30% infill, and support * Helmet Pipes: 0.1mm, 3 perimeters, 30% infill, and support To prevent warping during printing, make sure to use good bed adhesion. If you do experience some warping on the smaller parts, try using boiling water to heat up the affected area before quickly placing it on a flat surface and pushing down the edges with your fingers. Assembly- Assembly is relatively straightforward, and I have included exploded views of the ExoBot and pilot seat to help guide you through the process. To align the pieces, use small matchsticks or toothpicks where shown. The tools can be held in place using these sticks instead of glue, allowing for easy swapping or customization. Before assembling, roughen all surfaces with sandpaper and use superglue to hold everything together. The pilot seat should be assembled separately before attaching it to the body. Once complete, your ExoBot will be ready to roll. Summary- This project has been my biggest undertaking yet, and I'm thrilled with how it turned out. Learning ZBrush was a game-changer for me, and I have several more projects in mind that I want to try it out on. Meshmixer proved to be an invaluable tool, allowing me to complete the model with ease.
With this file you will be able to print ExoBot with your 3D printer. Click on the button and save the file on your computer to work, edit or customize your design. You can also find more 3D designs for printers on ExoBot.
