<<<Excel to Solidworks13 >>> <<<Mathematica 9.0 to Excel to Solidworks13>>>
grabcad
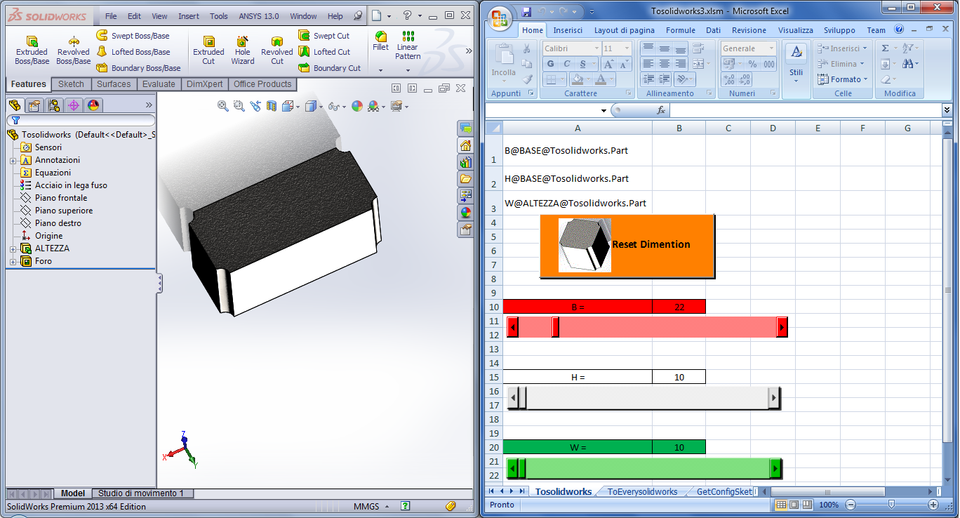
Start by opening Tosolidworks.SLDPRT and Tosolidworks3.xlsm in SolidWorks Worksheet. In step one, click "Reset Dimension" to set all cube dimensions to 10mm; adjustments are made automatically via scroll bars. Next, for step two, open any preferred SolidWorks SW13 part model with a named dimension (e.g., H@Extrude@part). Click "Load Doc Dimension" button to update all dimensions in the model simultaneously. Moving on to step three, open an SW13 assembly model and select a part with a named dimension (e.g., H@Extrude@part1@Myassembly). After choosing the part, click the "Load Component Dimension Button" to list its dimensions in the worksheet. Edit any generic part dimension value, resulting in the part's rebuilding within the assembly. Lastly, ensure you have installed ExcelLink for Mathematica before proceeding with step four. In Tosolidworks.nb, open both Tosolidworks.SLDPRT and Tosolidworks3.xlsm files in the "Tosolidworks" worksheet. Run your Mathematica program to adjust cube dimensions using scroll bars directly within Mathematica.
With this file you will be able to print <<<Excel to Solidworks13 >>> <<<Mathematica 9.0 to Excel to Solidworks13>>> with your 3D printer. Click on the button and save the file on your computer to work, edit or customize your design. You can also find more 3D designs for printers on <<<Excel to Solidworks13 >>> <<<Mathematica 9.0 to Excel to Solidworks13>>>.