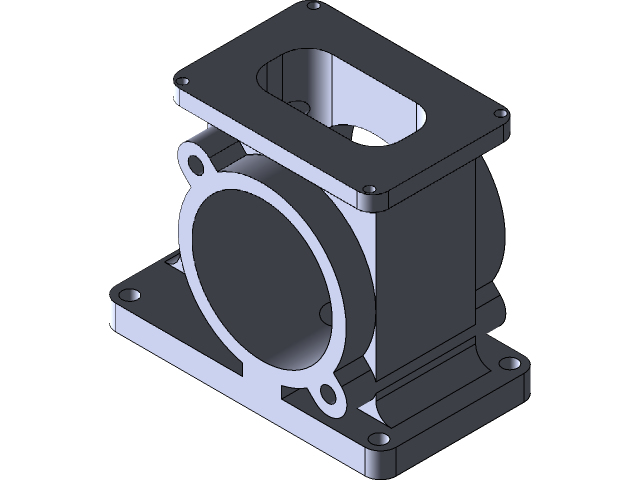
Example-30
grabcad
SolidWorks Tutorial Example Number Thirty This tutorial is designed to help users of SolidWorks master their skills and become proficient in using this powerful computer-aided design (CAD) software. We will be working on a project that involves creating a simple mechanical part, which will give us the opportunity to practice various features of SolidWorks. Step 1: Launching SolidWorks To begin our tutorial, we need to launch the SolidWorks program. This can be done by double-clicking on the SolidWorks icon located on your desktop or by searching for it in the start menu. Once the program is open, we will see the welcome screen. The welcome screen gives us several options for getting started with a new project. We can choose to start from a blank part, an assembly, or a drawing. In this tutorial, we will be starting from a blank part. Step 2: Creating a New Part To create a new part in SolidWorks, we need to click on the "New" button located at the top left corner of the screen. This will open up the new part dialog box. Here, we can choose the type of part we want to create and set various options such as units, dimensions, and material. For this tutorial, we will be creating a simple mechanical part made of aluminum alloy. We will set the units to inches, the dimensions to 2D, and the material to aluminum alloy. Step 3: Sketching the Part Once we have created our new part, we can start sketching the design. To do this, we need to click on the "Sketch" button located in the command manager. This will open up the sketch toolbar. The sketch toolbar gives us various tools for drawing and editing our sketches. We can use these tools to create lines, curves, arcs, and circles. In this tutorial, we will be creating a simple shape using lines and arcs. Step 4: Extruding the Part Once we have finished sketching our design, we need to extrude it to create a solid part. To do this, we can click on the "Extrude" button located in the command manager. This will open up the extrude dialog box. The extrude dialog box gives us various options for extruding our part. We can choose the direction of extrusion, set the height, and select a material. For this tutorial, we will be extruding our part by 1 inch in the z-direction and selecting aluminum alloy as the material. Step 5: Adding Features Once we have extruded our part, we need to add features such as fillets, chamfers, and holes. To do this, we can click on the "Features" button located in the command manager. This will open up the feature toolbar. The feature toolbar gives us various tools for adding features to our parts. We can use these tools to create fillets, chamfers, holes, and other types of features. In this tutorial, we will be adding a fillet to one edge of our part. Step 6: Assembling the Part Once we have finished adding features to our part, we need to assemble it with other parts to create a complete product. To do this, we can click on the "Assembly" button located in the command manager. This will open up the assembly toolbar. The assembly toolbar gives us various tools for assembling our parts. We can use these tools to add components, set relationships, and apply constraints. In this tutorial, we will be assembling our part with a shaft and a bearing. Step 7: Finalizing the Design Once we have assembled our part, we need to finalize the design by adding any necessary documentation such as dimensions, tolerances, and notes. To do this, we can click on the "Documentation" button located in the command manager. This will open up the documentation toolbar. The documentation toolbar gives us various tools for documenting our designs. We can use these tools to add dimensions, tolerances, notes, and other types of documentation. In this tutorial, we will be adding a note to indicate the material used in the part. Step 8: Saving and Sharing the Design Once we have finalized our design, we need to save it and share it with others. To do this, we can click on the "Save" button located at the top right corner of the screen. This will open up the save dialog box. Here, we can choose a location to save our file and give it a name. Once we have saved our design, we can share it with others by sending them the file or posting it online. In this tutorial, we will be saving our design as a SolidWorks part file (.sldprt). By following these steps, we have created a simple mechanical part using SolidWorks. We have practiced various features of the software such as sketching, extruding, and adding features. We have also assembled the part with other components and finalized the design by adding documentation.
With this file you will be able to print Example-30 with your 3D printer. Click on the button and save the file on your computer to work, edit or customize your design. You can also find more 3D designs for printers on Example-30.
