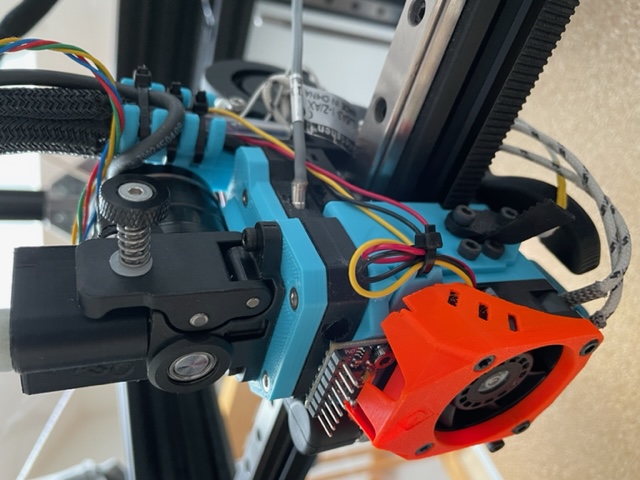
EVA 3 Toolhead sensor
prusaprinters
<p>This sensorplate will fit inbetween the drive and the universal front of the EVA 3 carriage. <br>With ERCF a toolhead filament sensor is needed, this sensorplate works with ERCF.</p><p>Needed hardware: </p><p>1) 1 M3 or M4 washer (polished without burrs) <br> The outer diameter should be between 7.8 and 8.8mm. Smaller M3 washers don´t work.<br> Thickness should be below 0.72mm<br>2) 1 or 2 6x3 neodym magnets<br>3) 5V M5 inductive sensor (sometimes the 10V sensors also work on 5V)<br> (https://www.amazon.de/gp/product/B07CL3PP2K is working for me)</p><p>The M4 model is working reliable, make sure to cut the PTFE tube so that the washer doesn´t touch the tube (just cut a small corner away).<br> </p><p>15-Sep-22 I removed the unreliable M3 model for the small M3 washer<br>18-Sep-22 I added a model with a wider washer gap, additonal there is a M3 setscrew for the sensor. This is tested with a 0.6nozzle, so it should work on a 0.4 nozzle.</p><p>Before you print the whole thing, print it first upto 75% of the height. You can than test it and you´ll see where you have an issue. Printing parameters are crucial, make sure the washer can move freely and the filament can feed through. Printing in transparent ABS gives you an advantage while adjusting.</p><p>I connected the black wire of the sensor to PB6 of the Octopus 1.1</p><p>[filament_switch_sensor toolhead_Sensor]<br>switch_pin:^PB6<br>runout_gcode:<br> M117 TH No Filament<br>insert_gcode:<br> M117 TH Detected <br> </p><p>Make sure the washer moves freely in the slot!!!!!!</p>
With this file you will be able to print EVA 3 Toolhead sensor with your 3D printer. Click on the button and save the file on your computer to work, edit or customize your design. You can also find more 3D designs for printers on EVA 3 Toolhead sensor.
