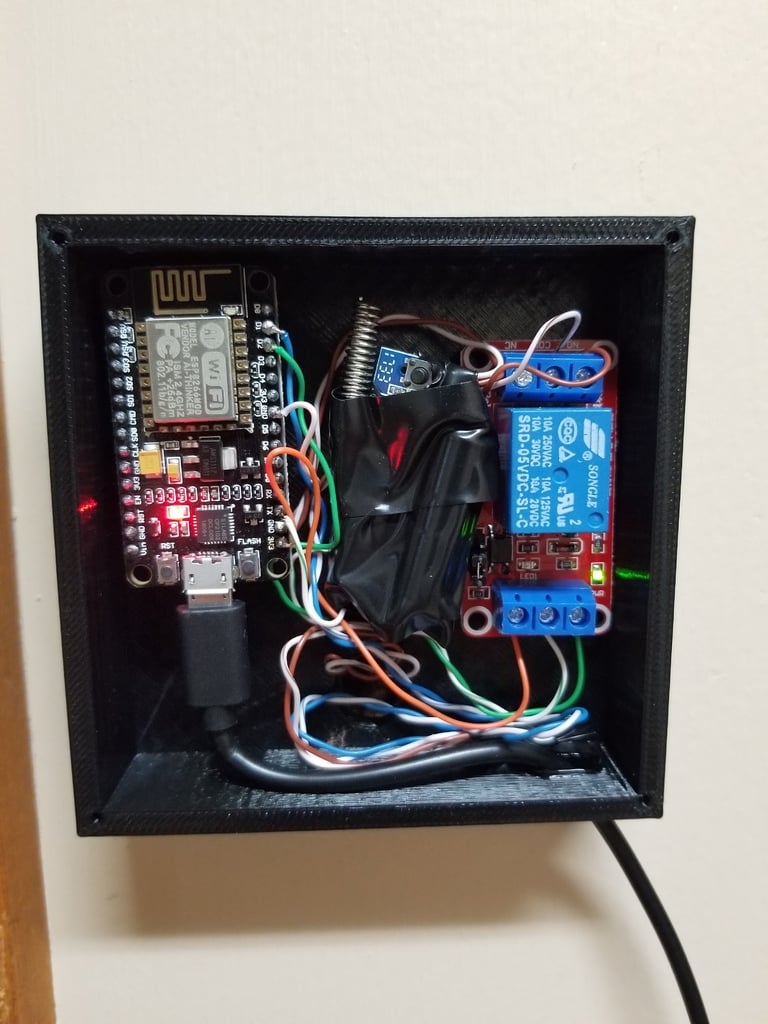
Esp8266 / Nodemcu Texting Doorbell
thingiverse
This is a project for a texting doorbell that I cobbled together in no time. I took an existing wireless doorbell and removed the outside electronics, placing them in a box with an esp8266 and a relay. The button on the outside tells the Node to send an Email and also activates the relay. The output of the relay goes to the button that was on the wireless doorbell board, making my receivers ding. I then set up my Gmail account to forward incoming emails to my phone as texts. I updated the outside button to a regular doorbell button and added a LED behind it to light it up. I also added code to make the LED blink a couple times when the button is pressed so the person outside can see that it worked. For the esp8266 setup, I used this video: www.youtube.com/watch?v=znFMNzT_Gms After watching the video, I modified the code to watch for a state change and then execute the web request. You can also make this send some data through the value portions of the code if you want. I'm not a coding expert in any way and just know the basics pretty much. I will post my code in a text file with most of the instructions on the side. Although, I would watch that video first. If I missed anything important, let me know. Things used: These are the buttons I used but I think I'm going to swap them out for regular doorbell buttons: https://www.amazon.com/Cylewet-Momentary-Button-Switch-CYT1078/dp/B0752RMB7Q/ref=sr_1_1?keywords=cyt1078&qid=1555465133&s=gateway&sr=8-1 Regular doorbell button I swapped to: https://www.amazon.com/Heath-Zenith-SL-664-02-Button-Finish/dp/B000BQPI8M/ref=sr_1_4?keywords=doorbell+button&qid=1556240905&s=gateway&sr=8-4 LED I added to the doorbell: https://www.banggood.com/100PCS-2x3x4mm-Wide-Angle-Flat-Top-LED-Diodes-Water-Clear-Transparent-Light-Lamp-p-1075736.html?rmmds=search&ID=233&cur_warehouse=CN Amazon link to LEDs: https://www.amazon.com/Rectangle-Transparent-Lighting-Electronics-Components/dp/B01C5HL0PO/ref=sr_1_1?crid=11JF98RKW32TS&keywords=2x3x4+led&qid=1556241074&s=gateway&sprefix=2x3x4%2Caps%2C283&sr=8-1 Nodemcu: https://www.amazon.com/HiLetgo-Internet-Development-Wireless-Micropython/dp/B010N1SPRK/ref=sr_1_1_sspa?crid=2I2N5KEF0Q60T&keywords=nodemcu&qid=1555466067&s=gateway&sprefix=node%2Caps%2C170&sr=8-1-spons&psc=1 Relay: I used these but they are 5volt relays. The node operates on 3.3 volts so technically you should use the ones in the second link I put. But the 5volt ones do function on 3 volts. 5volt: https://www.amazon.com/HiLetgo-Channel-optocoupler-Support-Trigger/dp/B00LW15A4W/ref=sr_1_3?keywords=5v+relay&qid=1555466099&s=gateway&sr=8-3 3volt: https://www.amazon.com/Channel-Driver-Module-Optocoupler-ESP8266/dp/B0798CZDR9/ref=sr_1_1_sspa?keywords=3.3v+relay&qid=1555466133&s=gateway&sr=8-1-spons&psc=1
With this file you will be able to print Esp8266 / Nodemcu Texting Doorbell with your 3D printer. Click on the button and save the file on your computer to work, edit or customize your design. You can also find more 3D designs for printers on Esp8266 / Nodemcu Texting Doorbell.
