ESP3D-Cover for Prusa MK3S+
prusaprinters
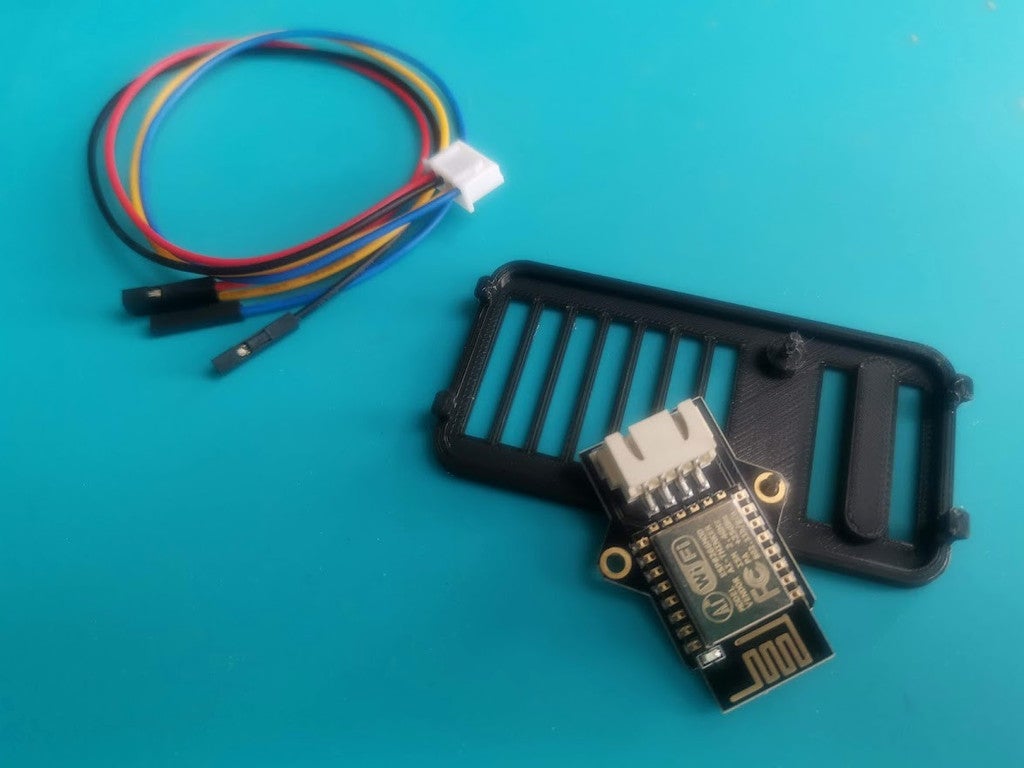
<p>Ever felt bothered that you've got a slot for a Raspberry Pi Zero in the enclosure of your Prusa MK3S+, yet you can hardly use it as the Pi Zero is kinda outdated?</p><p>Well, I was and I was wondering, whether I could'nt just fit an <a href="https://www.aliexpress.com/wholesale?SearchText=esp3d">ESP3D module</a> from Fysetc in exactly that spot, so I can use Luc's really neat <a href="https://github.com/luc-github/ESP3D">esp8266 firmware project</a> from GitHub to remotely control and monitor my printer.</p><p>So I got me the original raspberry-cover.stl vom <a href="https://github.com/prusa3d/Original-Prusa-i3/tree/MK3S/Printed-Parts/SCAD">Prusa's GitHub page</a> and put some mounting pins for the ESP3D module on it - and here you go: the esp3d-cover.stl for your Prusa MK3S+</p><p>Enjoy!</p><p> </p><h3>Print Settings</h3><p><strong>Printer: </strong>Prusa i3 MK3S+</p><p><strong>Rafts: </strong>No</p><p><strong>Supports: </strong>No</p><p><strong>Resolution: </strong>0.2</p><p><strong>Infill: </strong>100%</p><h3><strong>Filament:</strong> Prusament PETG Black <br/> </h3><p><strong>Notes: </strong></p><p>Best simply use the recommended print settings that you're using for all your Prusa printer parts.</p><p> </p><h3>Post-Printing</h3><p><strong>Assembly</strong></p><p>Well, the assembly is pretty simple: just shorten the wires and solder some pins to them - almost exactly like you would do with the Pi Zero.</p><p>But how to mount the PCB? Just put it on the printed pins on the inside of the cover, melt them flat with a hot knife or screwdriver and it'll be mounted perfectly. Couldn't be easier.</p><p> </p>
With this file you will be able to print ESP3D-Cover for Prusa MK3S+ with your 3D printer. Click on the button and save the file on your computer to work, edit or customize your design. You can also find more 3D designs for printers on ESP3D-Cover for Prusa MK3S+.