ESK8 Controller Mk2
thingiverse
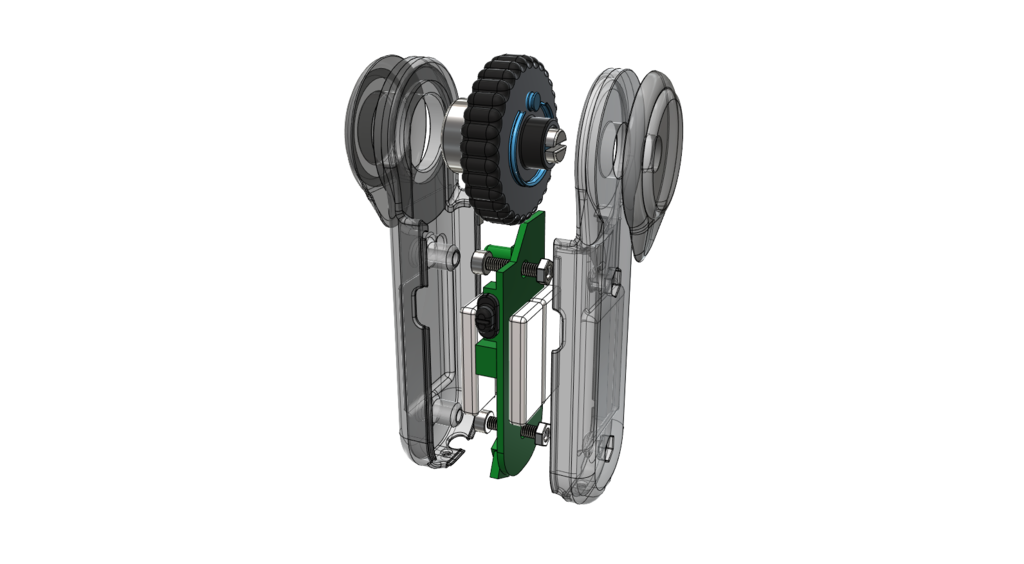
ESK8 Controller Mk2 It's been far too long since I last logged into Thingyverse... I really should get around to finishing those half-baked posts at some point. Today, I'm excited to share with you a brand new version of the electric skateboard controller that I put together a while back. To be honest, I wasn't entirely satisfied with the original - it was: - Way too complicated - A bit too bulky for my taste - A real pain to print nicely This one is a step up. In short, I bought an Meepo electric skateboard because it was, at the time, the best bang for your buck if you didn't feel like building your own from scratch. Of course, things have likely moved on since then (ha!), but as I'm really happy with my current setup, I haven't bothered to keep up. One thing that did bug me about the original controller was: - The throttle had a pretty limited range, which made it annoying to use - The battery would often run out before the skateboard itself even got tired! So, I decided to give it an upgrade by swapping out the throttle for a wheel and a bigger potentiometer. This new version is more of the same, just improved. To build this thing, you'll need: - The electronics from your old controller (make sure they're compatible with the Meepo type) - A 10k "hi-fi" potentiometer (Linear or logarithmic, dual or single gang - whatever suits your fancy) - A soldering iron (because a little bit of solder is required) - Optionally, some extra/larger 3.7v LiPo batteries - These files and instructions - M3 nuts and bolts to hold it all together (or glue if you're feeling lazy) Construction: 1) Carefully disassemble your old controller. 2) Print out the new parts. 3) Do a trial fit of the components and make any necessary adjustments. Now we get to the fun part: 4) Take some time to figure out how the original potentiometer is wired to the controller board, then unplug it. 5) Solder the original wiring to the new potentiometer and test it to make sure you got it right. 6) If you want, you can flip the PCB plug end to reverse the action. 7) Assemble the main parts, glue on the cover plates, and you're done! All the parts should fit together nicely, but depending on your printer's tolerances, some fiddling/gluing might be required. Optional extras: If you want to transfer the lanyard from your old controller to the new one, that'd be a great idea. The holes in the housing are sturdy enough, but for extra safety, I recommend running the internal end around the nearest PCB post. I've made some space to add extra/larger LiPo batteries - just check your measurements before buying, and if you use more than one, make sure to wire them to the controller board in parallel, not serial. The throttle wheel has a spot for springs/rubber bands to attach to the nearest PCB post if you want an auto-returning throttle. I personally don't like it that way, but hey, to each their own. Depending on your controller and how you wired the potentiometer, it can be set up to return fully in either direction or center. If you're into a "clicky" wheel, superglue a piece of clear plastic packaging (you know, the kind electronics come sealed in) to the inside of the housing. The end needs to engage with the knobs on the wheel. The wire dangling from the PCB is the controller aerial - I'd recommend replacing it with a longer one for more reliable communication. Just make sure the new wire is a whole number multiple of the original. I didn't include holes for the activity LEDs, but if you want to add them, feel free to drill some. A heated paperclip will do the job nicely. Have fun!
With this file you will be able to print ESK8 Controller Mk2 with your 3D printer. Click on the button and save the file on your computer to work, edit or customize your design. You can also find more 3D designs for printers on ESK8 Controller Mk2.