eq3-2 motor covers-R.A.
thingiverse
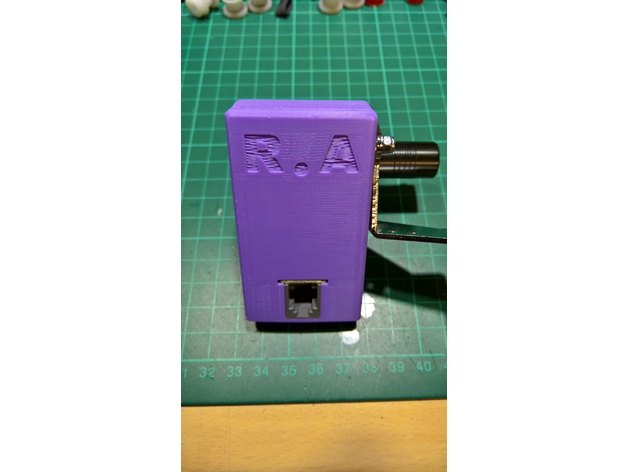
After breaking the Dec RJ11/RJ12 connector, I decided to design a cover to keep it safer. To match the Dec motor, I also blasted on and did the R.A motor. This one requires an 8mm M3 nut and bolt just like the Dec motor. I moved the RJ11/RJ12 connector from the metal support bracket and included it in the cover. Similar to the Dec motor, I used hot melt glue to secure the grey connector. Print Settings Printer: ctc rep dual sailfish Resolution: 0.25 Infill: 0.25 Post-Printing Deconstructions Remove the motor unit from the tripod. Remove the 2 small screws that hold the RJ11/RJ12 connector board from the metal bracket. Slide the RJ11/RJ12 connector board into the printed part from behind and fire up the glue gun to apply a bead of glue around the outside edge of the RJ11/RJ12 connector and the printed part. Once the glue has dried, remove the upper motor mount screw and line the printed part up to the screw hold, then insert the new screw and tighten it. Design Work I start everything in Tinkercad to get a rough part prototyped. Once I have something that looks and fits, I change over to 123D to tweak and finalize the design.
With this file you will be able to print eq3-2 motor covers-R.A. with your 3D printer. Click on the button and save the file on your computer to work, edit or customize your design. You can also find more 3D designs for printers on eq3-2 motor covers-R.A..