Enhancements for Sainsmart/Genmitsu 3020 PRO MAX CNC
prusaprinters
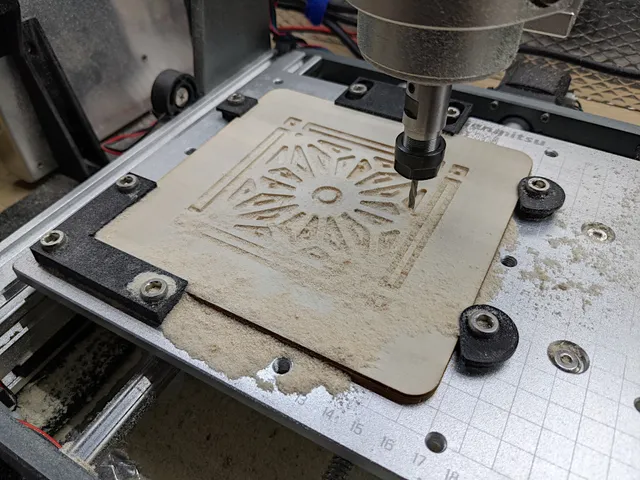
Included in this mini-collection: work holding and cable management.For the work holding, the flat Genmitsu workplate has a set of M6 holes set at an unusual spacing pattern, 54mm X and 42.5mm Y.All clamps accept an M6 machine bolt with a standard allen cap head. The L clamps fit as a lower-left or upper-right corner to reference a working origin. The sliding clamps fit either X or Y spacing. The cam clamps are designed to rotate up against your workpiece until it is snug, then will tighten slightly more as you torque down the bolt. I have included two styles of work face: a five millimeter flange, and a seven millimeter slope. It would be easy to make other heights, contact me if you aren't able to remix/modify STLs yourself.The Genmitsu design has only zip ties to manage all the cables. Larger machines often have a flexible cable tunnel. Assemble a tunnel from the included link parts. Anywhere from ten to fourteen copies of the “link” seems to work best. Pin one end to the CNC top frame with an end piece. Once your cables are routed, just force the hinge free and snap the retaining arms closed over your cables to keep them tucked in. See the photos.The Z probe is just left to dangle or get tangled behind the machine. Included are two sizes of round Z probe caddy holders, one for the beefy stock 35mm*19mm probe, and another for a popular alternative which is only 30mm*14mm. These holders fit into the T-Track on the side of the machine, out of the way but easily reached. The T-track tongue may print a little bit messy in this vertical orientation if your 3d printer bed adhesion is weak, but the resulting tongue holds securely enough.The Y limit switch and several other cables can be pinned in place to the T-Track frame elements using the T-Track tiedown part. The Genmitsu design suggests you mount the Y limit switch onto the top of a piece of sheet metal. I wanted to mount it underneath, but then the switch won't properly bump the moving Y carriage underneath. The “end stop bumper” is a snap-on piece which allows for this alternate mounting position. Just wrap it around the Y carriage mount, where the brass anti-backlash nut assembly rides the threaded rod. See the photos.A major annoyance of the Genmitsu design is that they suggest you attach the X limit switch(es) to the outer upright frame parts. The moving X carriage will then bump those switches. This makes it easy to snag your hand on the switches, and also has no convenient cable tie opportunities. In this collection, there are two T-track parts which can hold X limit switches on the X carriage itself. Print both pieces, fit them into the T-track slot, then slide them toward each other to sandwich the X limit switch tightly against the carriage. See the photos.I included a small holder for the offline controller, aka the “jog shuttle” device. It sits atop the stock power supply and holds the controller where its screen can be seen and buttons used. A little double-sided tape will keep this in position, since there are few good screw mount points for it. Two power supply vertical bookend-style holders can be screwed down to your tabletop.Some of these parts are refinements/remixes of pieces by a Thingiverse user “Steves_bay_3_garage”, but it appears he has not migrated his originals to Printables. The workholding clamps, probe holders, and limit switch management parts are original designs.
With this file you will be able to print Enhancements for Sainsmart/Genmitsu 3020 PRO MAX CNC with your 3D printer. Click on the button and save the file on your computer to work, edit or customize your design. You can also find more 3D designs for printers on Enhancements for Sainsmart/Genmitsu 3020 PRO MAX CNC.
