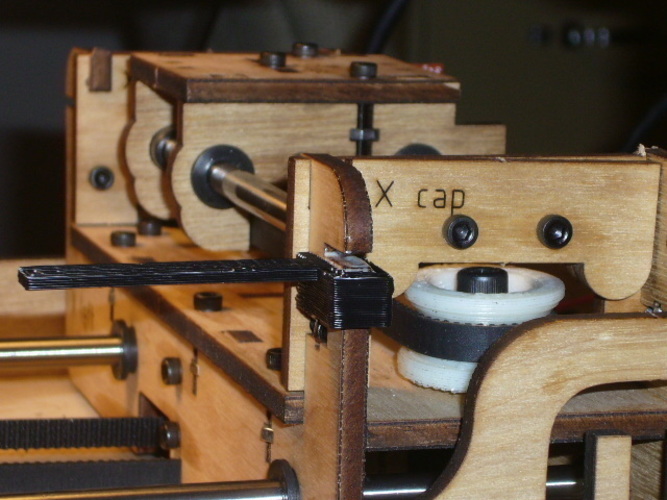
Endstop Trigger, any axis
pinshape
Summary Building on Zaggo's Z axis endstop trigger, I've created a set for the other axes, complete with Sketchup files that make it easy to customize the length of the stick for your machine. Instructions Start by modifying the length of the stick as needed using Sketchup, then export the design in STL format. Next, use Skeinforge to generate G-code and print the part. This assembly fits over standard laser cut wood frames used in the X and Y stages. Simply align it with the optical endstop opening, attach it with hot glue, and you're good to go. For the minus Z axis, I've designed the stick to be about 1 mm shorter than where the extruder hits the build plate, eliminating false triggers. To achieve precise positioning, place black electrical tape on the end of the stick. This will trigger exactly when the extruder reaches the build plate, allowing you to run it down to the stop and then back up by a specific distance for accurate extrusion control.
With this file you will be able to print Endstop Trigger, any axis with your 3D printer. Click on the button and save the file on your computer to work, edit or customize your design. You can also find more 3D designs for printers on Endstop Trigger, any axis.
