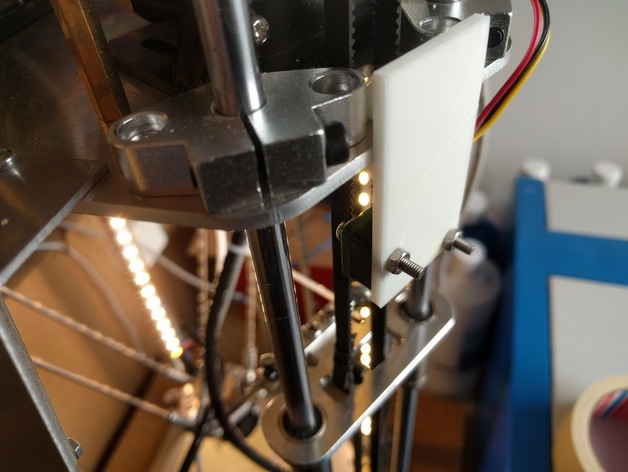
Endstop bracket for 3KU Delta Printer
thingiverse
The arms of the standard microswitches on the 3KU delta printer have a persistent tendency to bend. When this occurs, the printer must be recalibrated once more, in addition to each bend weakening the arm and compromising accuracy. These endstop brackets are designed to replace the default brackets and enable the microswitches to function without the arms. This results in higher accuracy and a more robust system. Furthermore, since the microswitches are now located on the exterior of the printer, the likelihood that the Bowden tube or any other cable collides with the microswitch is significantly reduced. Required parts: * 3x M3 screws, 16mm long * 3x M3 nuts * Endstop cables (the default cables are too short) * 3x microswitches (if you want to retain the original microswitches) Tools needed: * Drill + 3.2mm drill bit Print settings: Printer: 3KU delta Rafts: Doesn't Matter Supports: No Resolution: 0.2mm Infill: 40% Post-printing procedures: Mounting Slide the bracket over the printer plate and drill a 3.2mm hole through the top hole of the printer plate, ensuring straight drilling. Mount the (new) microswitch onto the top of the plate, ensuring the switching part faces outward. Insert an M3 nut into the nut trap. Slide the bracket over the printer plate and secure it using an M3 screw. Connect the microswitch cable to the RAMPS board. Verify that the timing belts do not rub against the switch and first test by hand that the switches function properly (you can use M119 to check which endstop triggers).
With this file you will be able to print Endstop bracket for 3KU Delta Printer with your 3D printer. Click on the button and save the file on your computer to work, edit or customize your design. You can also find more 3D designs for printers on Endstop bracket for 3KU Delta Printer.
