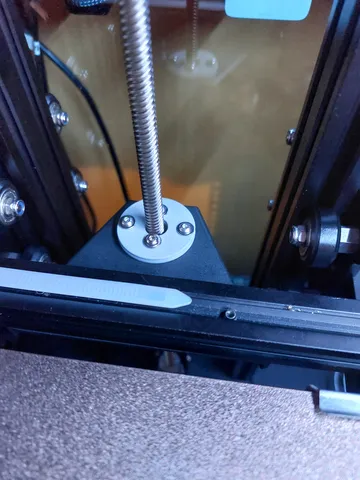
Ender 6 Lead screw nut to bed frame mount
prusaprinters
I've been having various issues with Z wobble, and after fitting an oldham coupler (unitak3d oldham coupler for ender3; https://www.amazon.co.uk/gp/product/B0C73KJ4LQ ), this is a direct replacement for the OEM black disk to allow better fitting of the coupler fasteners which did not sit flat.I've provided 2 versions; choose if you want heatset or through-hole/nut version for the wider 27mm spaced holes.PartB could possibly be replaced with the OE black disc that this print is replacing, but since it's 3mm thick then you may need slightly shorter screws or an additional washer or 2 to pack out to 4mm.HeatsetParts: 1A & 2M3 fasteners: 2x 14mm, 2x 18mm4x M3 washers. add to head-side of fasteners.2x m3 heatset, with a 4.2mm lead. these to be fitted to the wider 27mm spaced hole. Throughhole/nutParts: 1B & 2M3 fasteners: 2x 18mm, 2x 20/22mm2x M3 nuts6x M3 washers. add to head-side of all fasteners & nuts. (Dis)AssemblyBrace the bed from dropping down, and remove Z lead screwRemove the 2x screws on the lead-screw nut mount (those with the wider centers on left & right side)Remove lead screw nut & black disc from lead screw.Remove lead screw nut from black disc. Keep nut.Place part 1 (8mm thick) on the bottom of the bed mount bracket. Part2 (4mm) on top. Align with pre-drilled holes on the bed mount bracket and screw together using the 14 or 20/22mm screws.Locate the 2x M3 18mm and assemble your lead-screw nut assembly (either just the lead-screw nut, oldham coupler, etc)Refit Z Lead Screw & test. Print settingsi printed 4 shells for all perimeters, top & bottom & 50% cubic infill.
With this file you will be able to print Ender 6 Lead screw nut to bed frame mount with your 3D printer. Click on the button and save the file on your computer to work, edit or customize your design. You can also find more 3D designs for printers on Ender 6 Lead screw nut to bed frame mount.
